In this article, I’d like to introduce some detail-up techniques for military gear that even beginners can try. While it may require a bit of sewing skill, you can easily make these using materials you have on hand, so give it a shot!
Collar Cloth
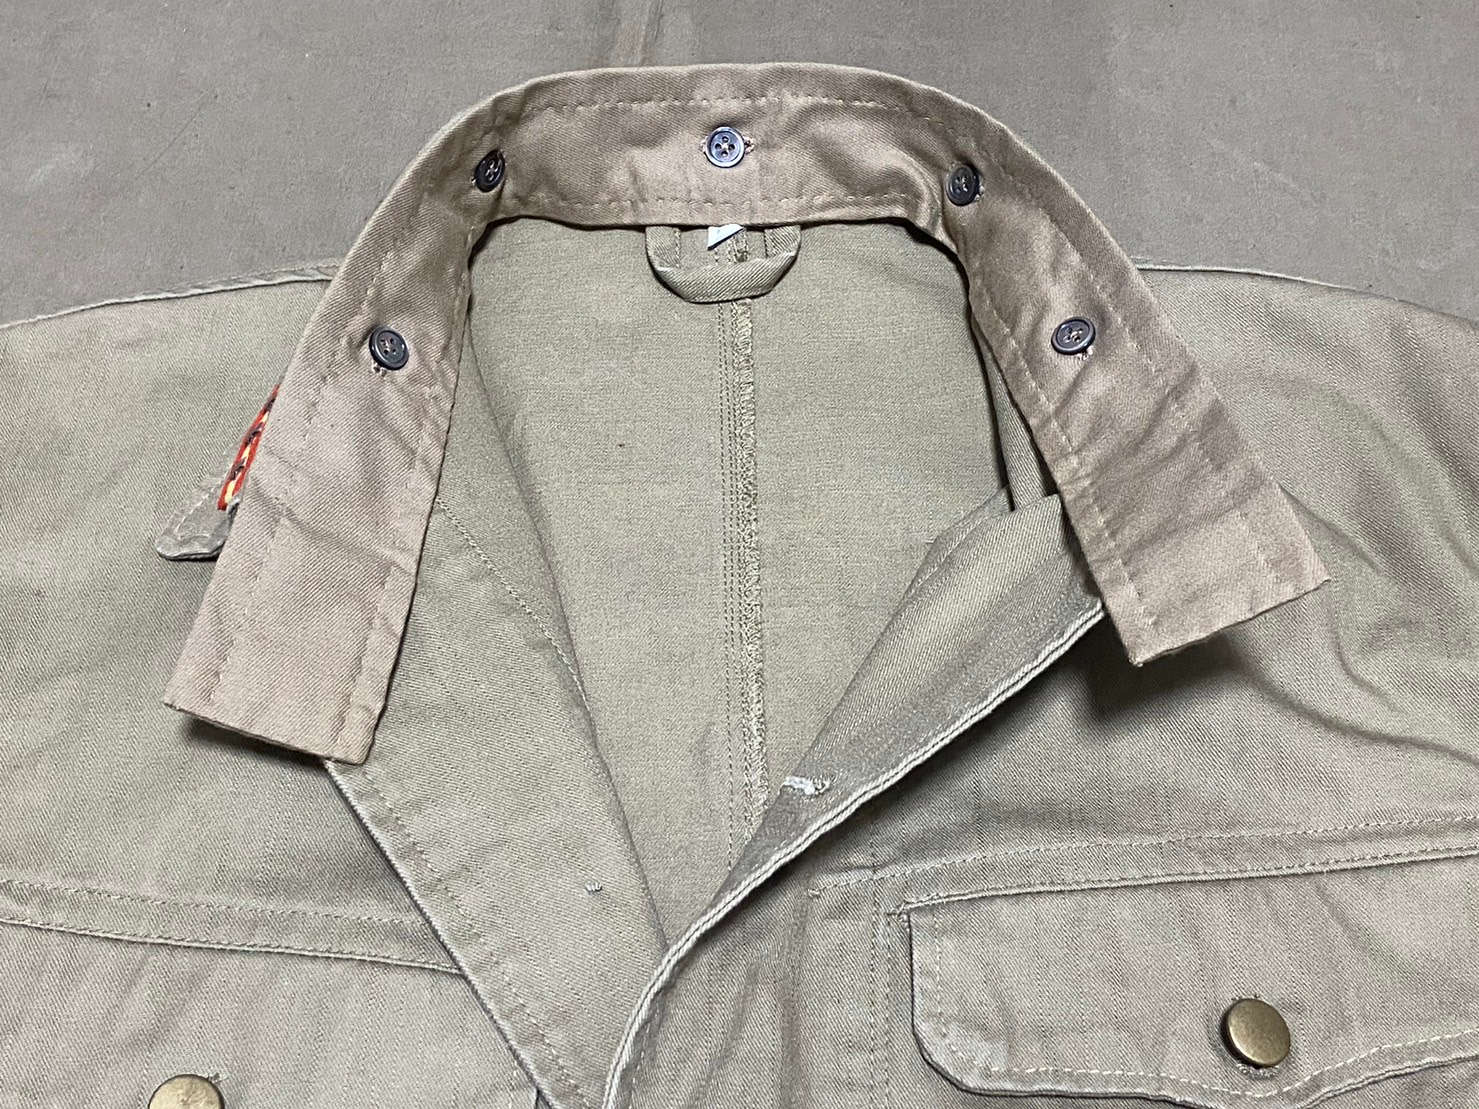
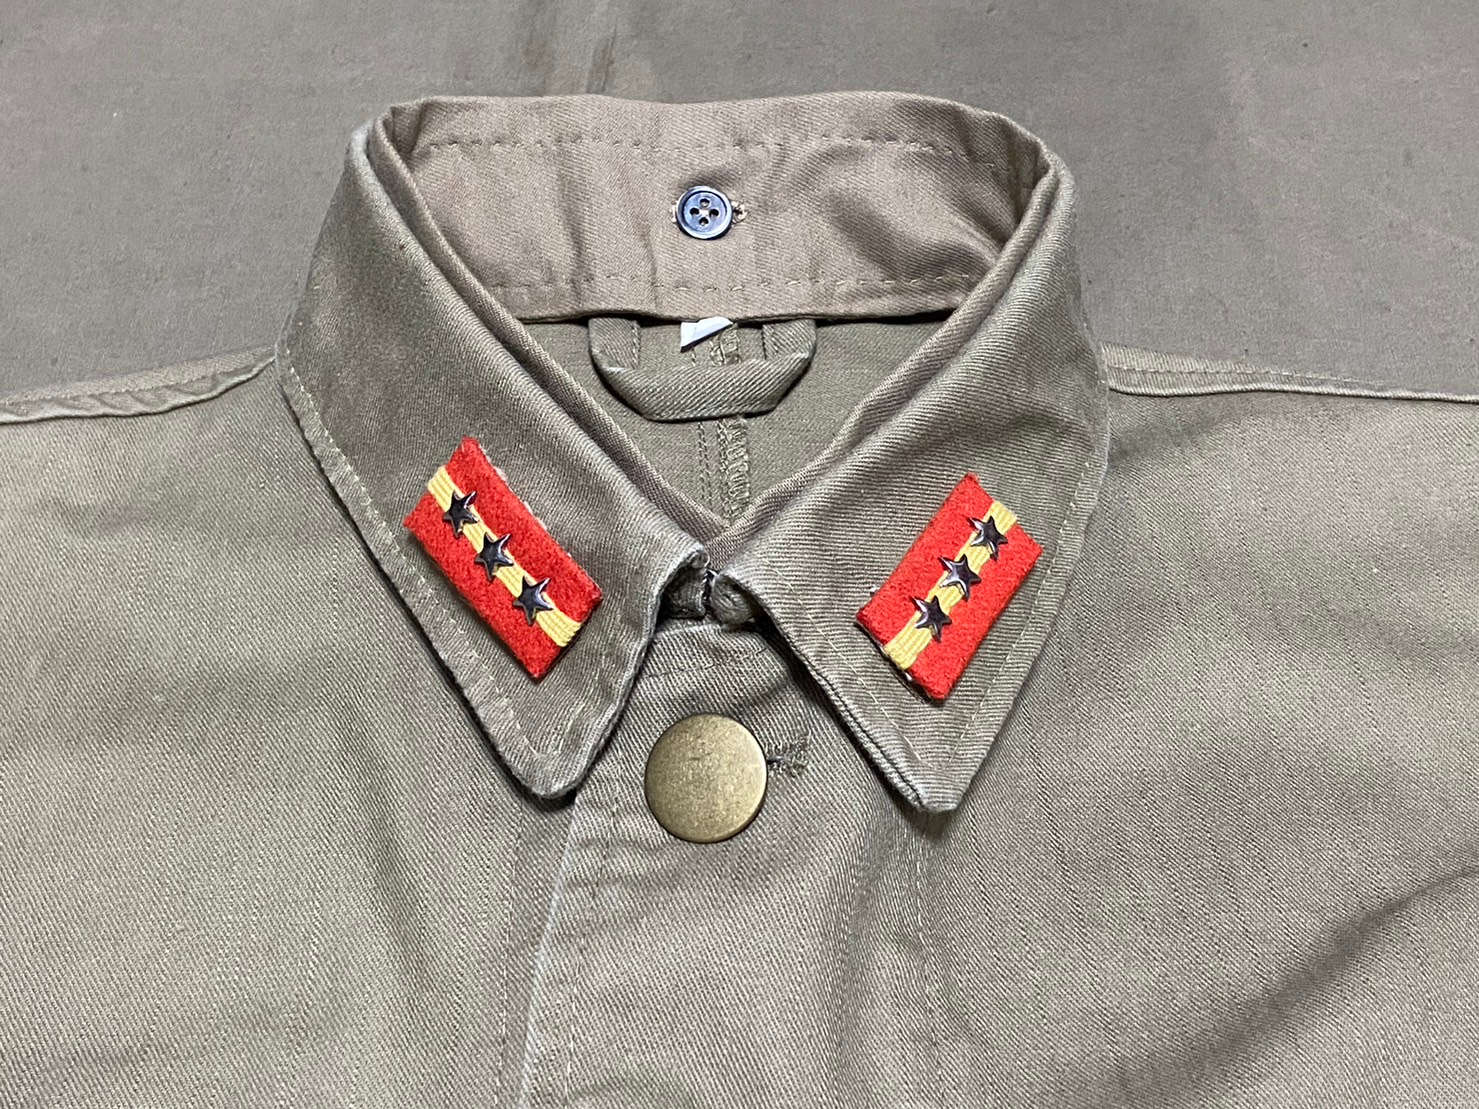
A “collar cloth” (Eri-fu/襟布) refers to the fabric sewn onto the collar of a military uniform to prevent it from getting dirty. It’s the same concept as the collar protectors found on modern Japanese student uniforms. Military uniforms cannot be frequently laundered, so the collar cloth is removable for washing purposes. It is part of the standard clothing mentioned in the Army Salary Regulations, and it was issued to non-commissioned officers and soldiers.
I previously introduced this in the How to Collect Imperial Japanese Army Infantry Equipment (Intermediate).
Cut a piece of white or khaki fabric into the shape of an isosceles triangle. According to the 1930 (Showa 5) regulations, the base should be 816mm and the sides 515mm, but approximate sizing is fine. Fold the fabric back and forth into pleats of about 4cm in width, and sew it as shown in the following photo.
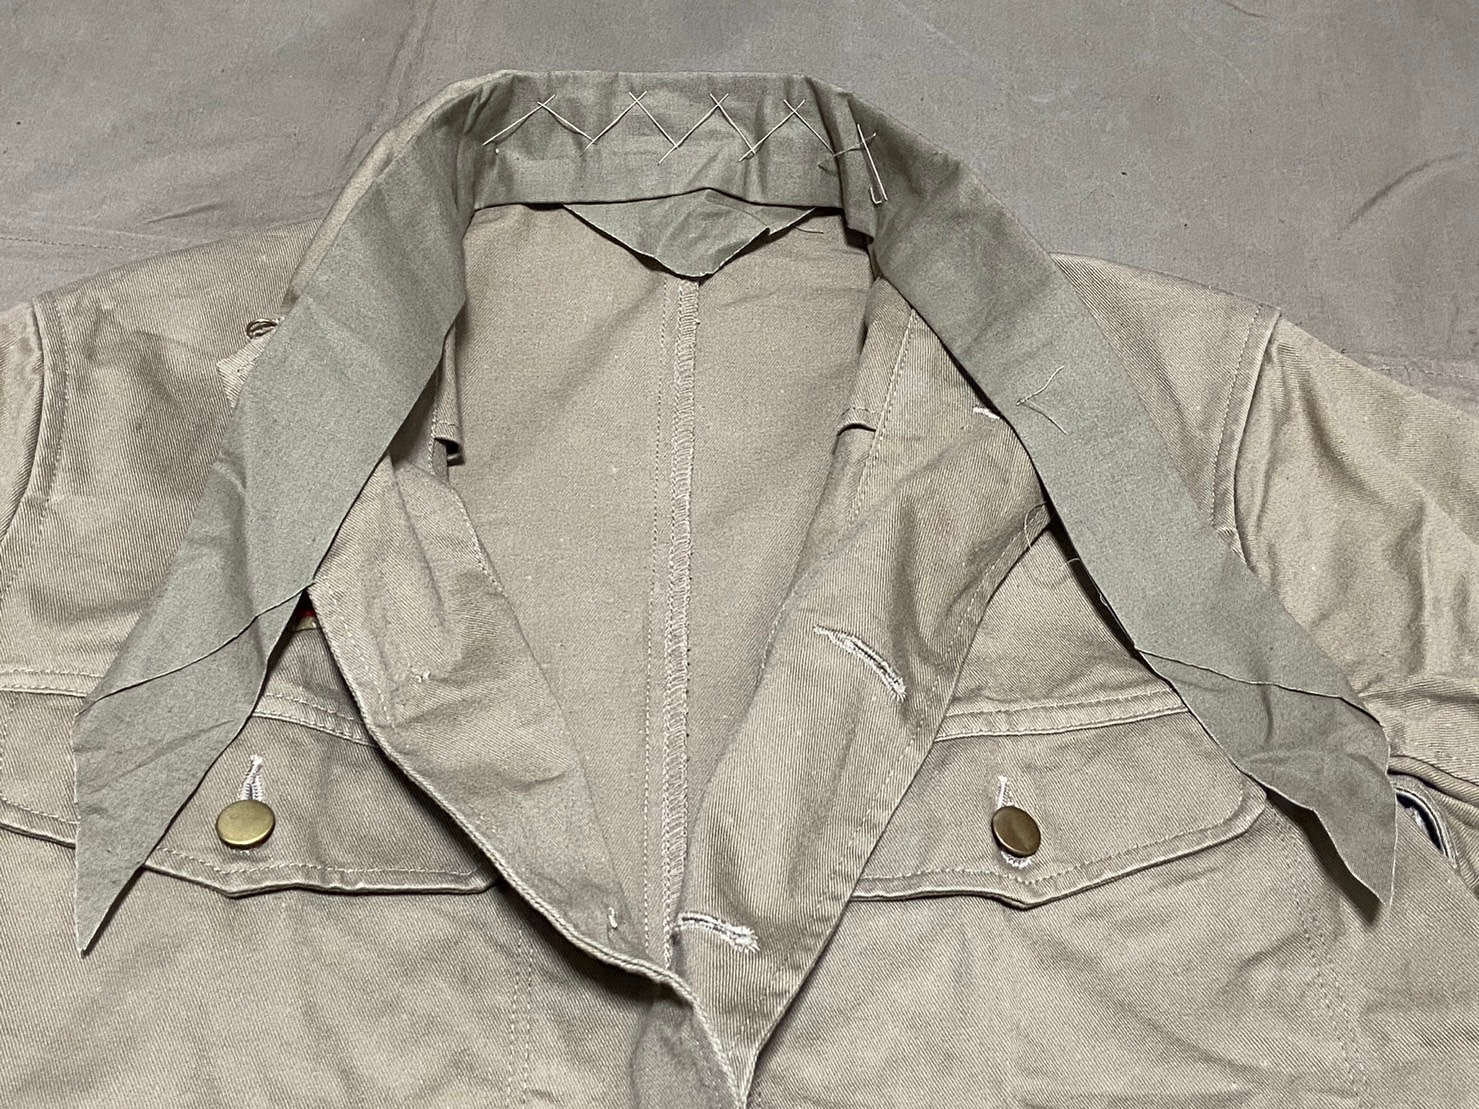
If you’re willing to put in a little more effort, you can create a custom collar cloth similar to those used by officers, with button attachments. This makes it easier to remove for washing. In my case, I sew the collar cloth into a band, creating buttonholes for it. The collar cloth should be attached so that it extends about 3mm beyond the edge of the collar.
Button Loss Prevention Thread
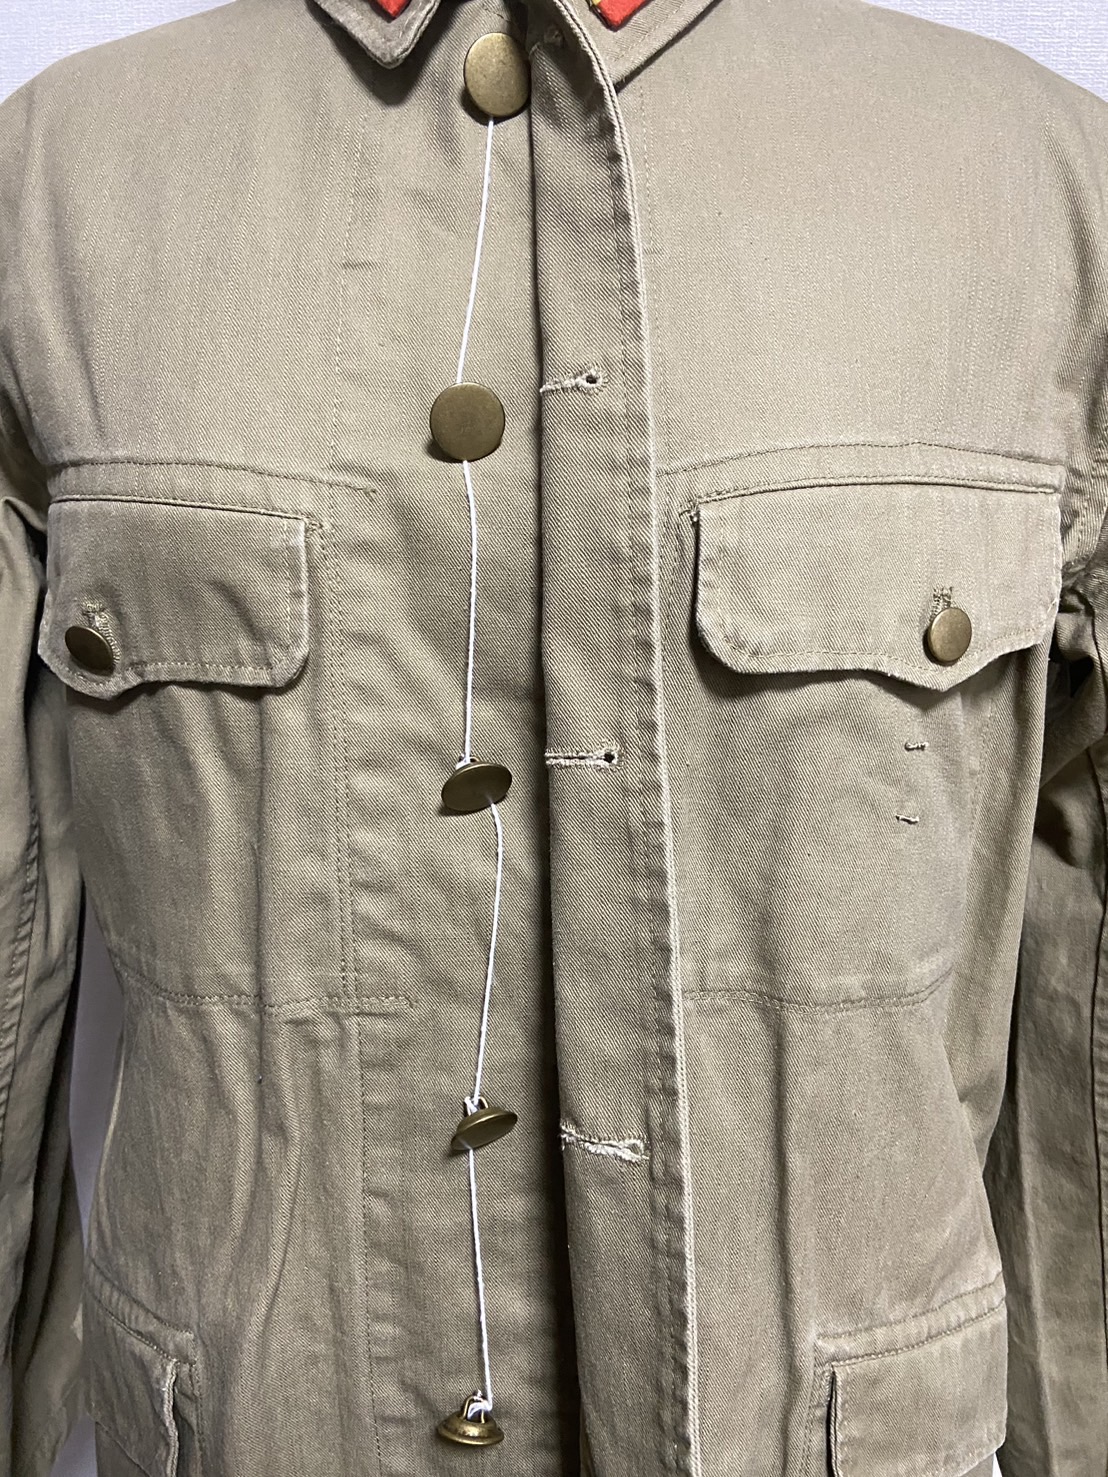
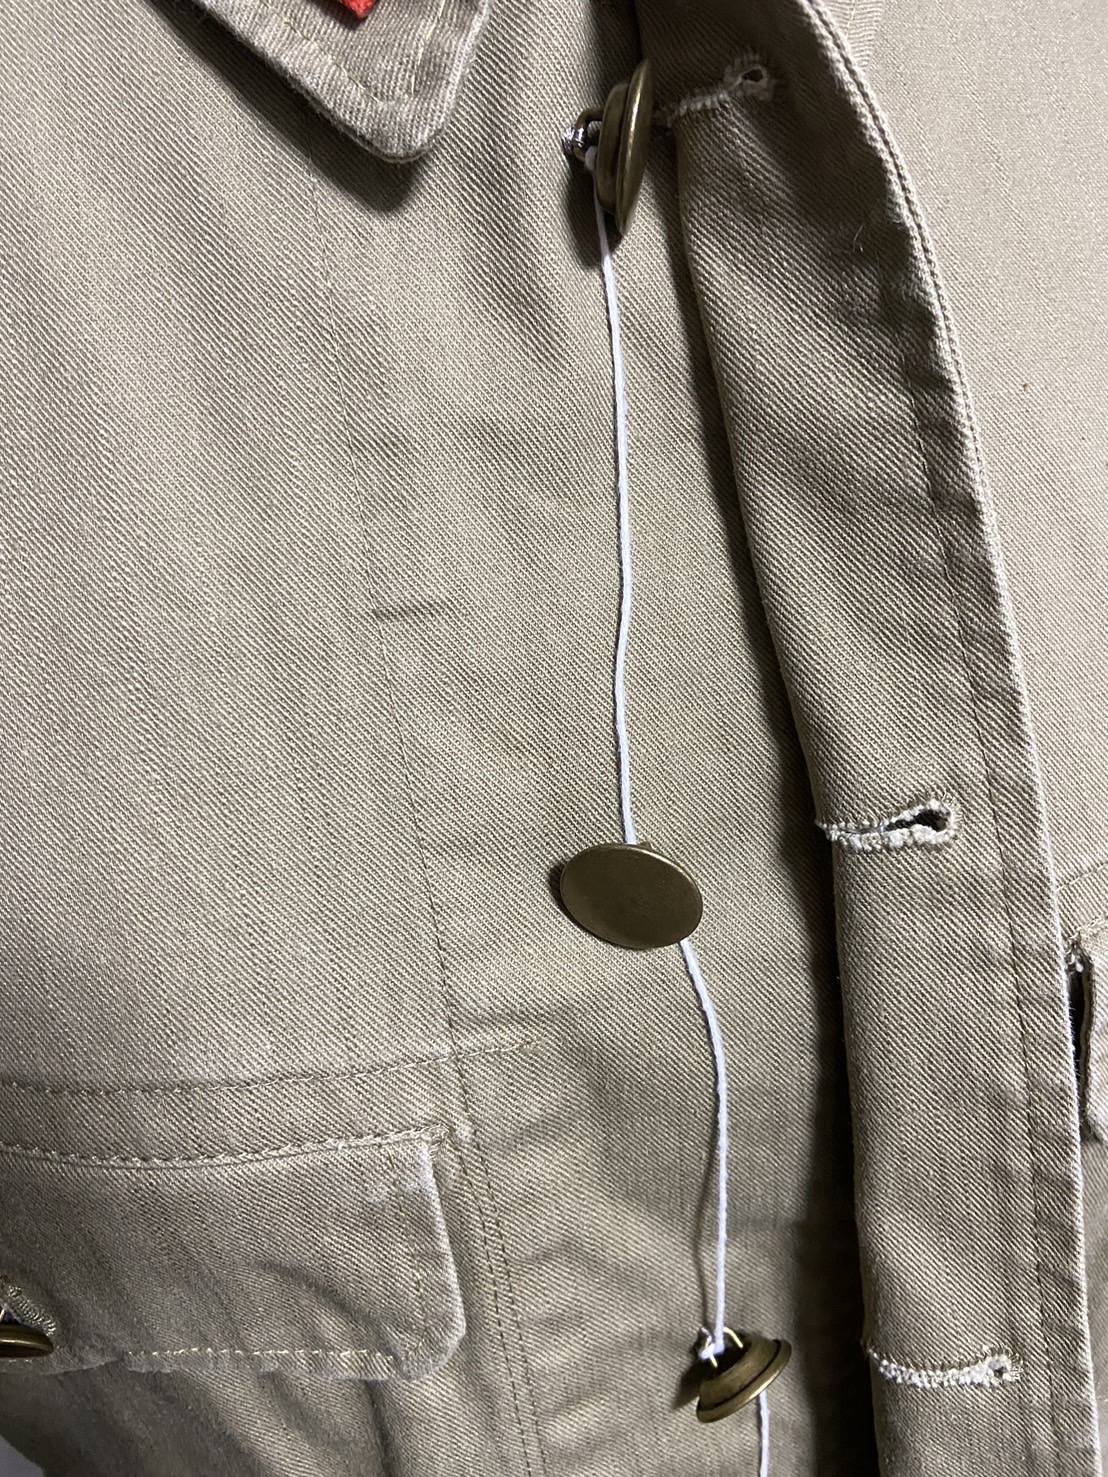
The next tip is a measure to prevent losing buttons if the thread holding them breaks. If you lost a button on your issued military uniform, you’d be in serious trouble. To avoid losing a button even if its thread snapped, soldiers would connect the buttons with kite string or similar material.
The method is simple, as follows: tie kite string to the shank of the 1st and 5th buttons, and pass the string through the shanks of the buttons in between. It’s better to not just pass it through but wrap it around the shank once for added security.
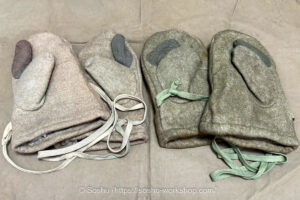
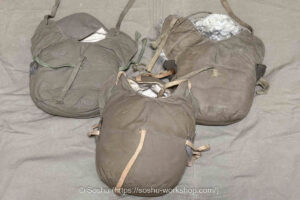
The Bayonet Scabbard Cover and Retention Strap
Next, let’s focus on upgrading the bayonet. To protect the bayonet scabbard and to address issues like noise and reflection, units would create covers to attach to the bayonet scabbard. The materials used were primarily things like collar fabric or old raincoats.
If you sew the fabric used for the collar into a pouch shape, you’ll have your cover ready, so it can be made by hand even without a sewing machine. Replicas of windlass bayonets, for instance, have a large round piece at the tip of the scabbard that can look quite disappointing, but by attaching a cover, you can hide that unsightly feature.
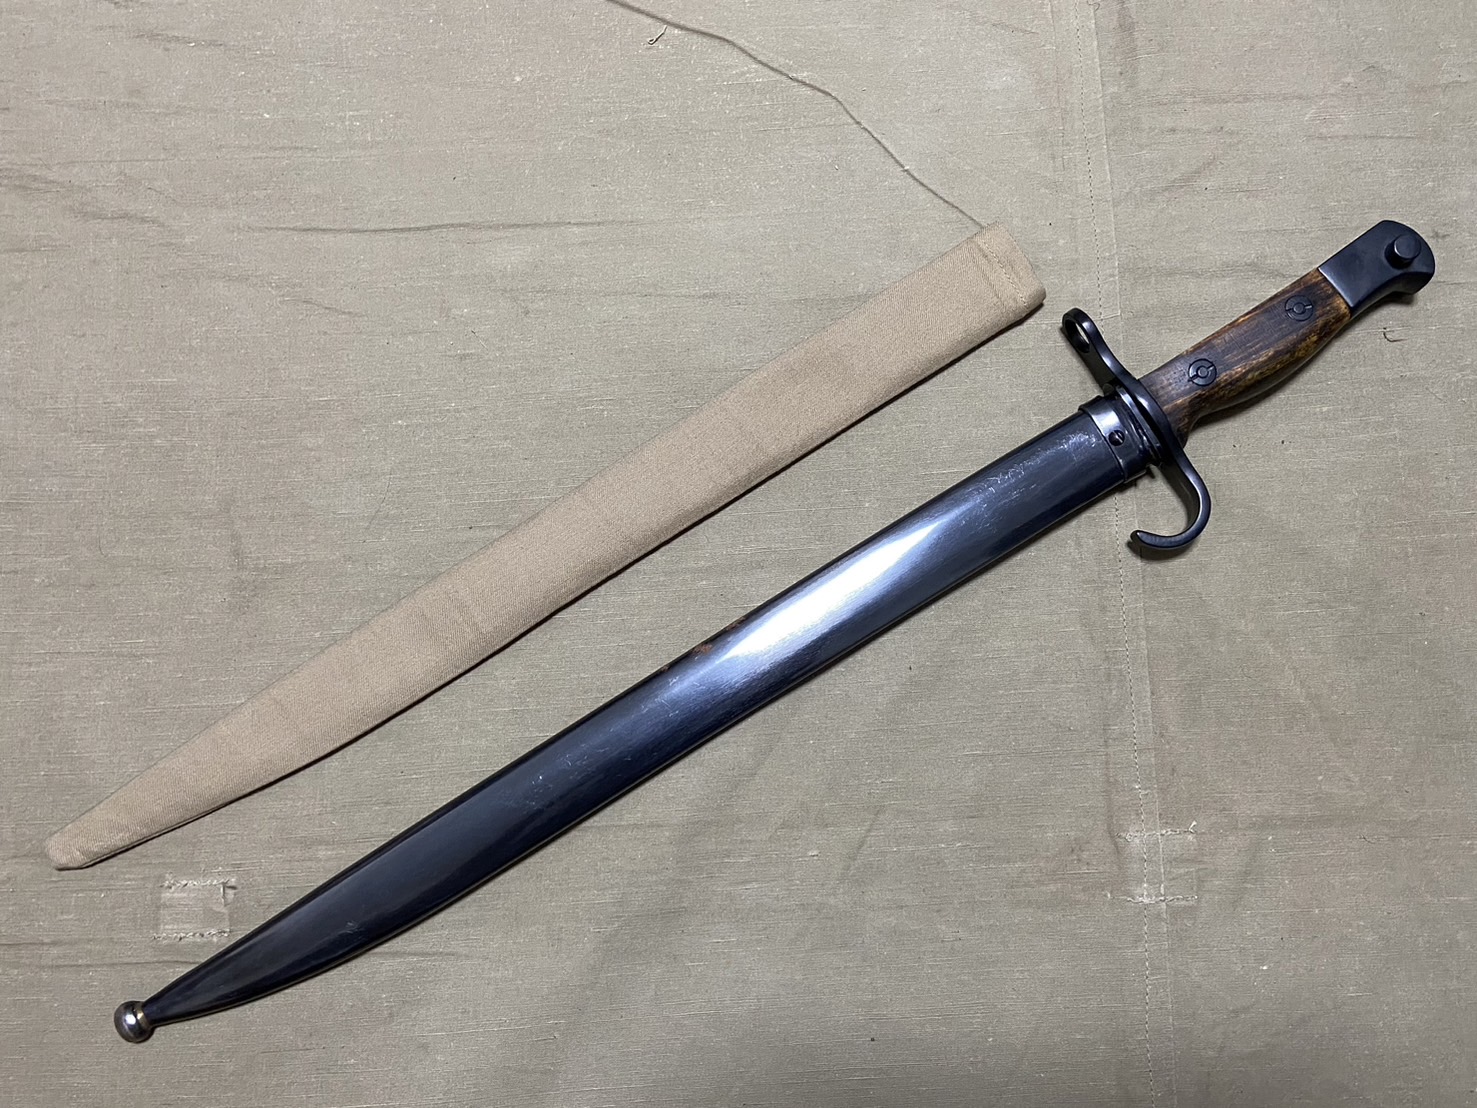
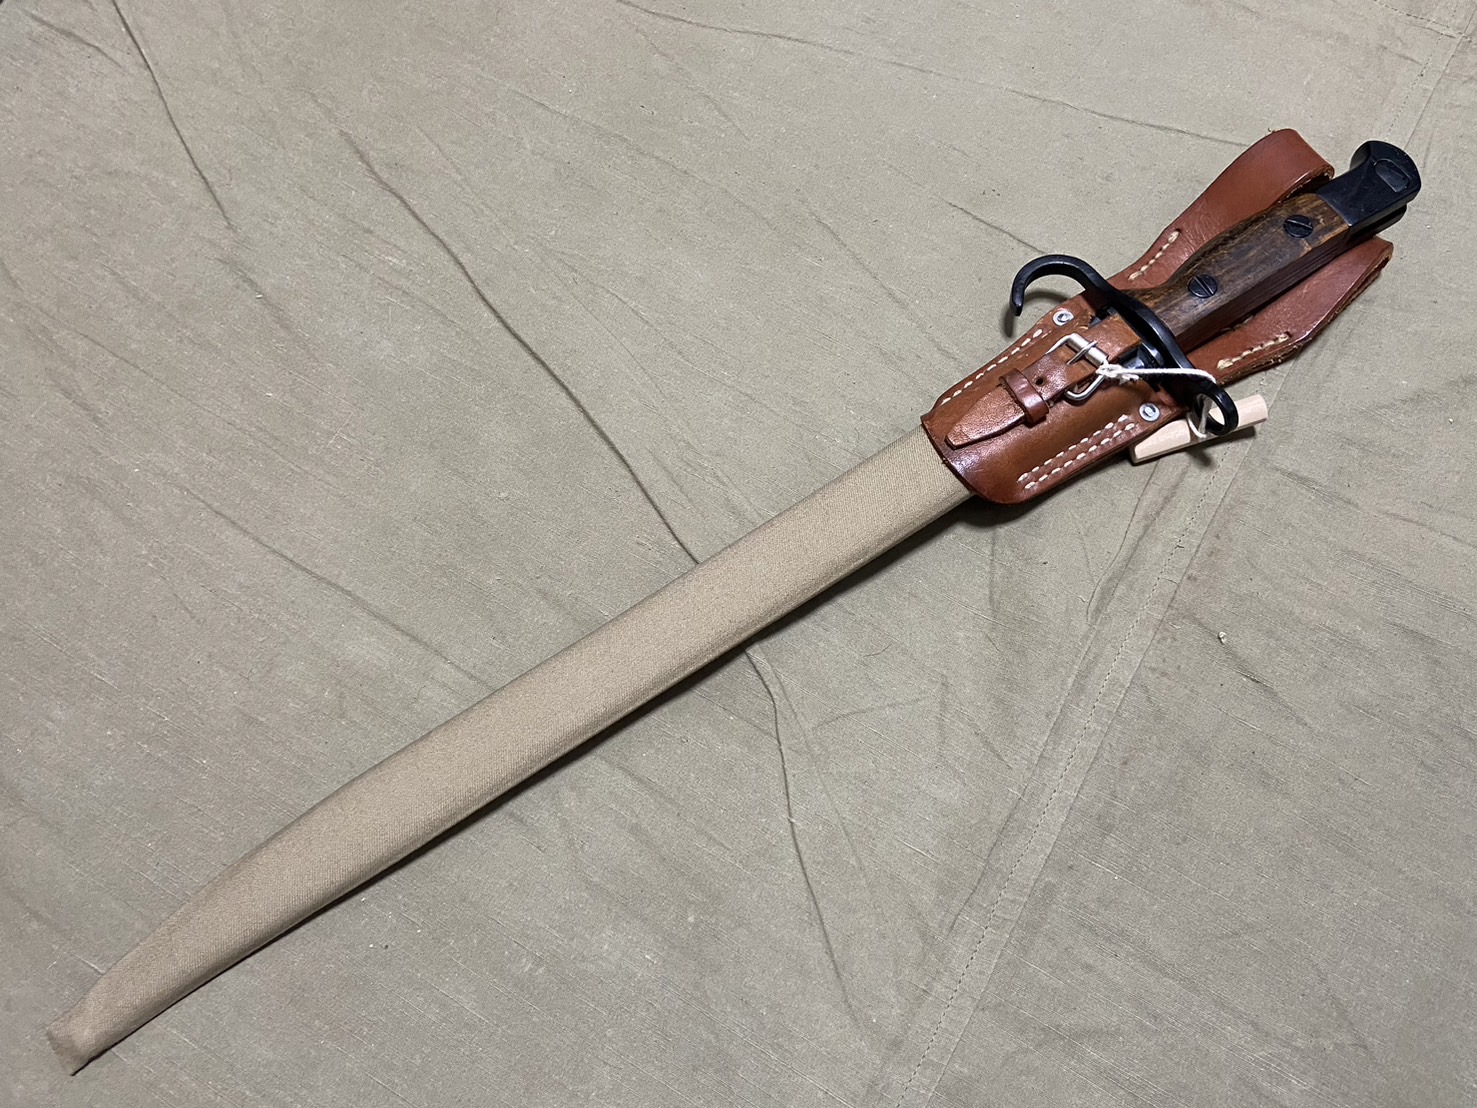
Additionally, I recommend attaching a retention strap to the bayonet. While crawling or moving through vegetation, the bayonet’s hook can snag on branches or bushes, causing it to come loose and potentially get lost. Such accidents occurred in the past, so to prevent losing the bayonet, soldiers made and attached retention straps like the one described below.
Windlass bayonets, for instance, often have loose sheaths that allow them to slip out easily. By attaching a retention strap, you can prevent unintended detachment. This precaution can be quite beneficial as a safety measure during outdoor airsoft games.

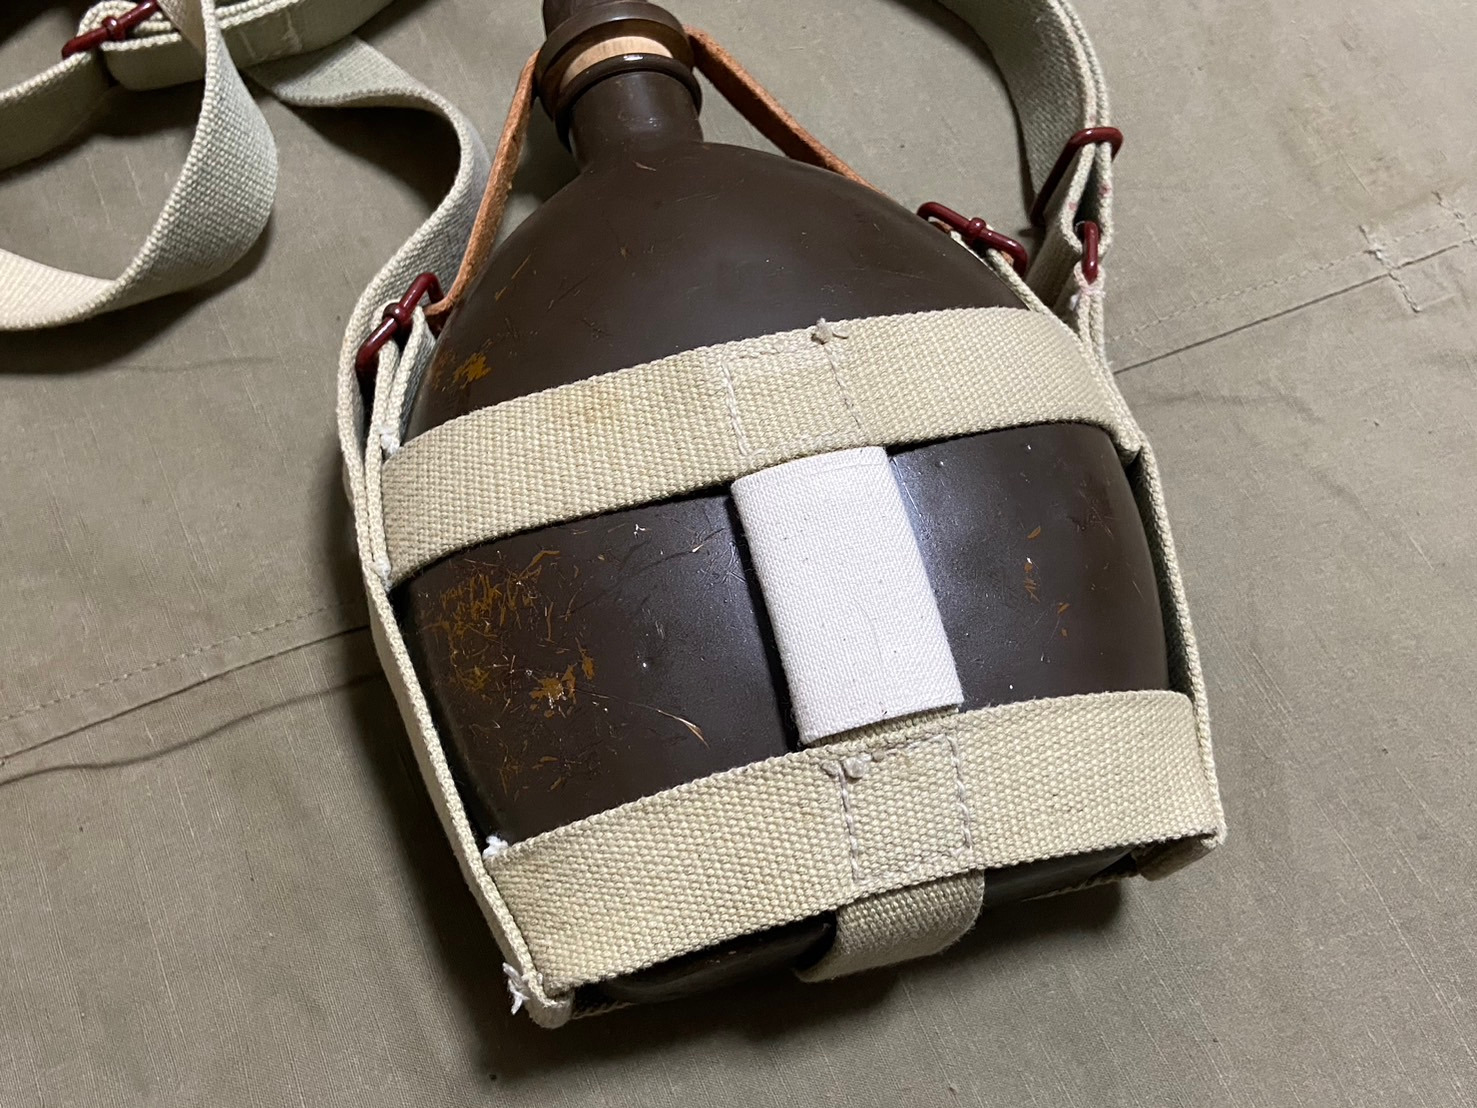
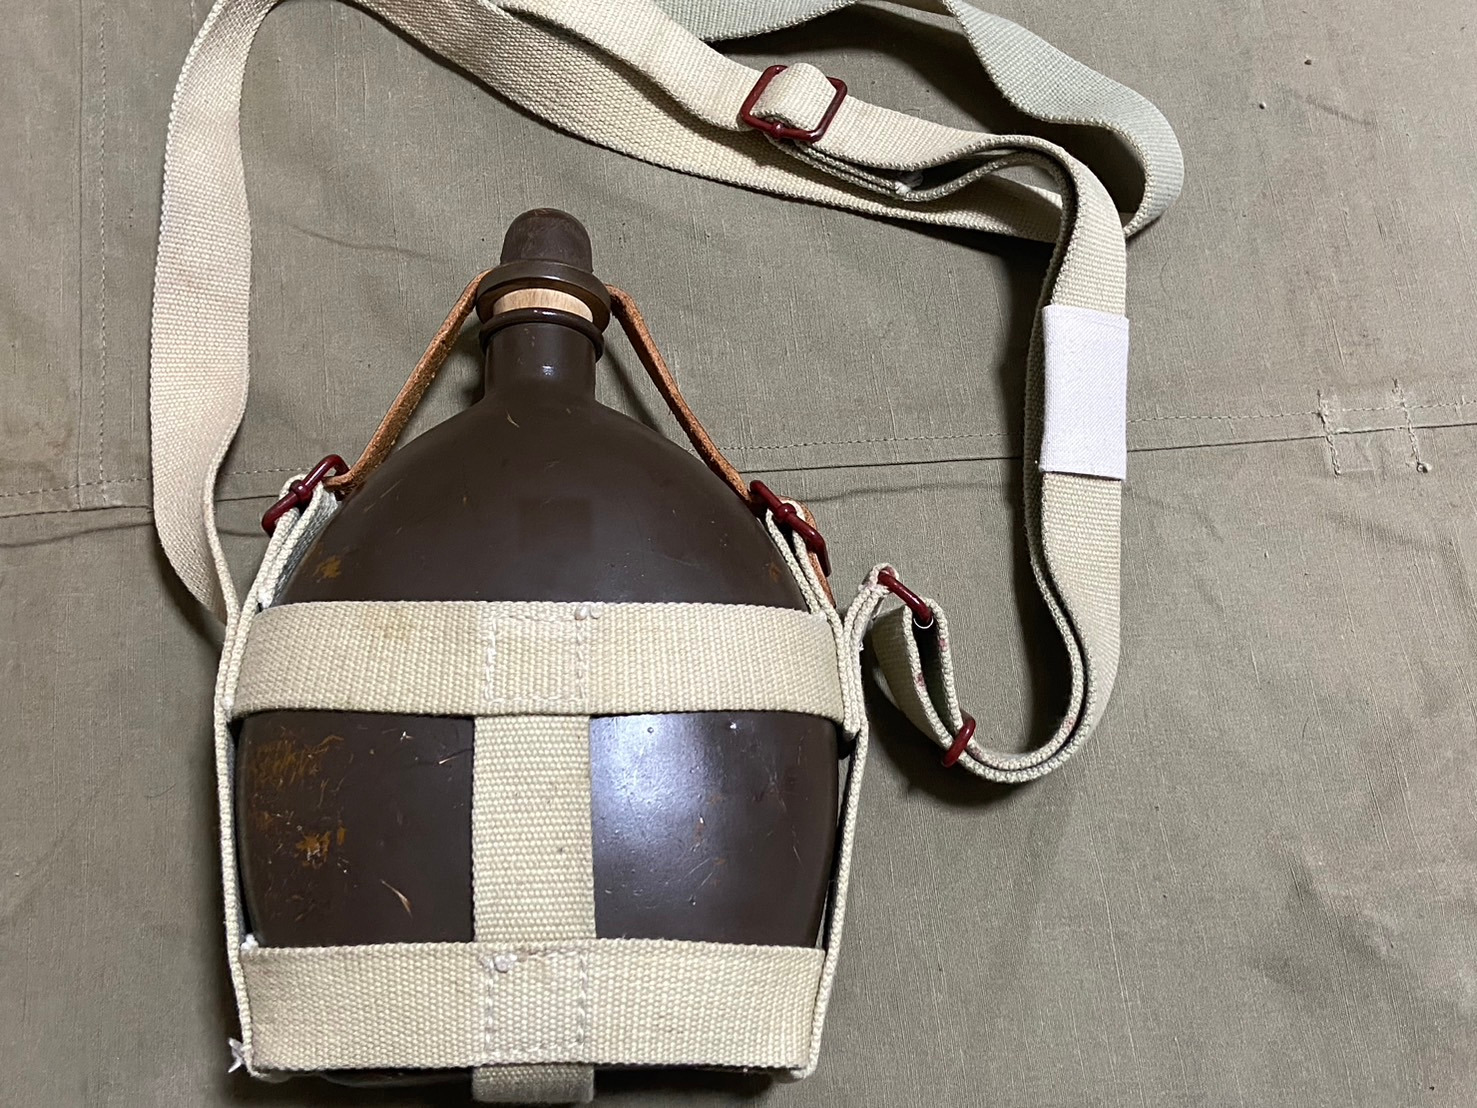
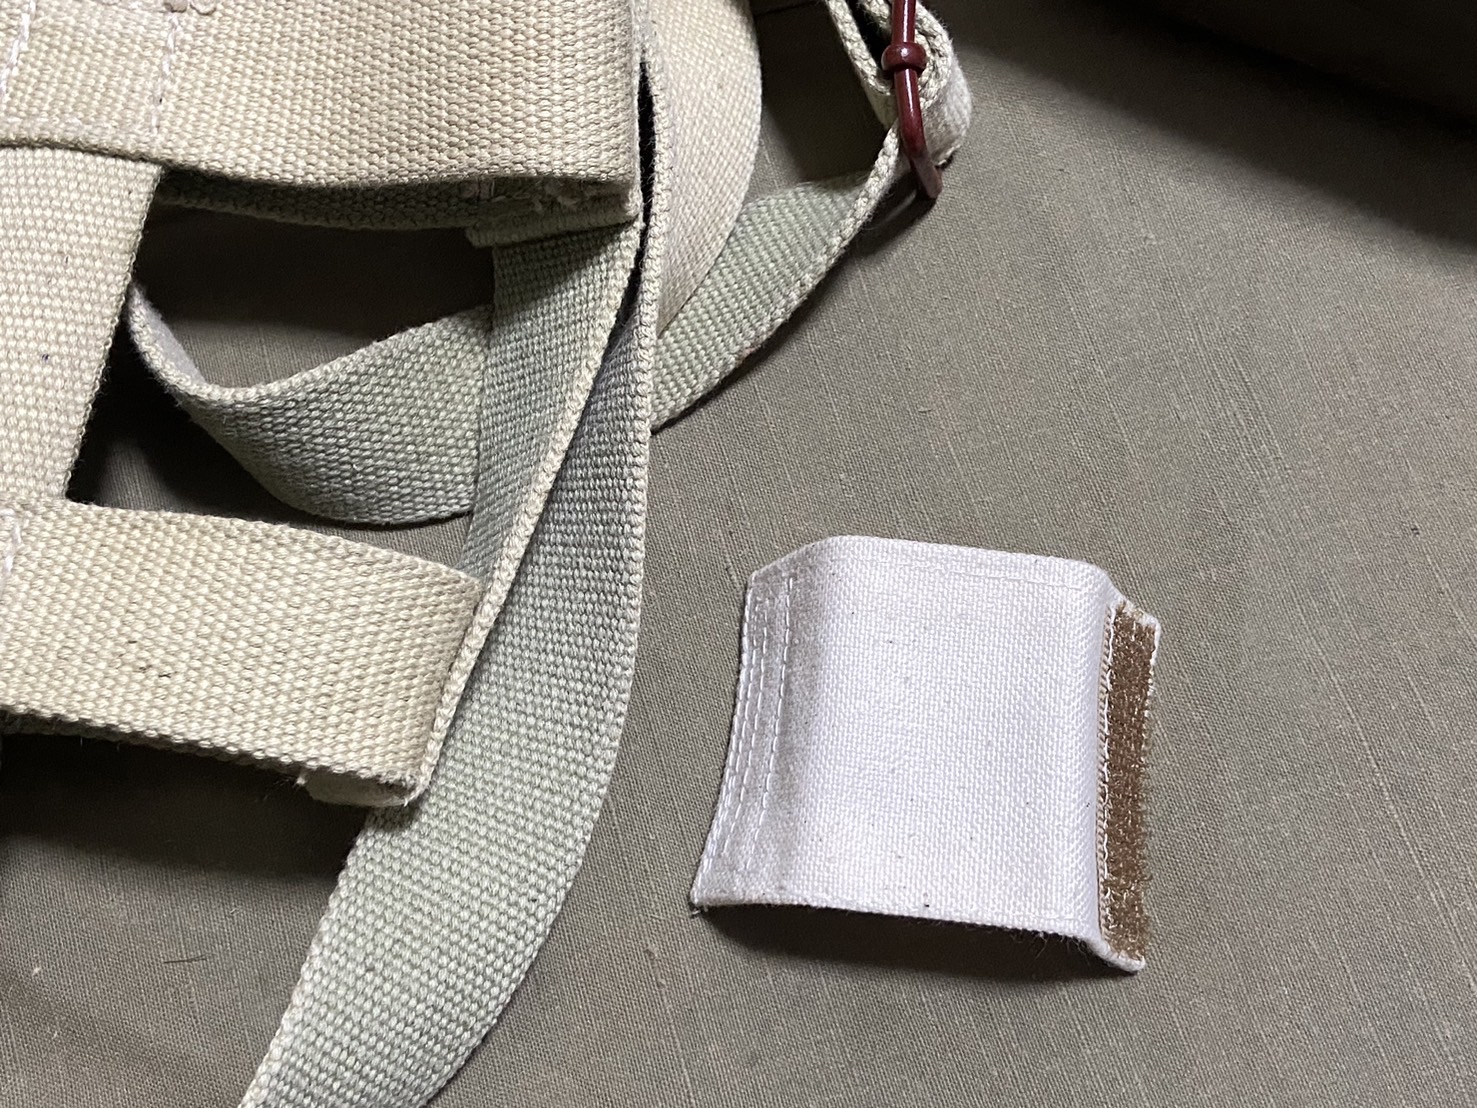
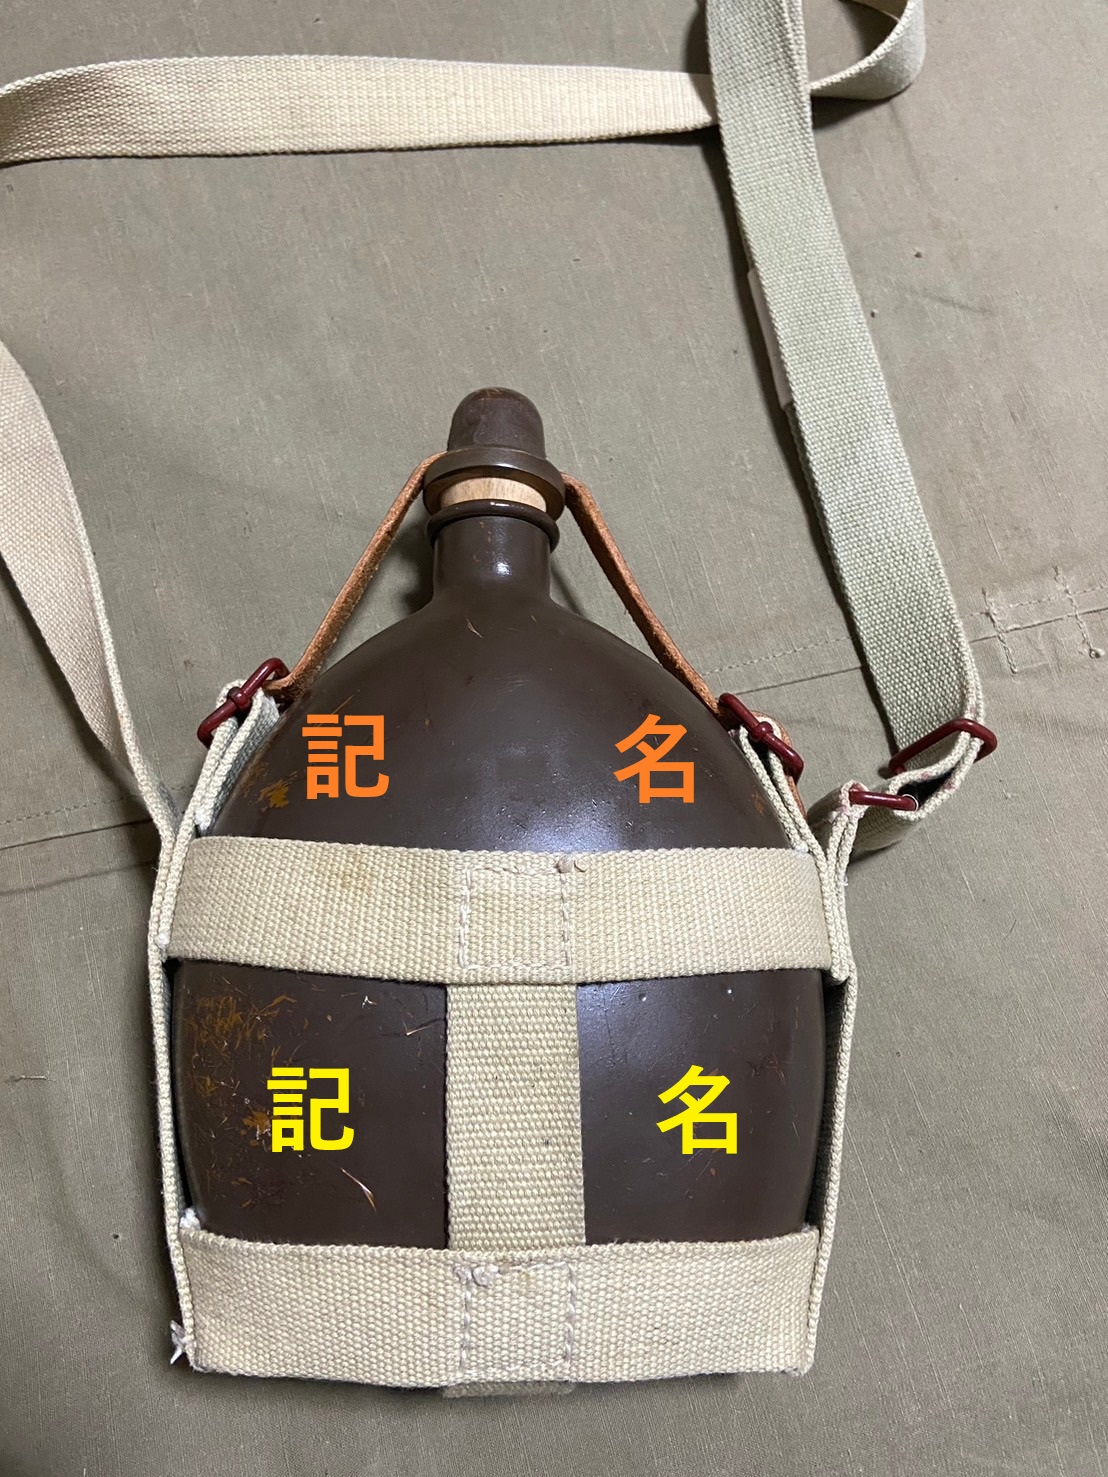
Writing a Name on a Canteen
It is common for a canteen to have a name written on it to indicate whose it is.
The first method is to attach a name tag and write the name on it. Typically, only the surname is written. In the past, a name tag was sewn onto the canteen strap with the name written on it, but in my case, I created a name tag that can be attached with Velcro. This allows me to change the position of the tag or remove it if I don’t want to display the name.
In particular, when using the attachment method shown in the very first photo below, you will need to adjust the position of the name tag depending on whether you hang the canteen on the right or the left. As I mentioned in another article, the canteen strap is reversible, and you can switch the direction of the canteen so that the buckle comes to the front when it is hung. Typically, the canteen is hung from the left shoulder to the right hip, but depending on the situation, such as when carrying a pistol or for medics, it may be necessary to hang it from the right shoulder to the left hip.
The second method is to write the name directly on the body of the canteen. This can be done by scratching the surface with a nail-like object to remove the paint and create the name. However, this method is acceptable for replica canteens, but it might feel a bit inappropriate to do on a well-preserved authentic canteen. Some canteens simply have letters scratched into the surface that are hard to see unless you look closely, while others have more elaborate lettering that is clearly readable from a distance.
What you often see is names written in orange or yellow, as shown in the following photo. At that time, there was a mix of writing styles for horizontal text, with some written from right to left and others from left to right. Therefore, when it comes to horizontal writing, it can be a dilemma as to which direction to write.
In the authentic canteen I own, the owner’s name is written from left to right, just like in modern Japanese.
Summary
That concludes my introduction to detail-up techniques recommended for beginners. While there are many small items, mastering these points can give you the feel of a seasoned veteran. I encourage you to give it a try.
Some items, like the bayonet sheath covers, are also available on my Yahoo! Auctions account, so feel free to check them out if you’re interested.