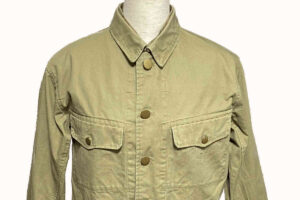
Following the previous article, this time I’ll be replacing the cords on the S&Graf-made Shelter Half to enhance its details.
Even if you don’t own an authentic example, this article includes measurements and dimensions so that you can perform the modification yourself.
When working, please also refer to the diagram at the end of “Shelter Half Regulations and Usage”1.
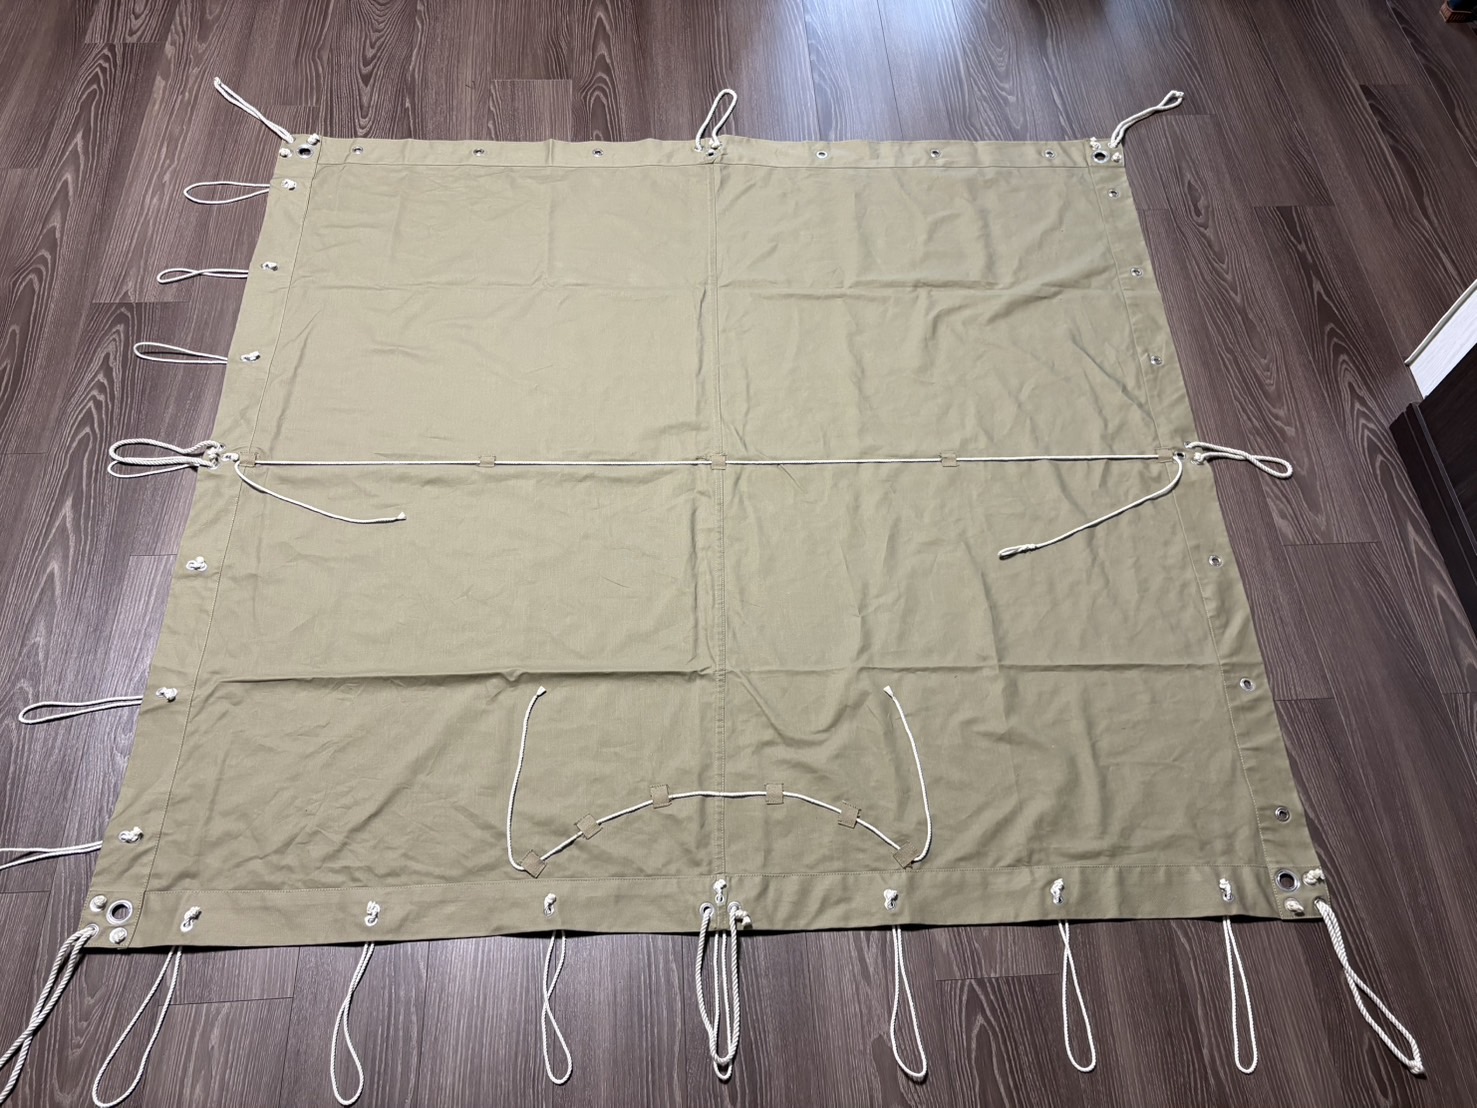
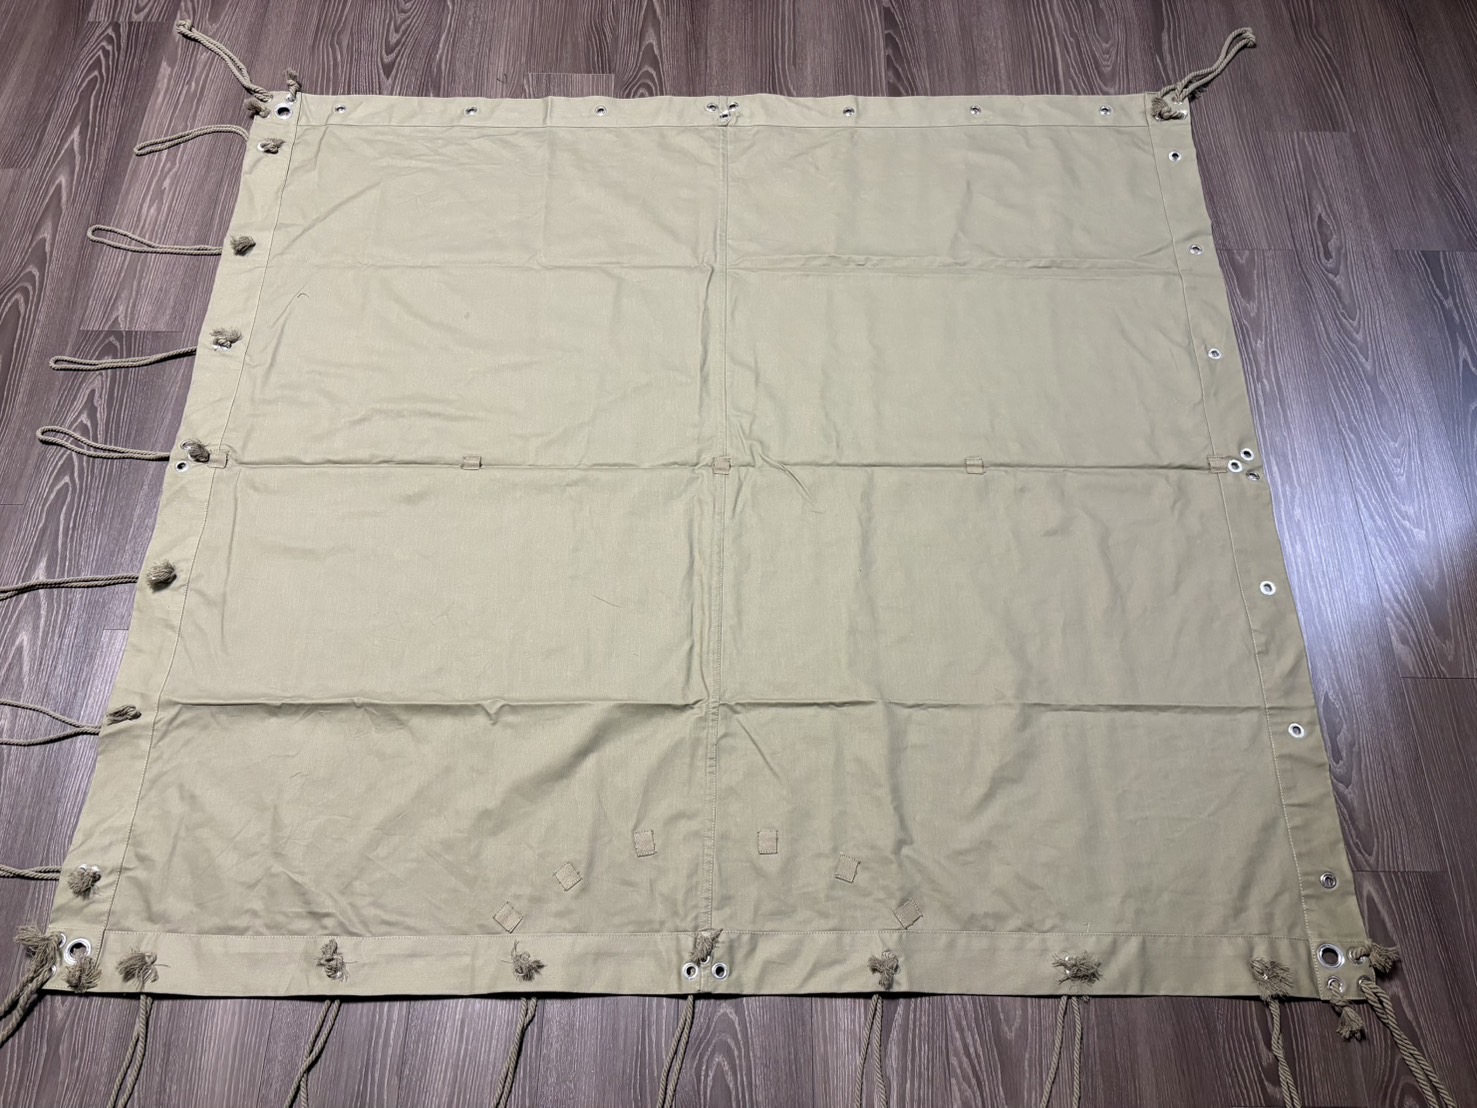
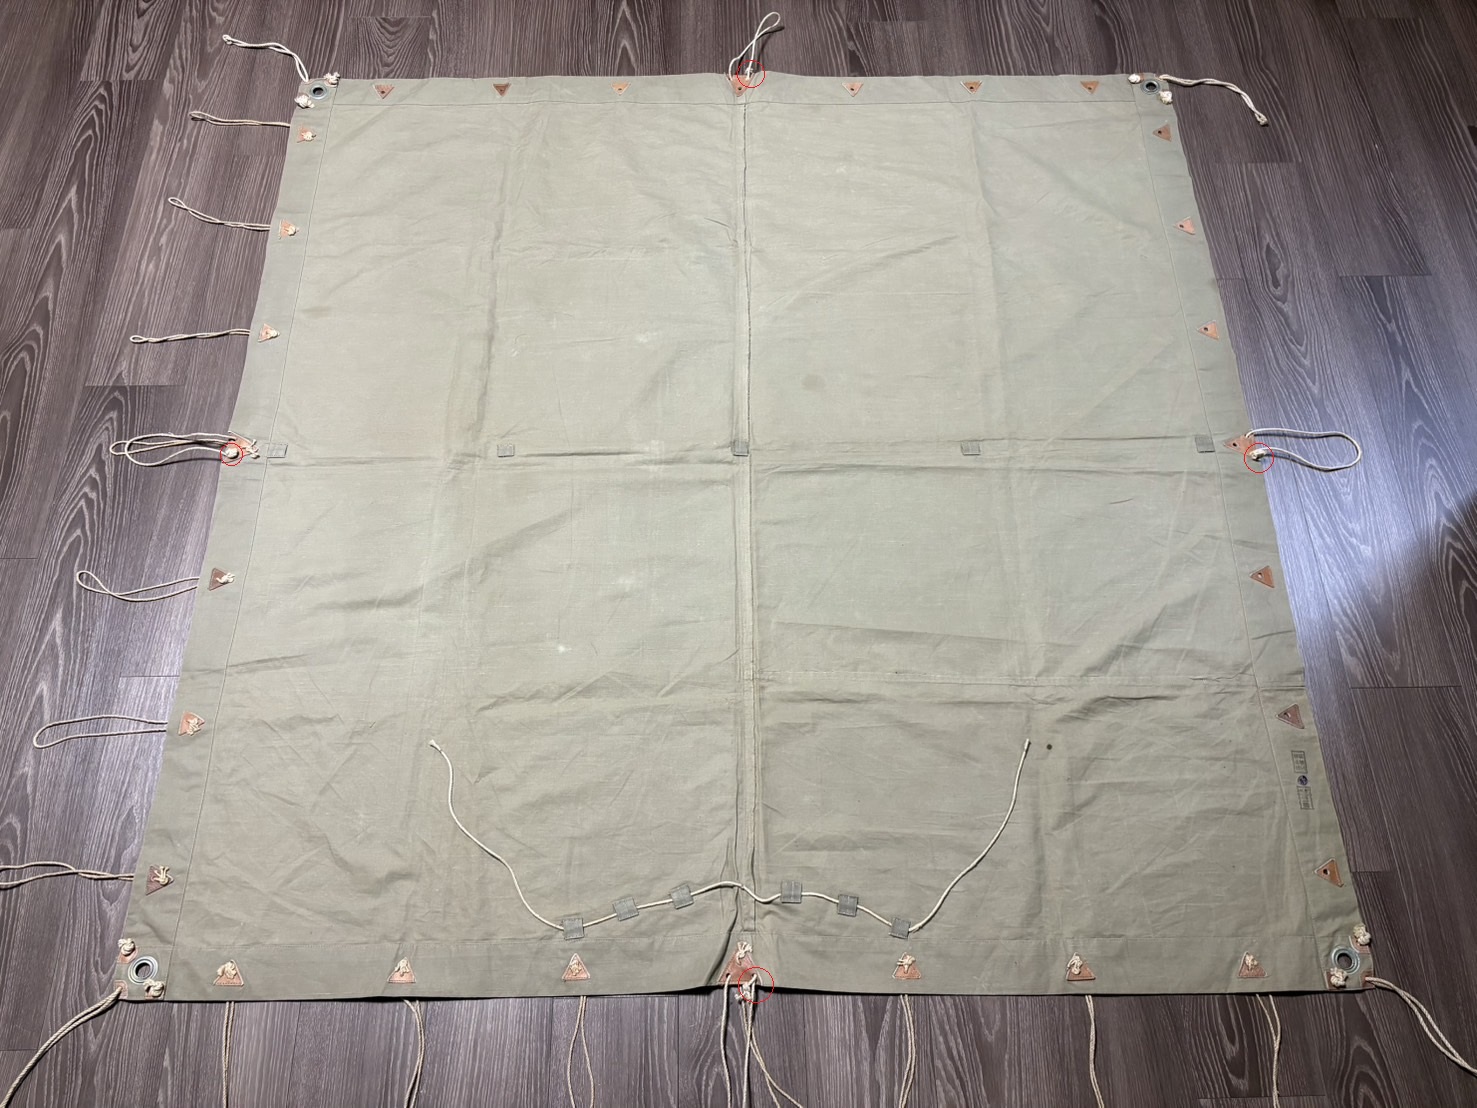
First, please take a look at the completed photos. One of the left-side rope loops is hidden, but let’s overlook that little detail.
Compared to before the modification, I believe it now has a much more authentic appearance.
Preparing the Rope
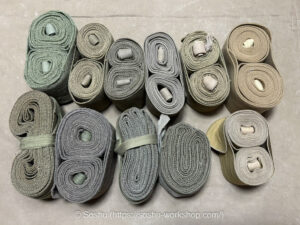
For the ropes, use hemp ones. However, avoid common hemp ropes that have coarse, prickly fibers. It’s best to choose ropes with a smooth surface labeled as “linen” or “Manila hemp.”
Authentic ropes are quite stiff and have almost no stretch even when pulled. If possible, it’s ideal to examine the actual material in person before purchasing.
The ropes should be in an unbleached, natural color. Authentic ones tend to have a slightly duller tone, closer to the shelter half fabric—most likely due to dirt and aging over the past 80 years.
If you’d like to match the color more closely, dyeing the rope with coffee can produce a convincing effect.
If you can’t find suitable hemp ropes, you can substitute cotton ones. Visually, cotton and hemp ropes are hard to distinguish, so if you’re just wearing the shelter half as a cloak rather than pitching it, cotton rope will suffice. However, cotton ropes lack durability—they stretch easily under strong tension—so for practical use, hemp is essential.
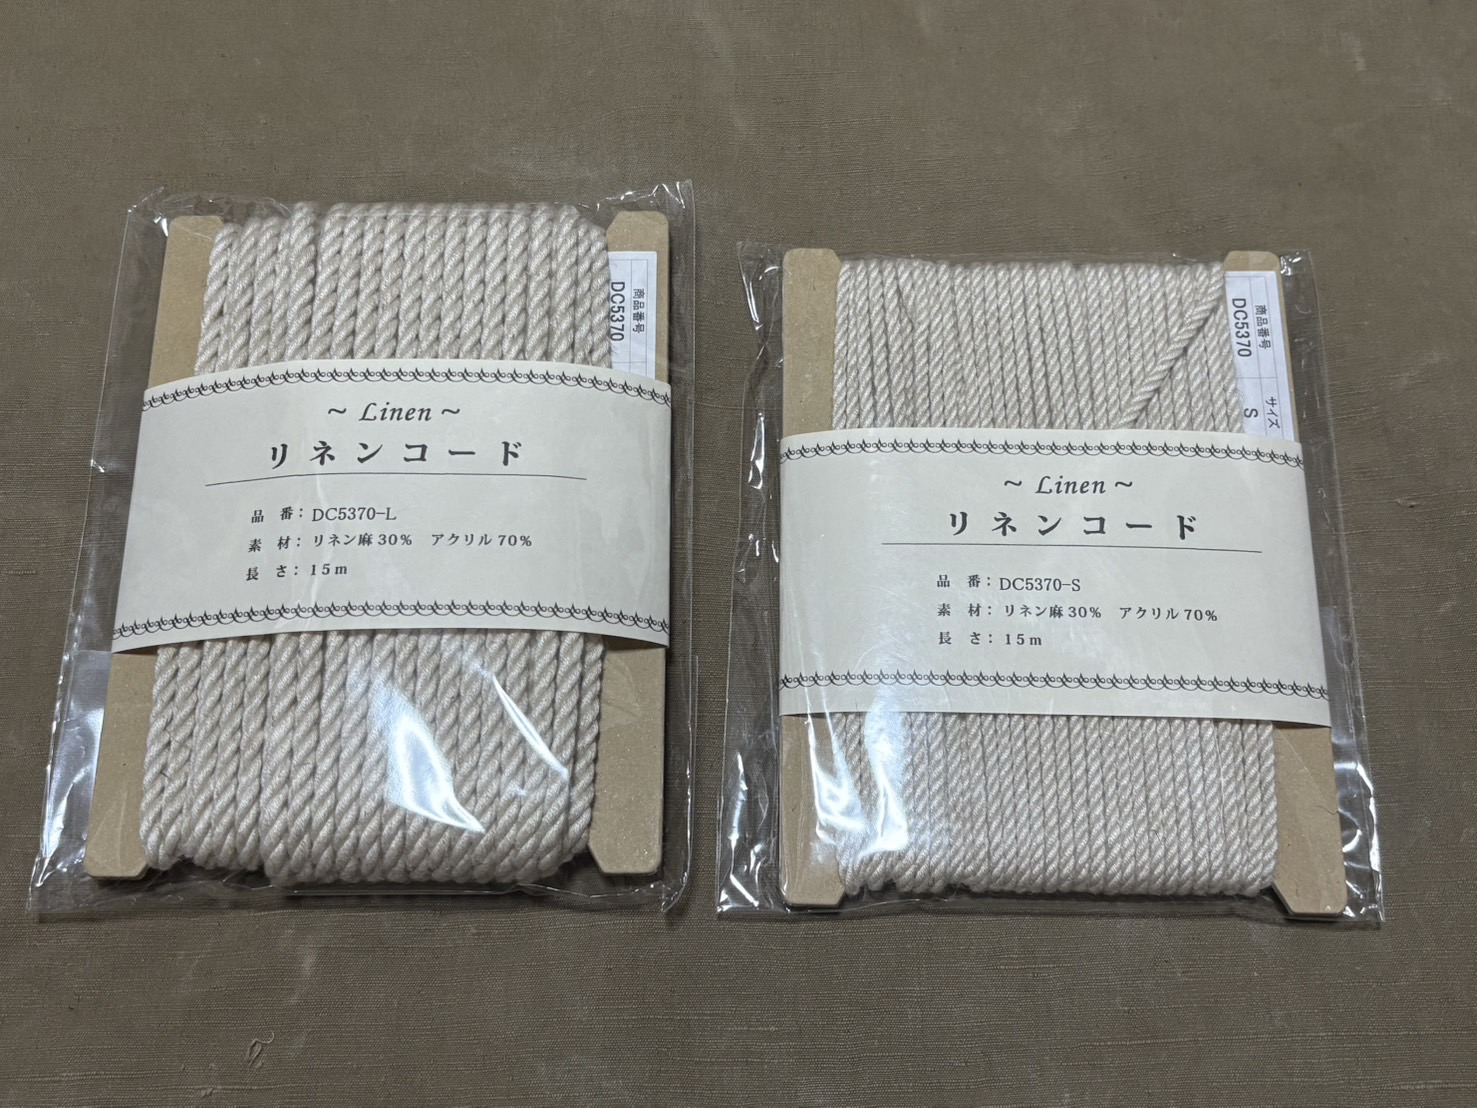
You’ll need two different thicknesses of rope: 4 mm for the thicker type and 3 mm for the thinner one.
I tried 5 mm and 3 mm ropes, but found that 4 mm is closer to the authentic size, though the difference in appearance is minimal.
Below are the ropes I used. I’d rate them about 65 out of 100—there’s room for improvement. They’re a blend of 30% linen hemp and 70% acrylic, so I’m not completely satisfied.
Since there aren’t many stores nearby that sell ropes, I ordered these online. It’s difficult to judge the quality just from product photos, and though I bought several types to compare, I think I could find even better ones with a bit more time and effort.
The thicker ropes are used for the four corners and the center of each edge.
The thinner ropes are used for the tie codes, neck cord, and ridge cords.
To replace all ropes on one shelter half, about 10 meters of thick rope and 15 meters of thin rope—allowing a bit of extra length—should be sufficient.
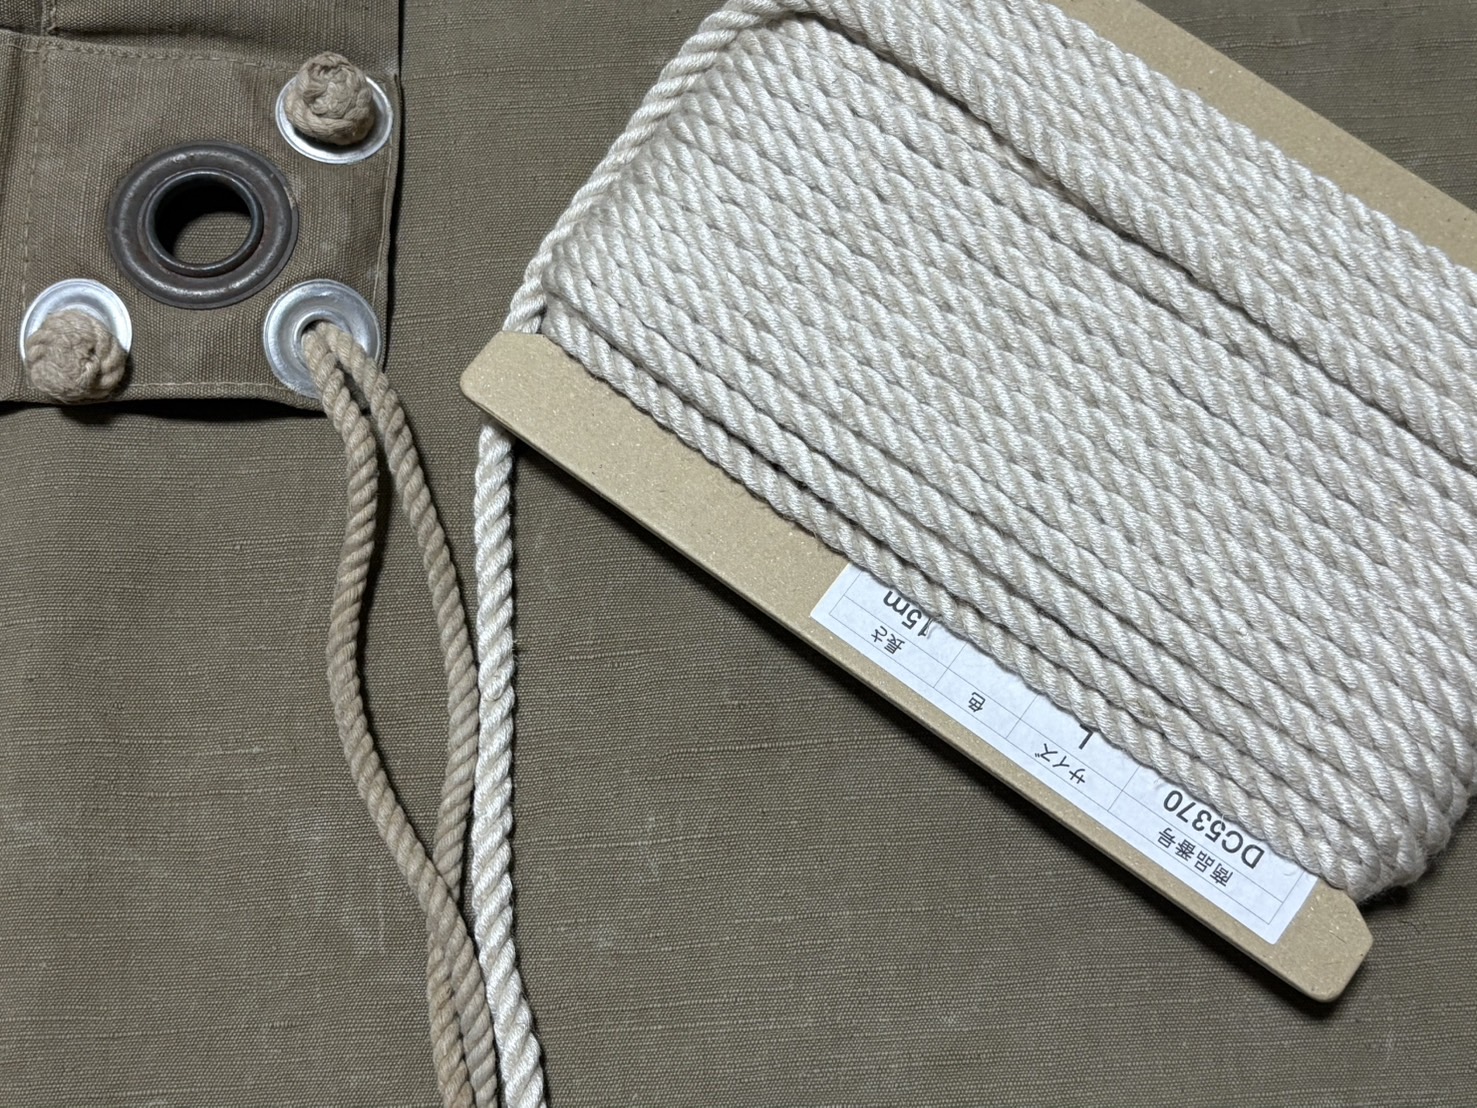
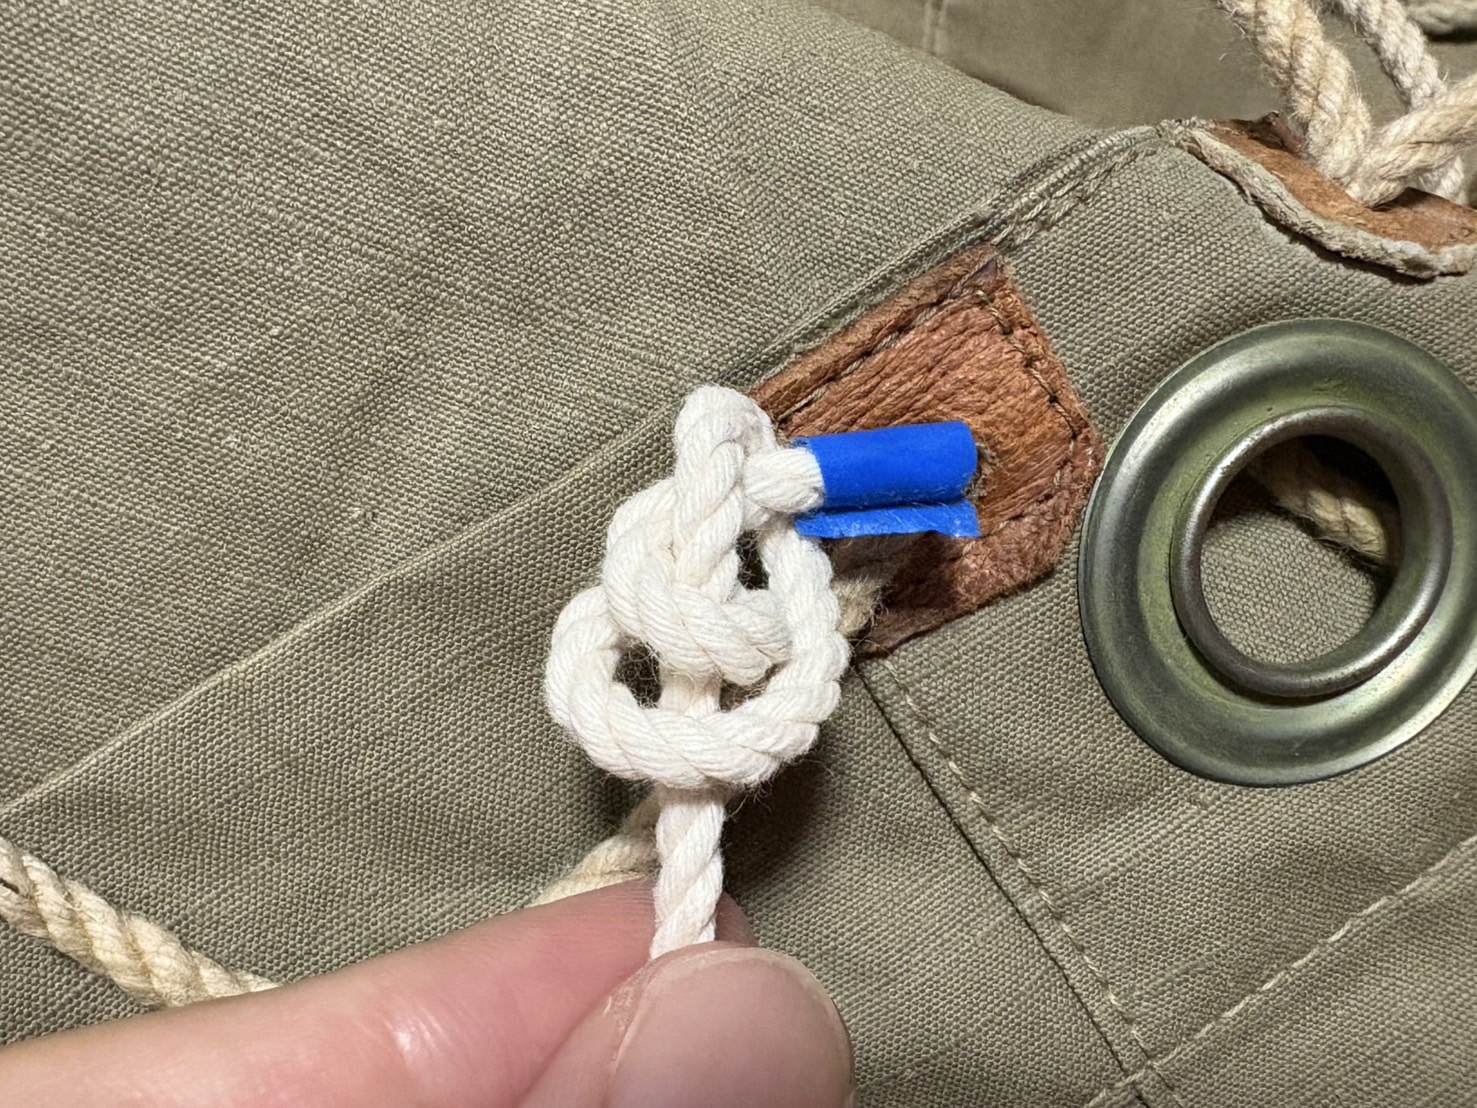
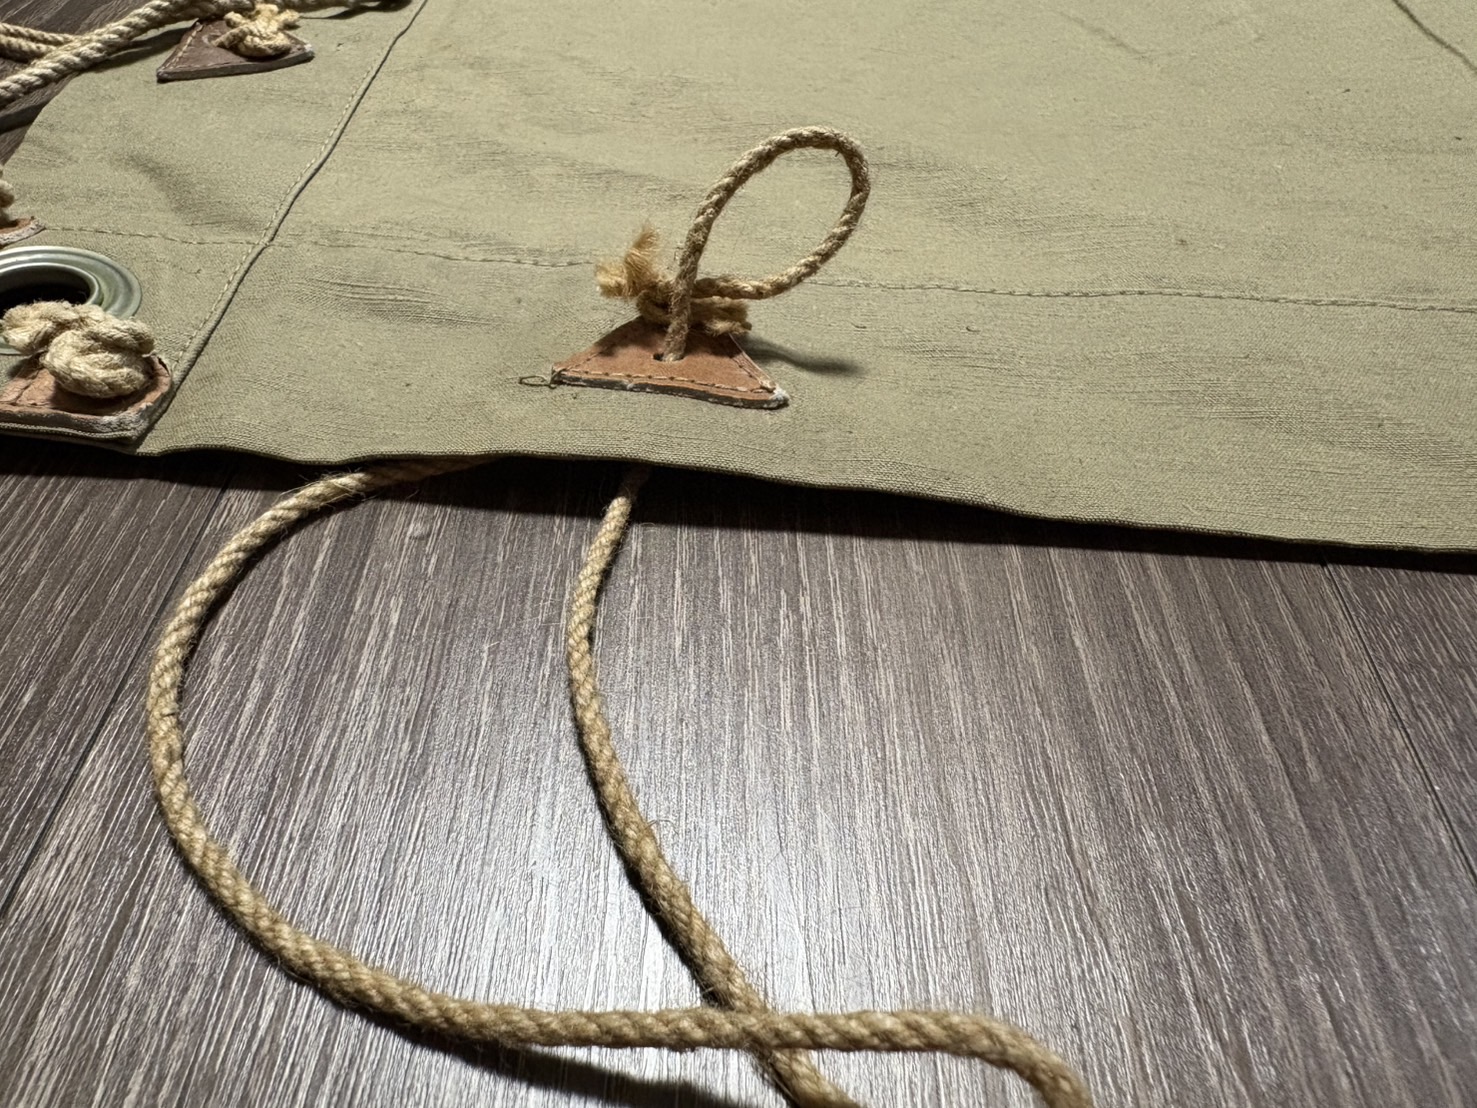
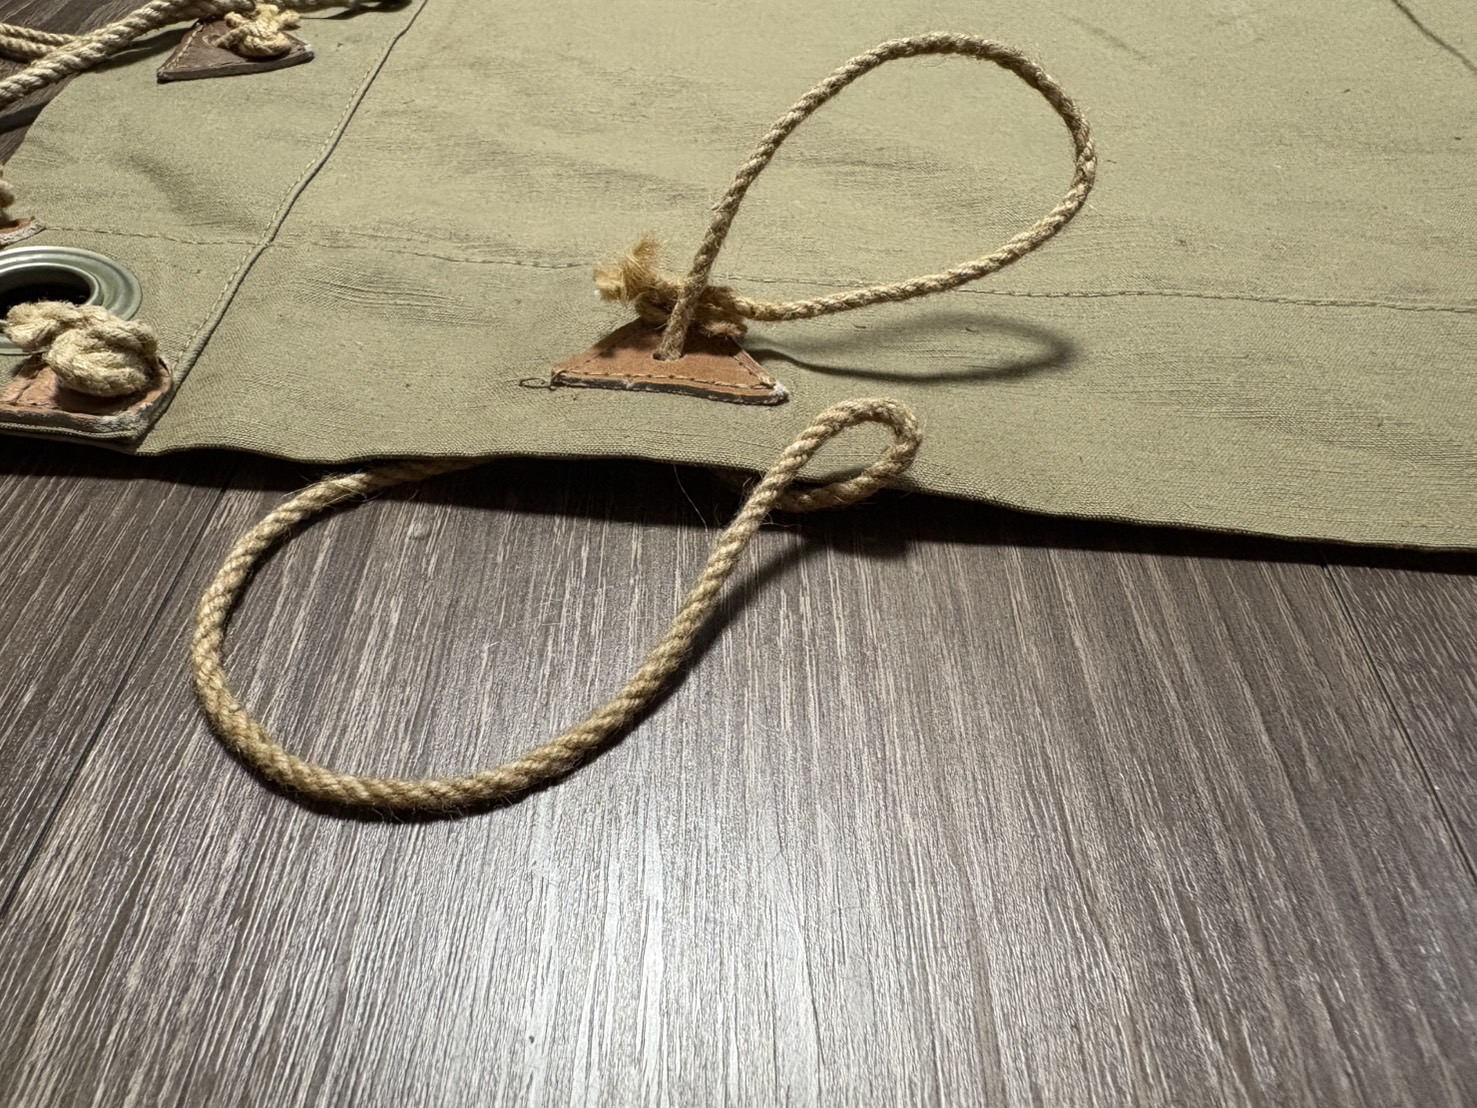
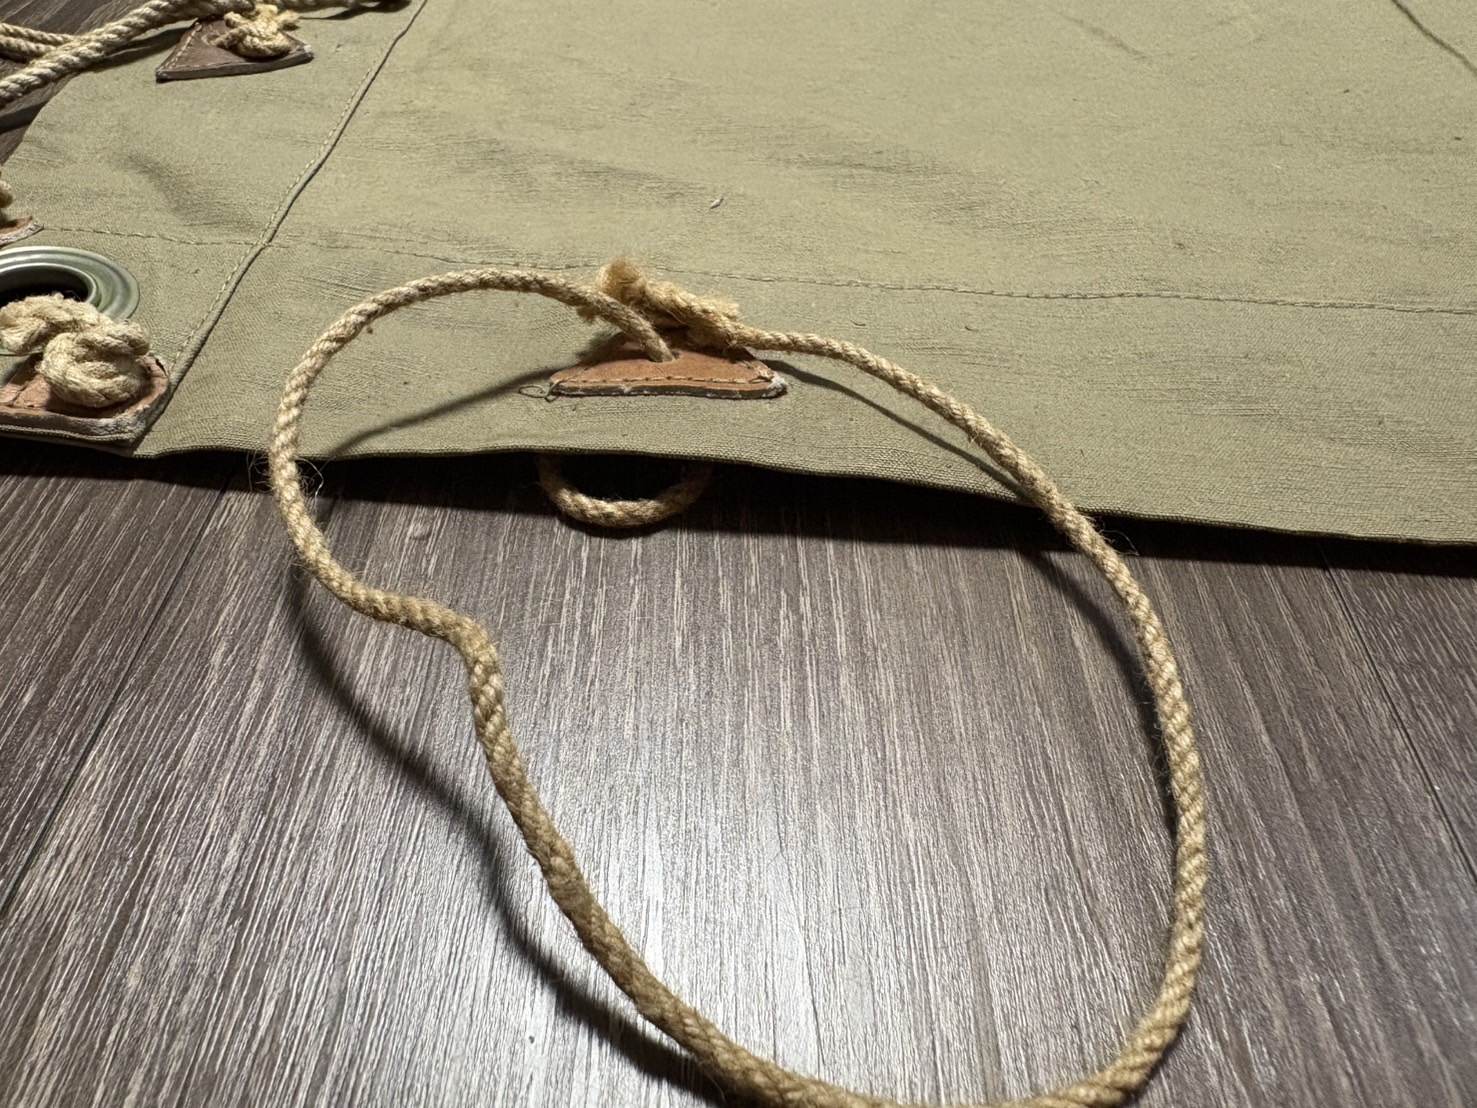
Corner Ropes
Start by replacing the ropes at the four corners. Refer to Figure A at the lower right of Slide 14 in Shelter Half Regulations and Usage. This diagram shows both the threading method and the dimensions—adjust your ropes accordingly.
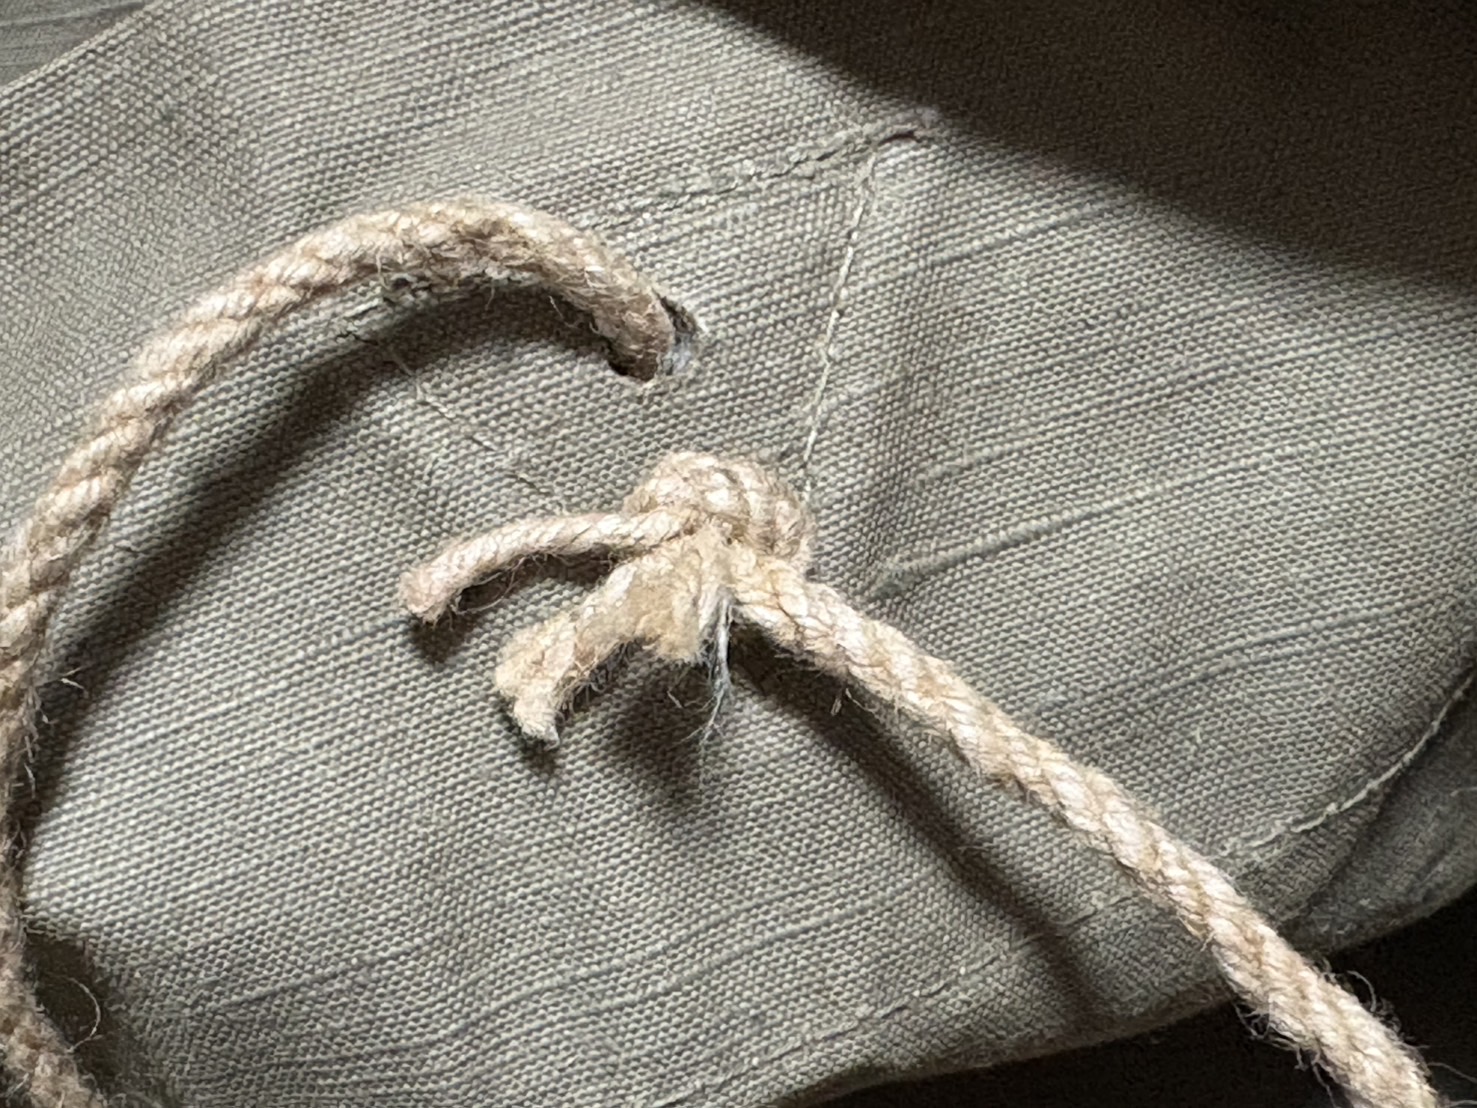
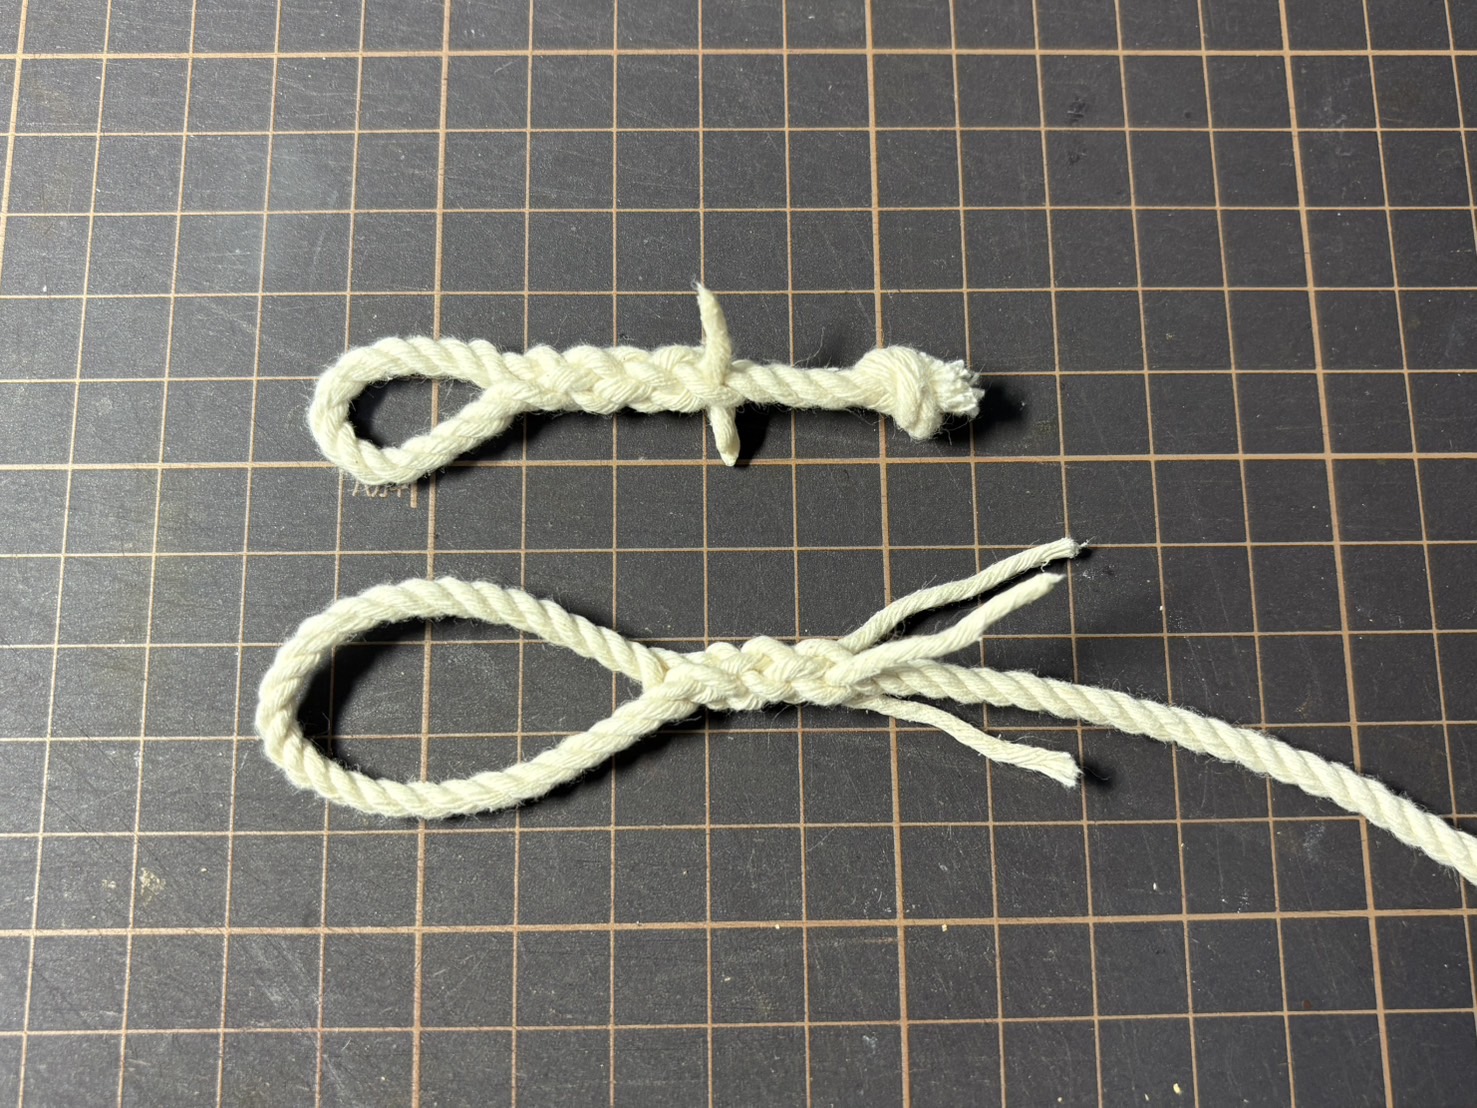
The knots are arranged as shown below: the first three examples are from authentic shelter half, and the last one is from S&Graf. The knotting method used by S&Graf is correct, so you can use it as a reference when replacing the ropes.
Adjust the total length, including the knot, to 590 mm, as specified in the regulations.
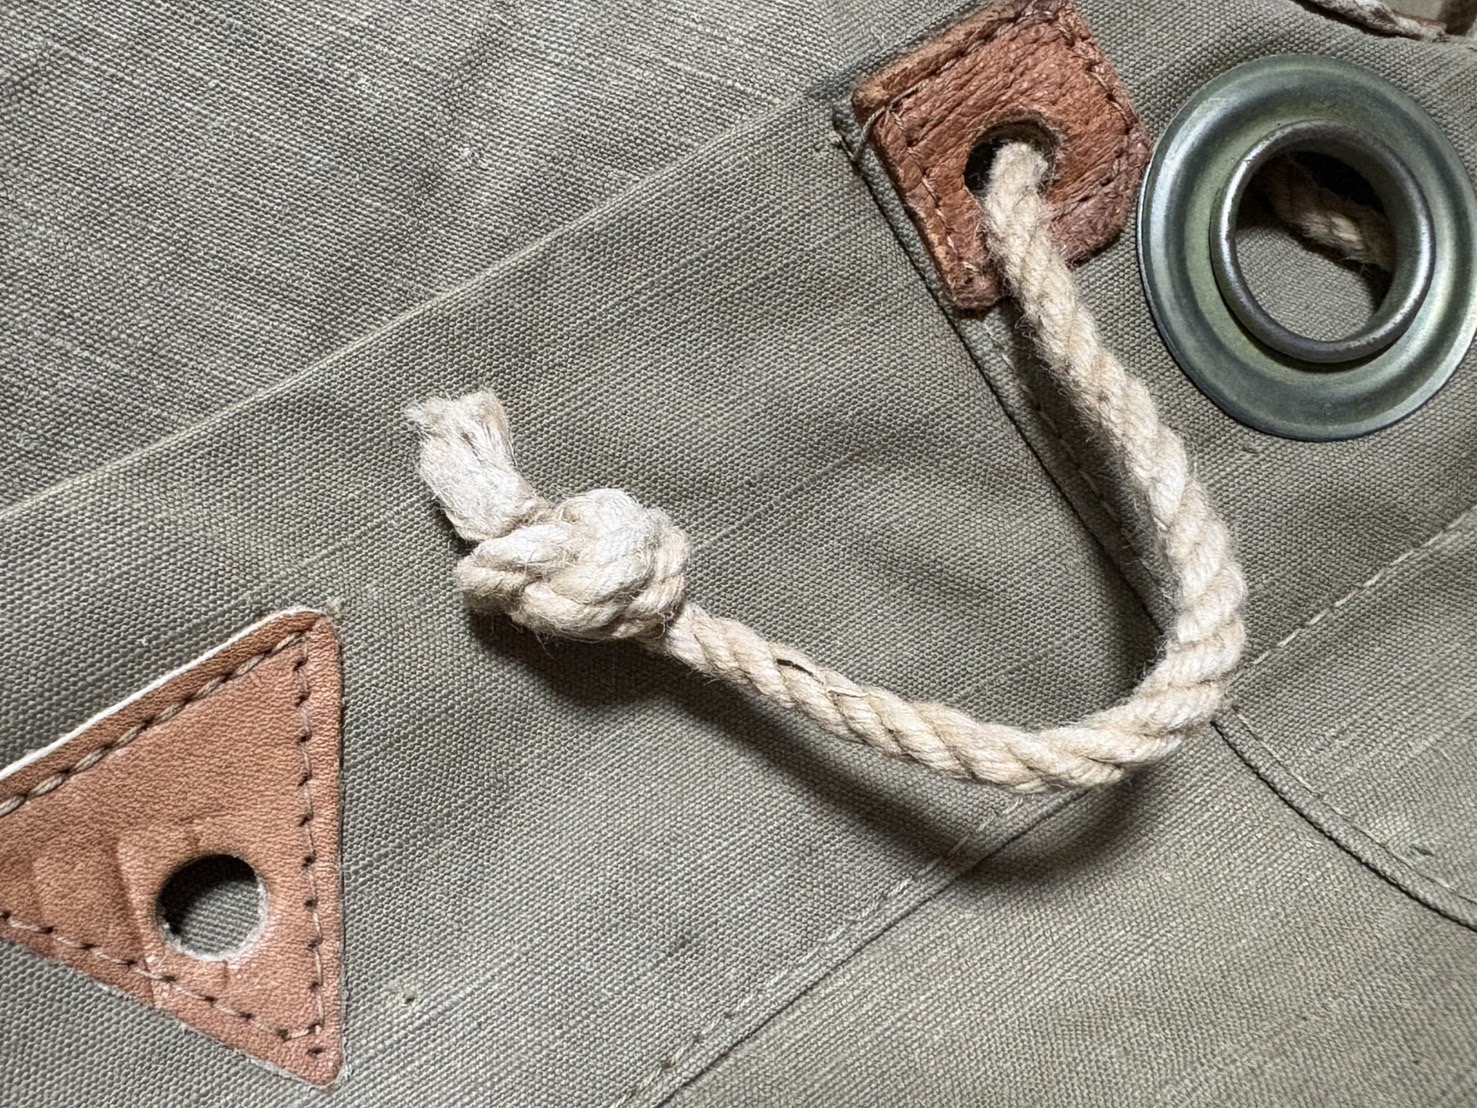
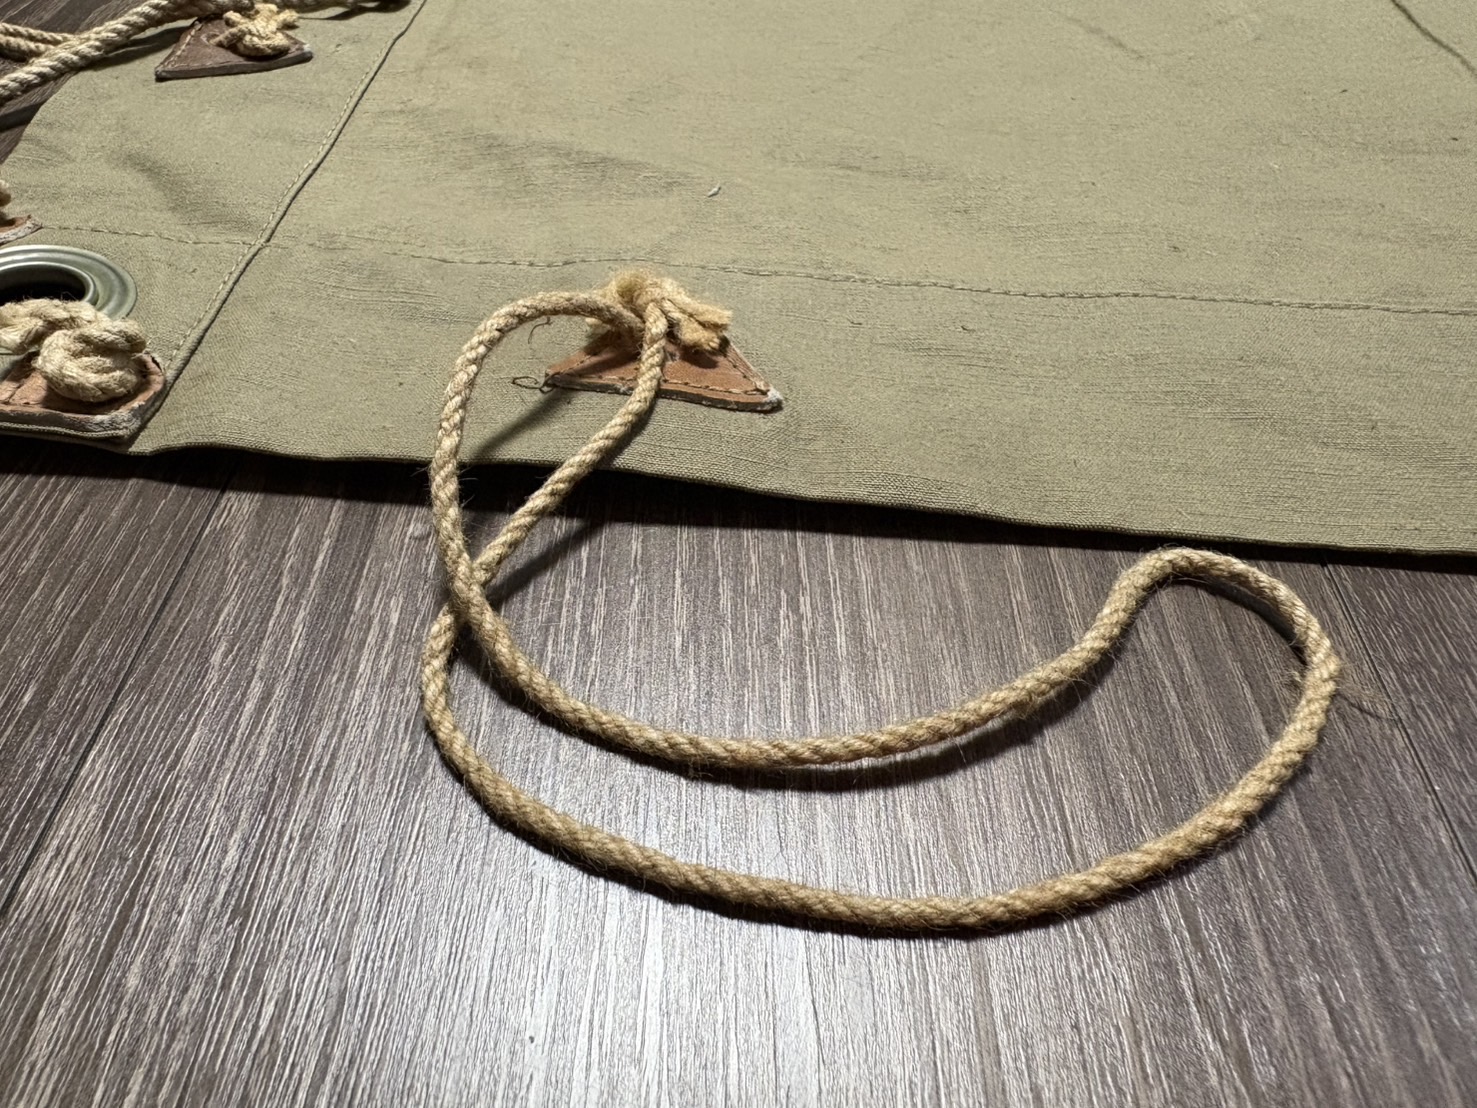
To make the knotting process easier to understand, I’ve included some photos below. You should be able to tie the knots in the same way by following these examples.
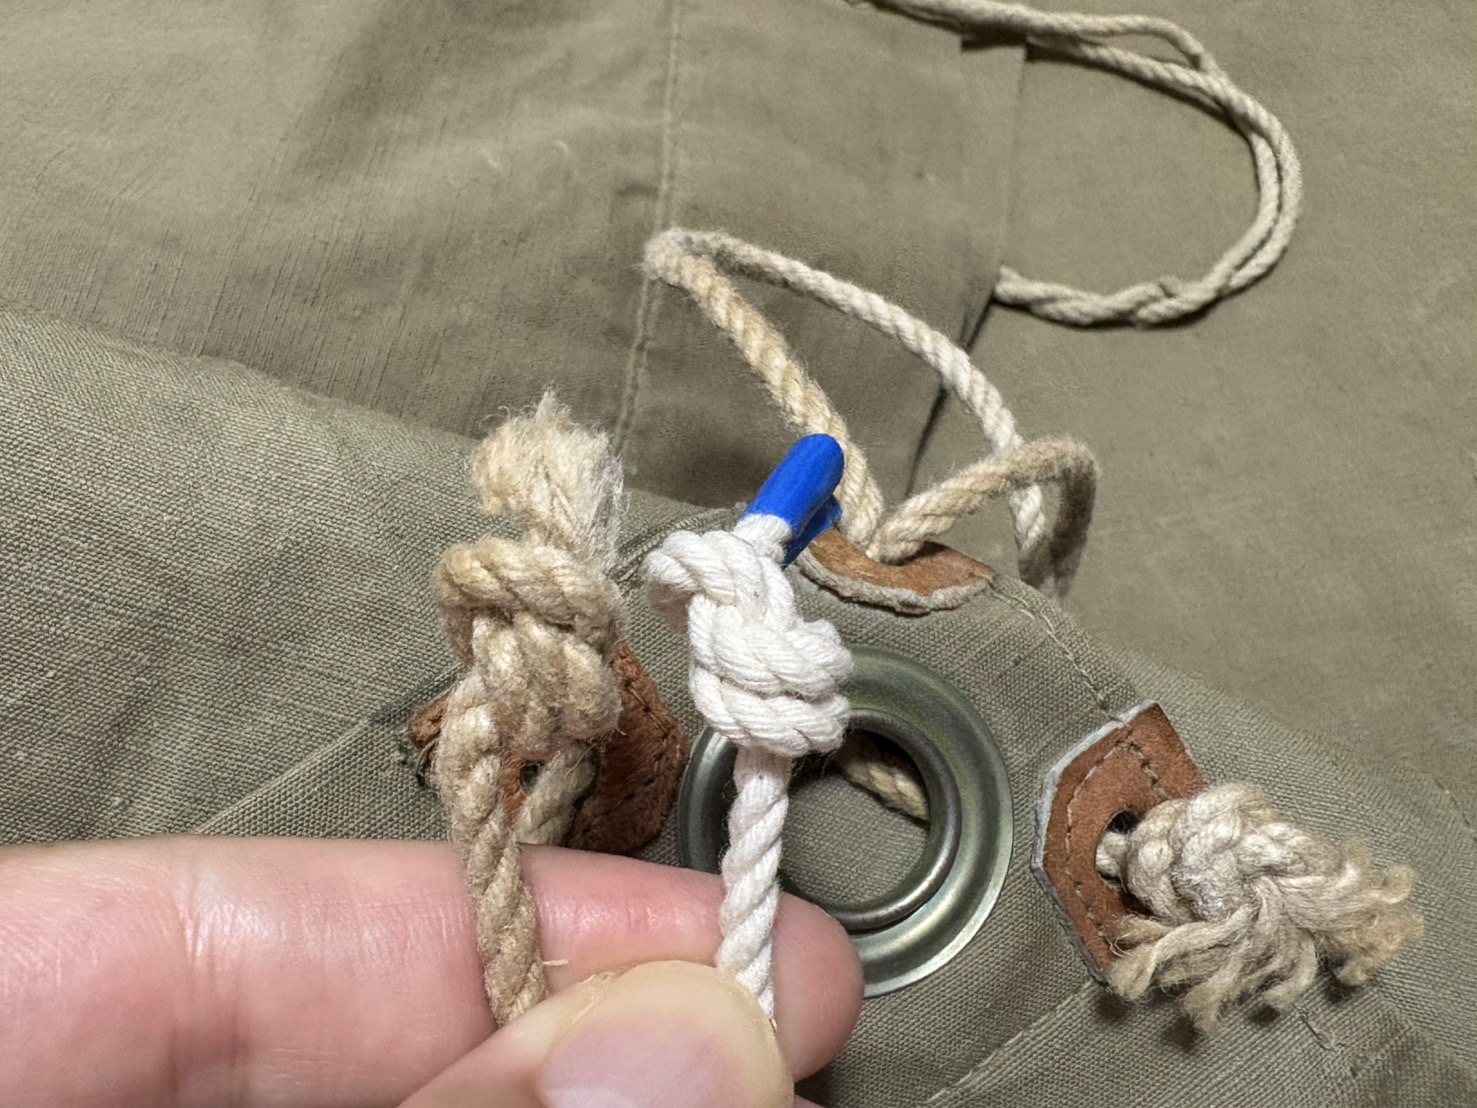
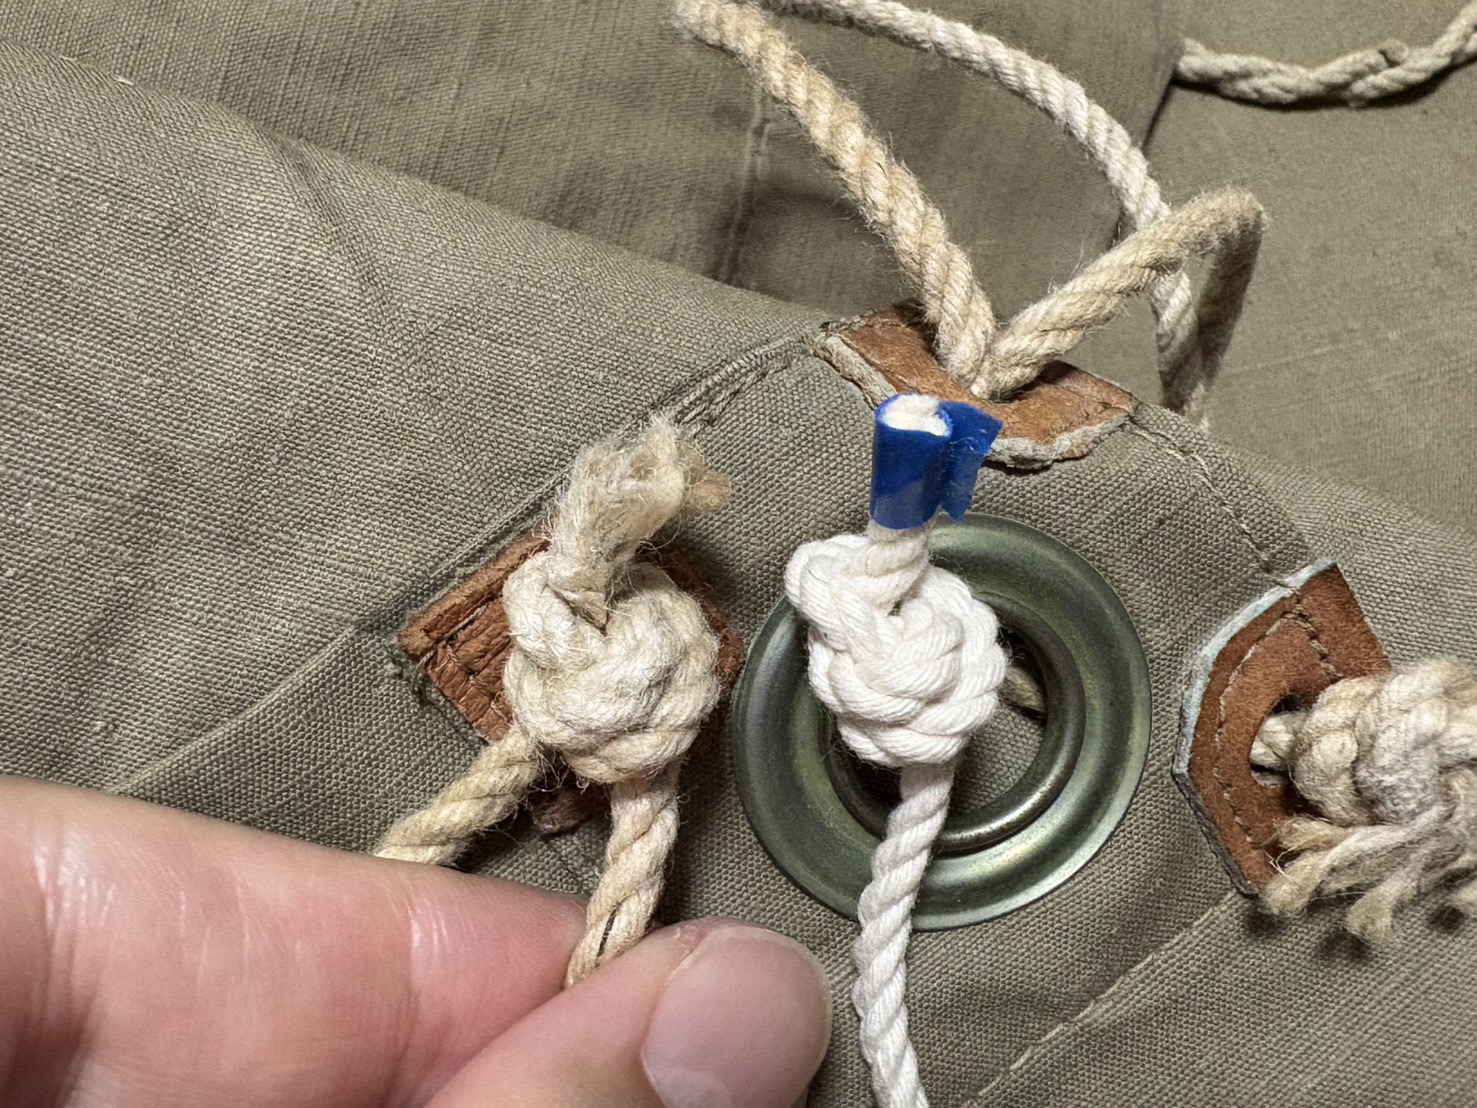
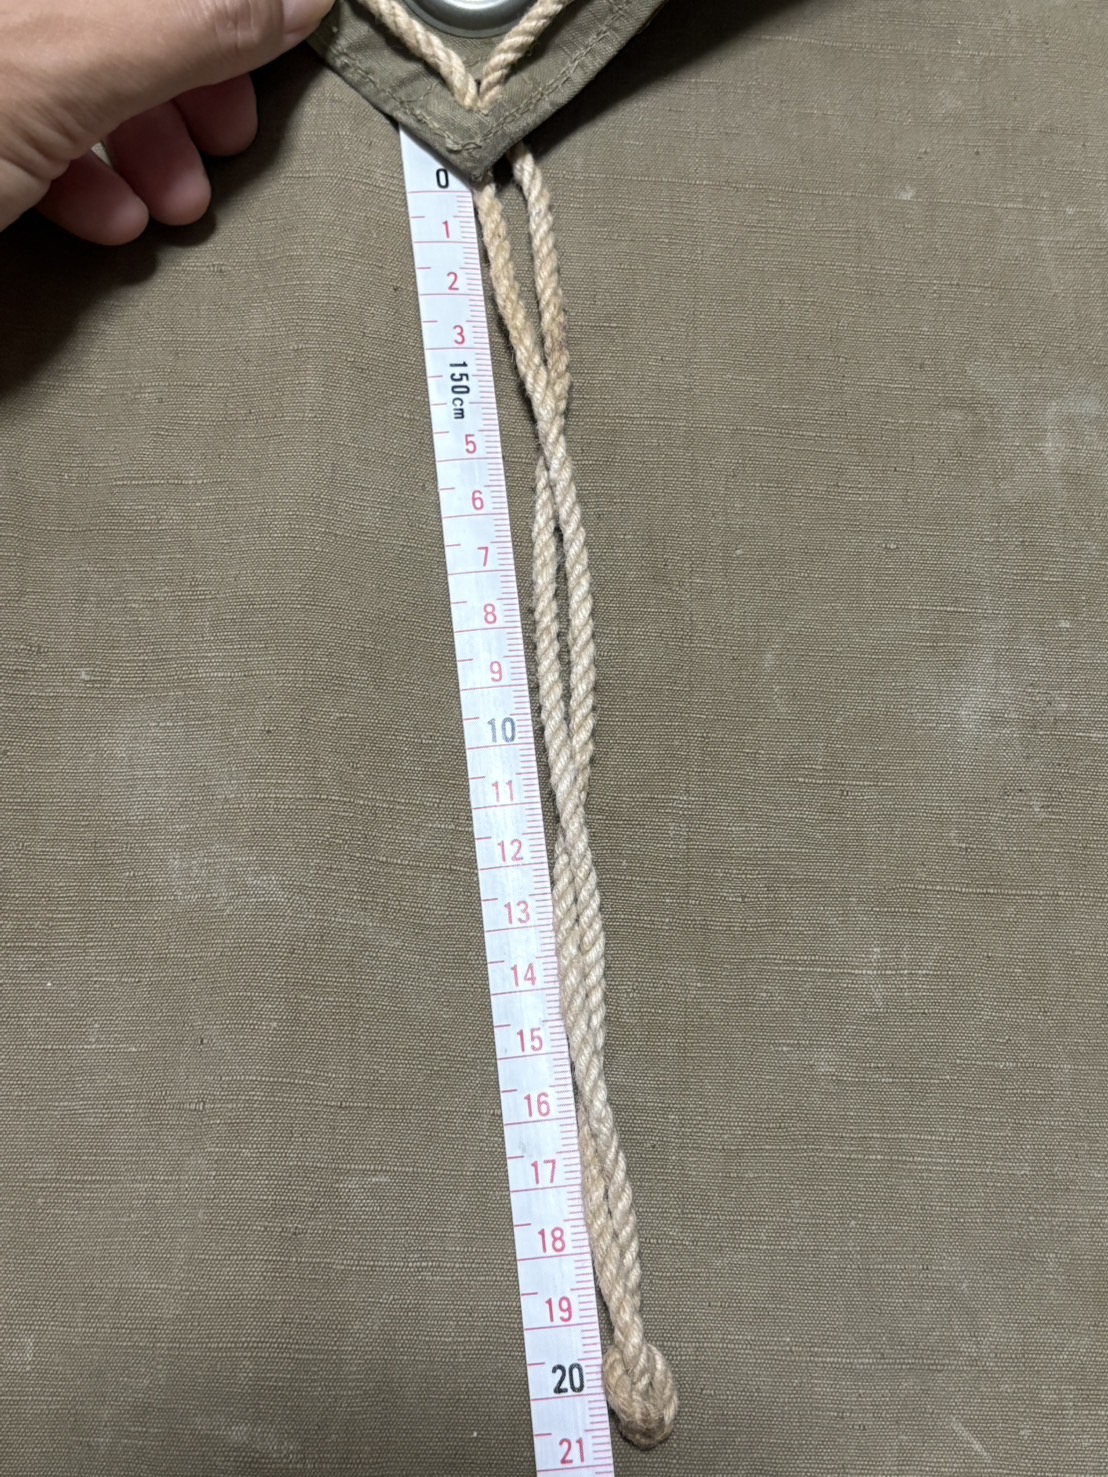
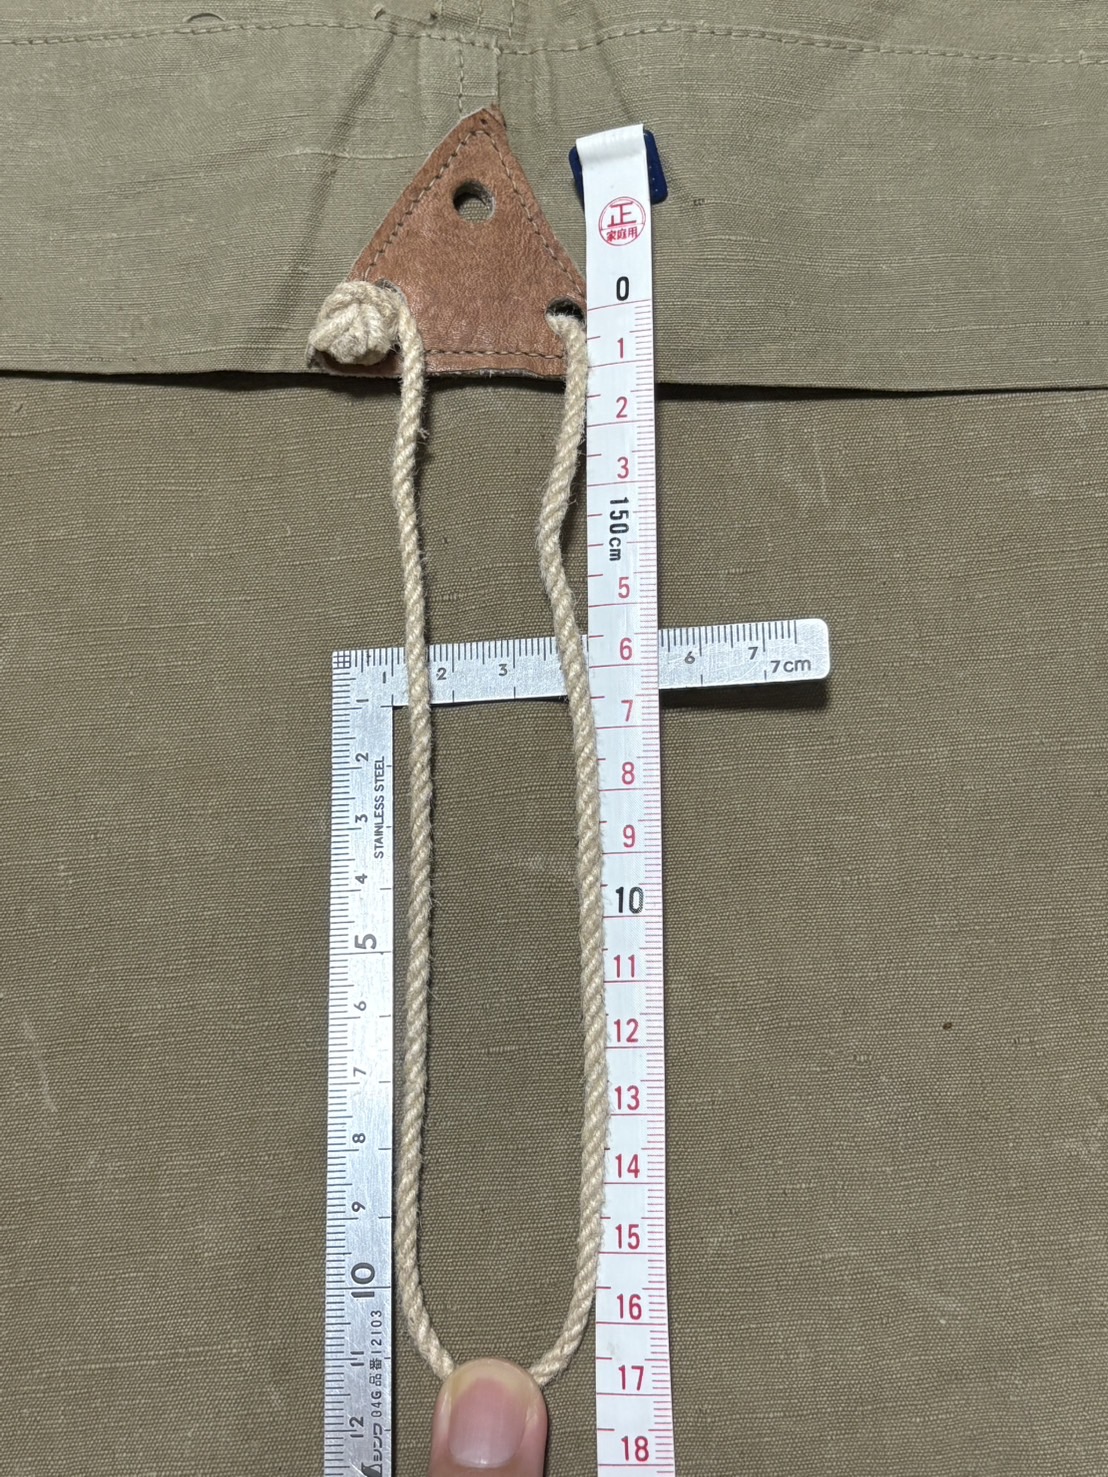
The examples shown here are from authentic shelter halves. The ropes extend about 21 cm beyond the knot, so you can use that as a reference for length.
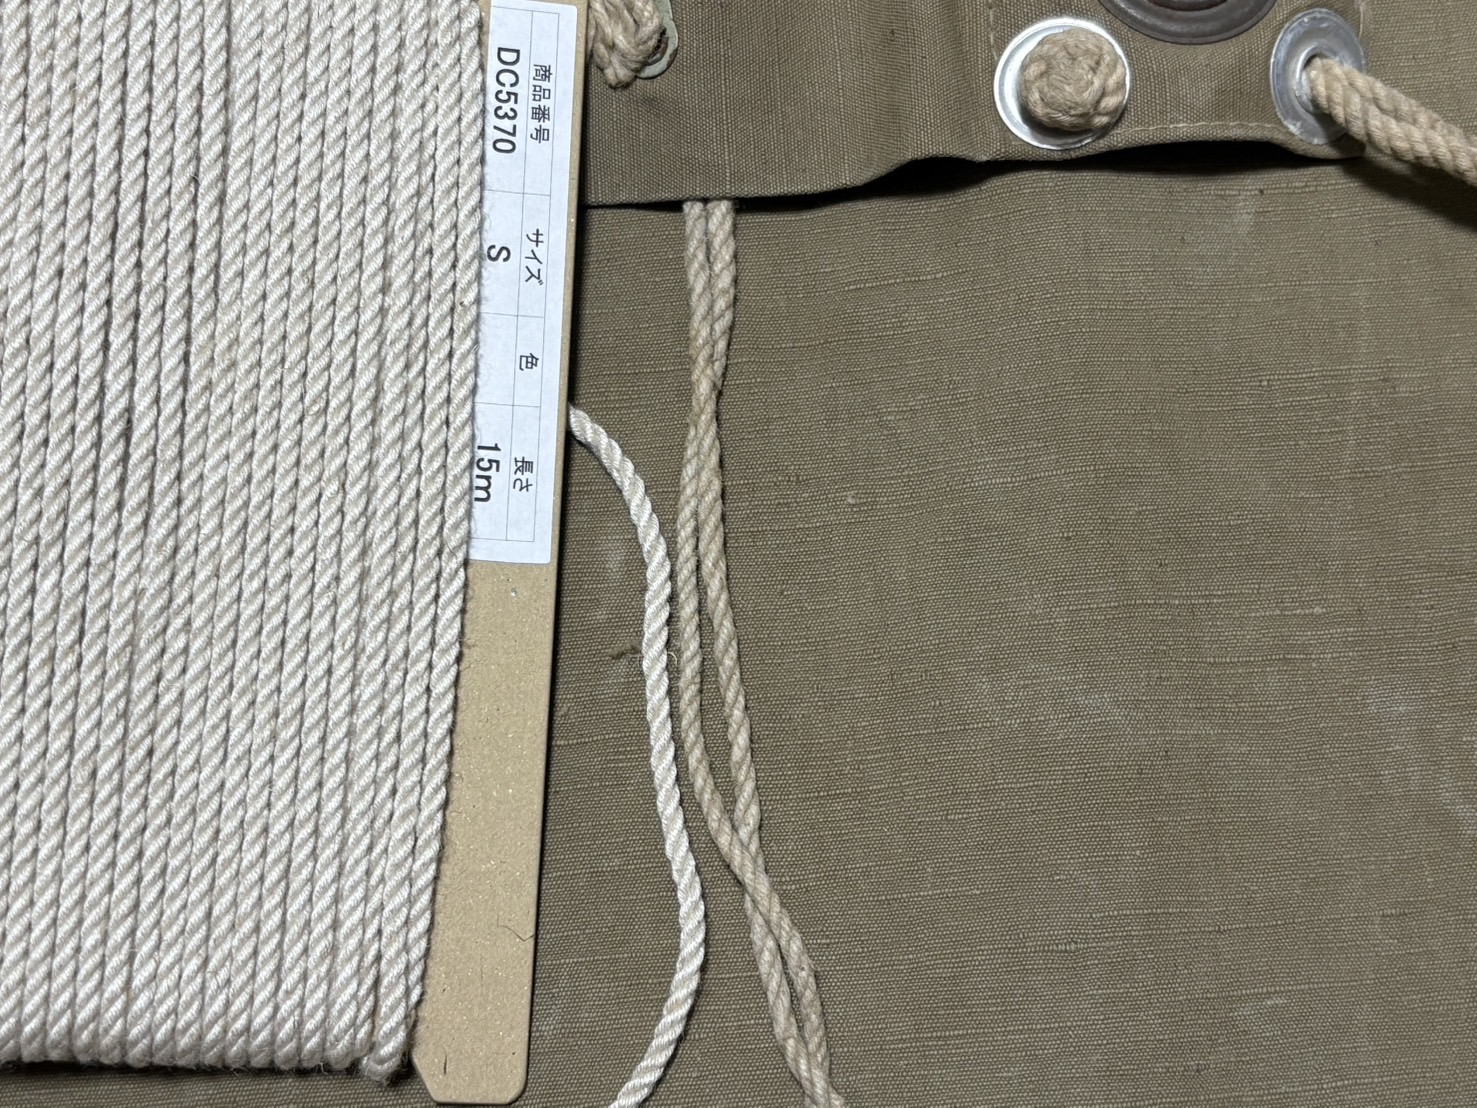
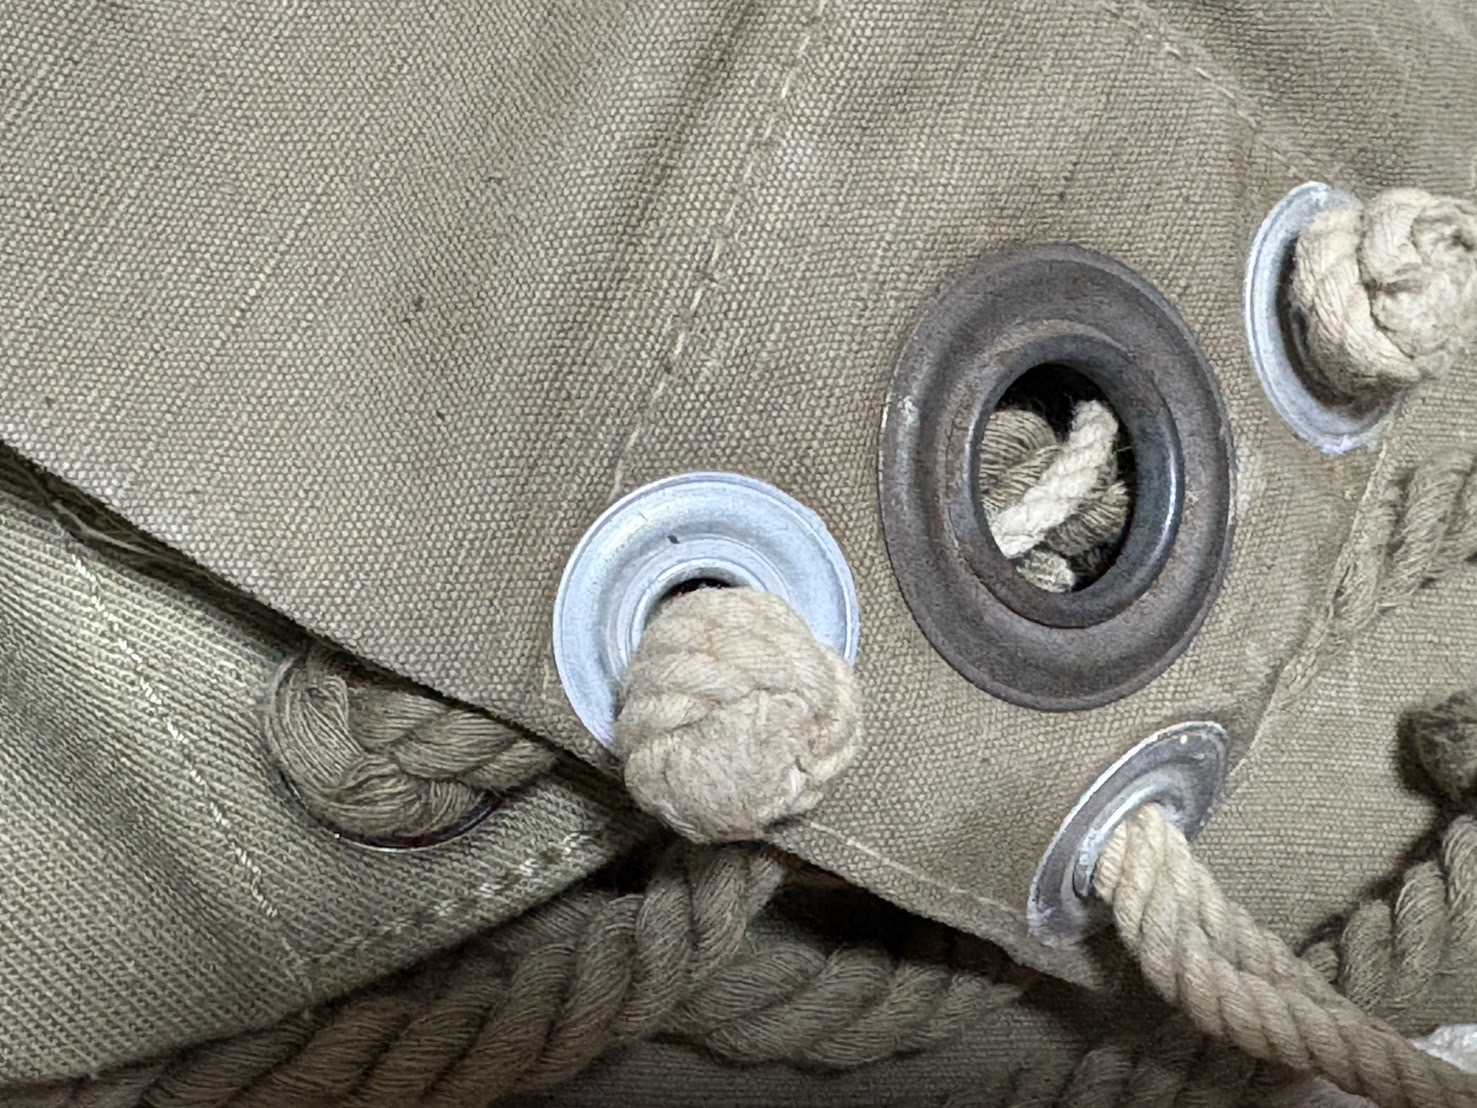
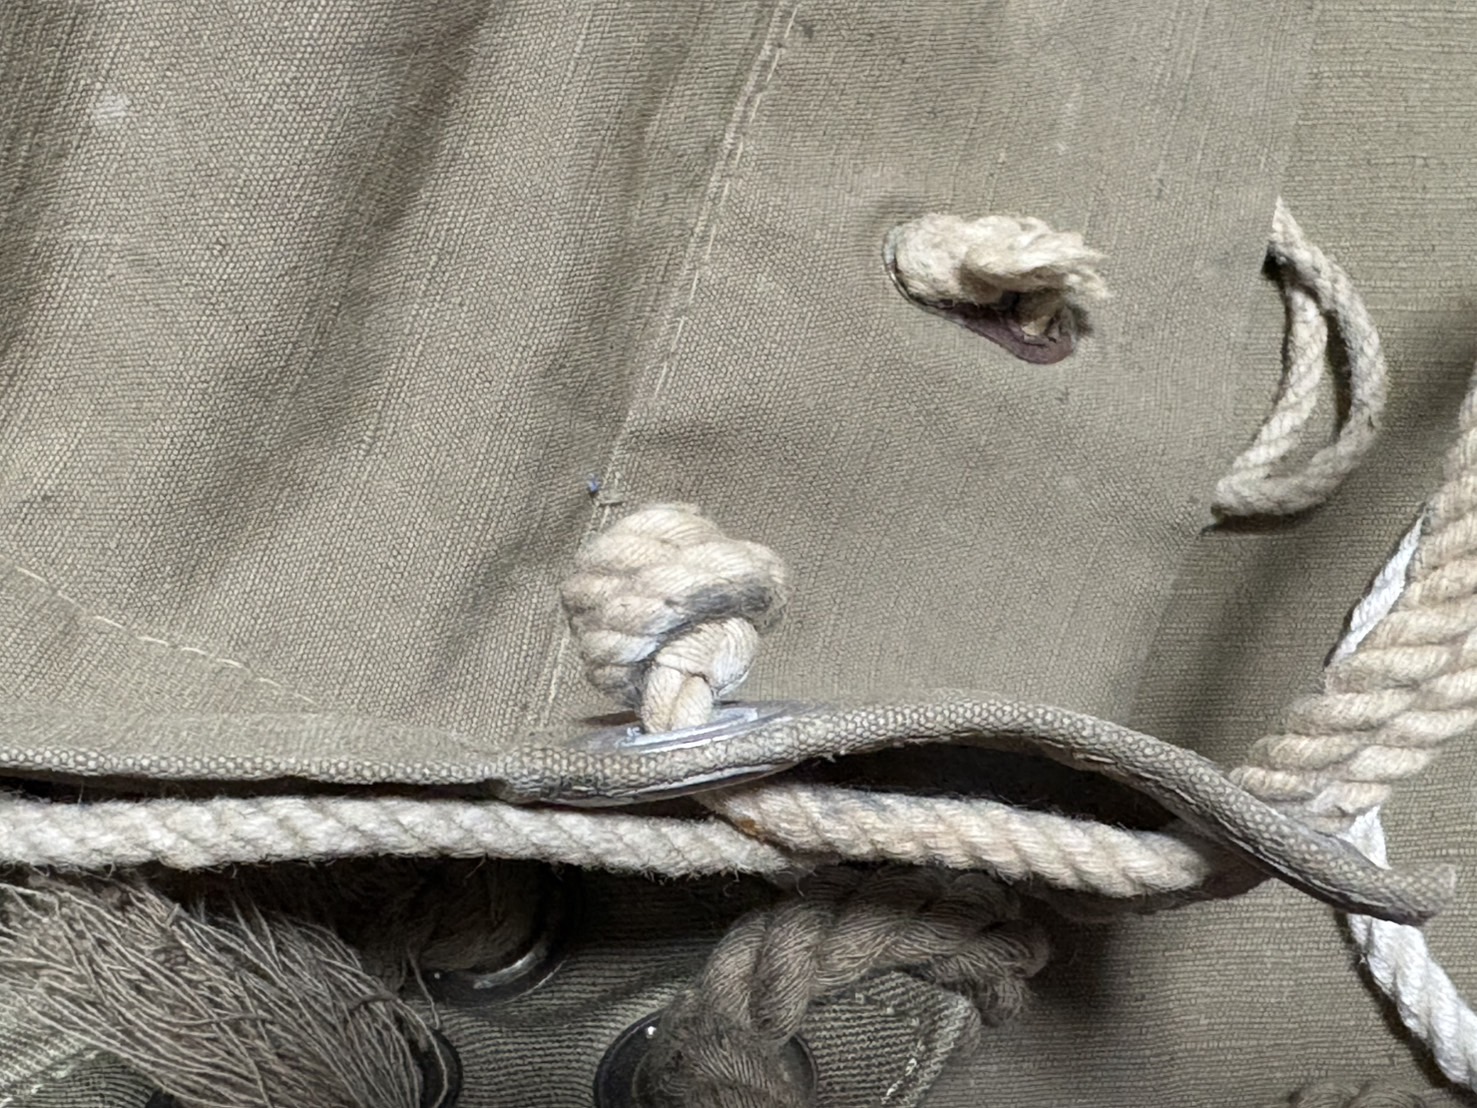
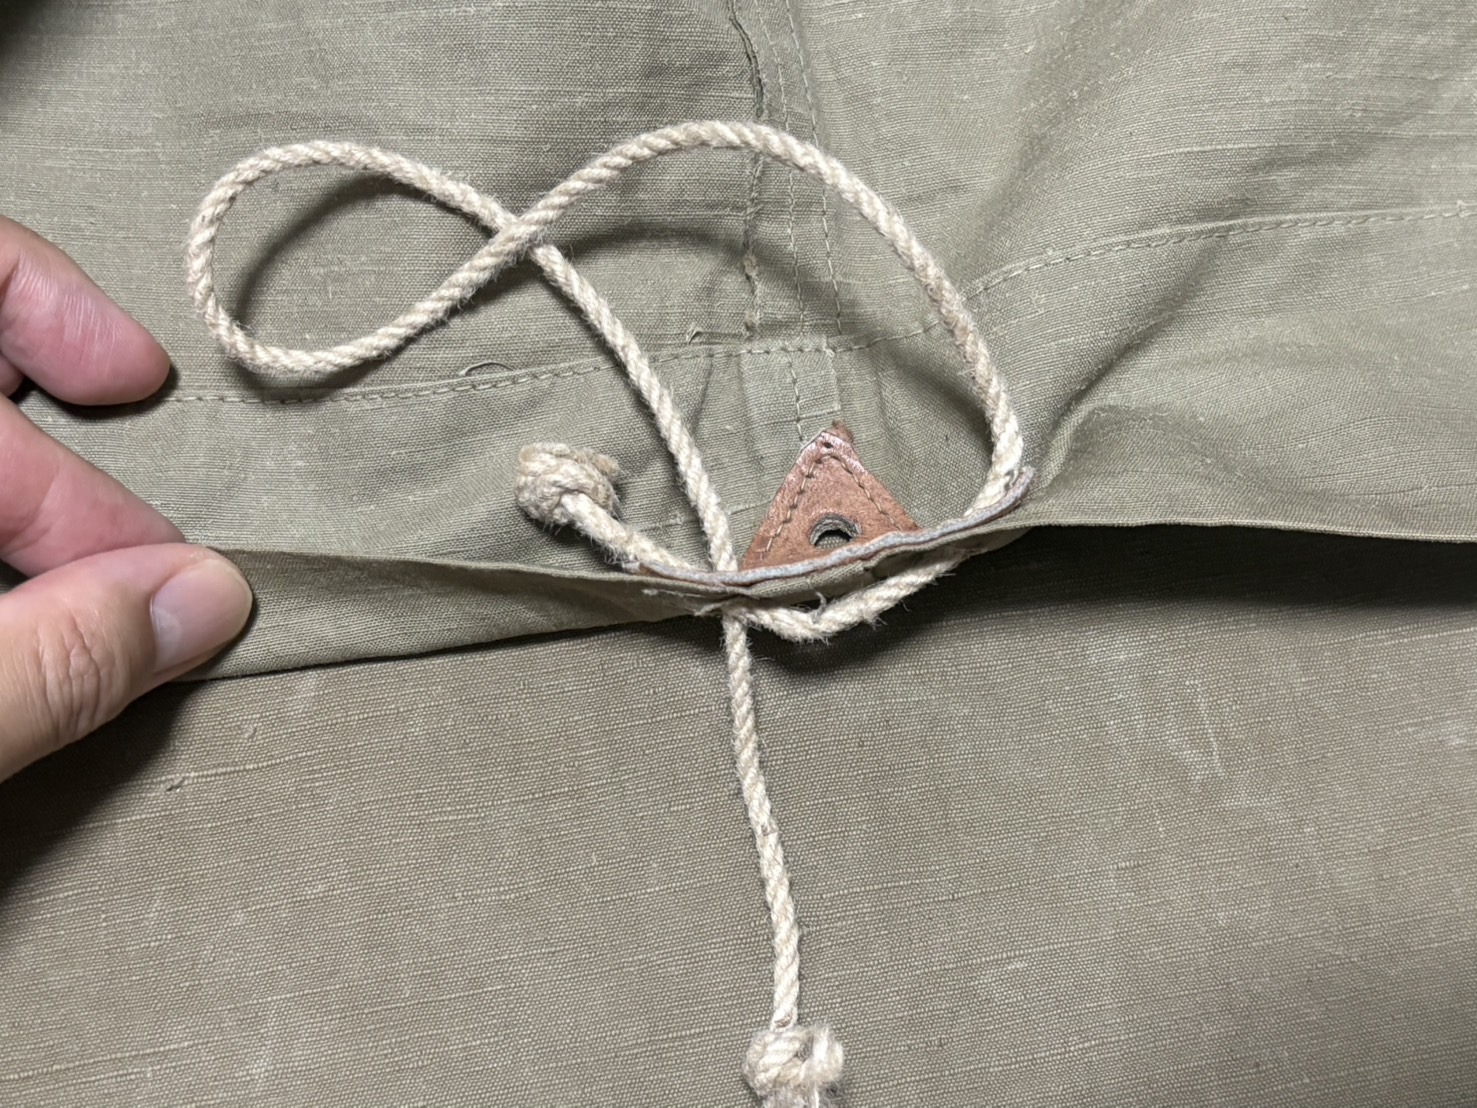
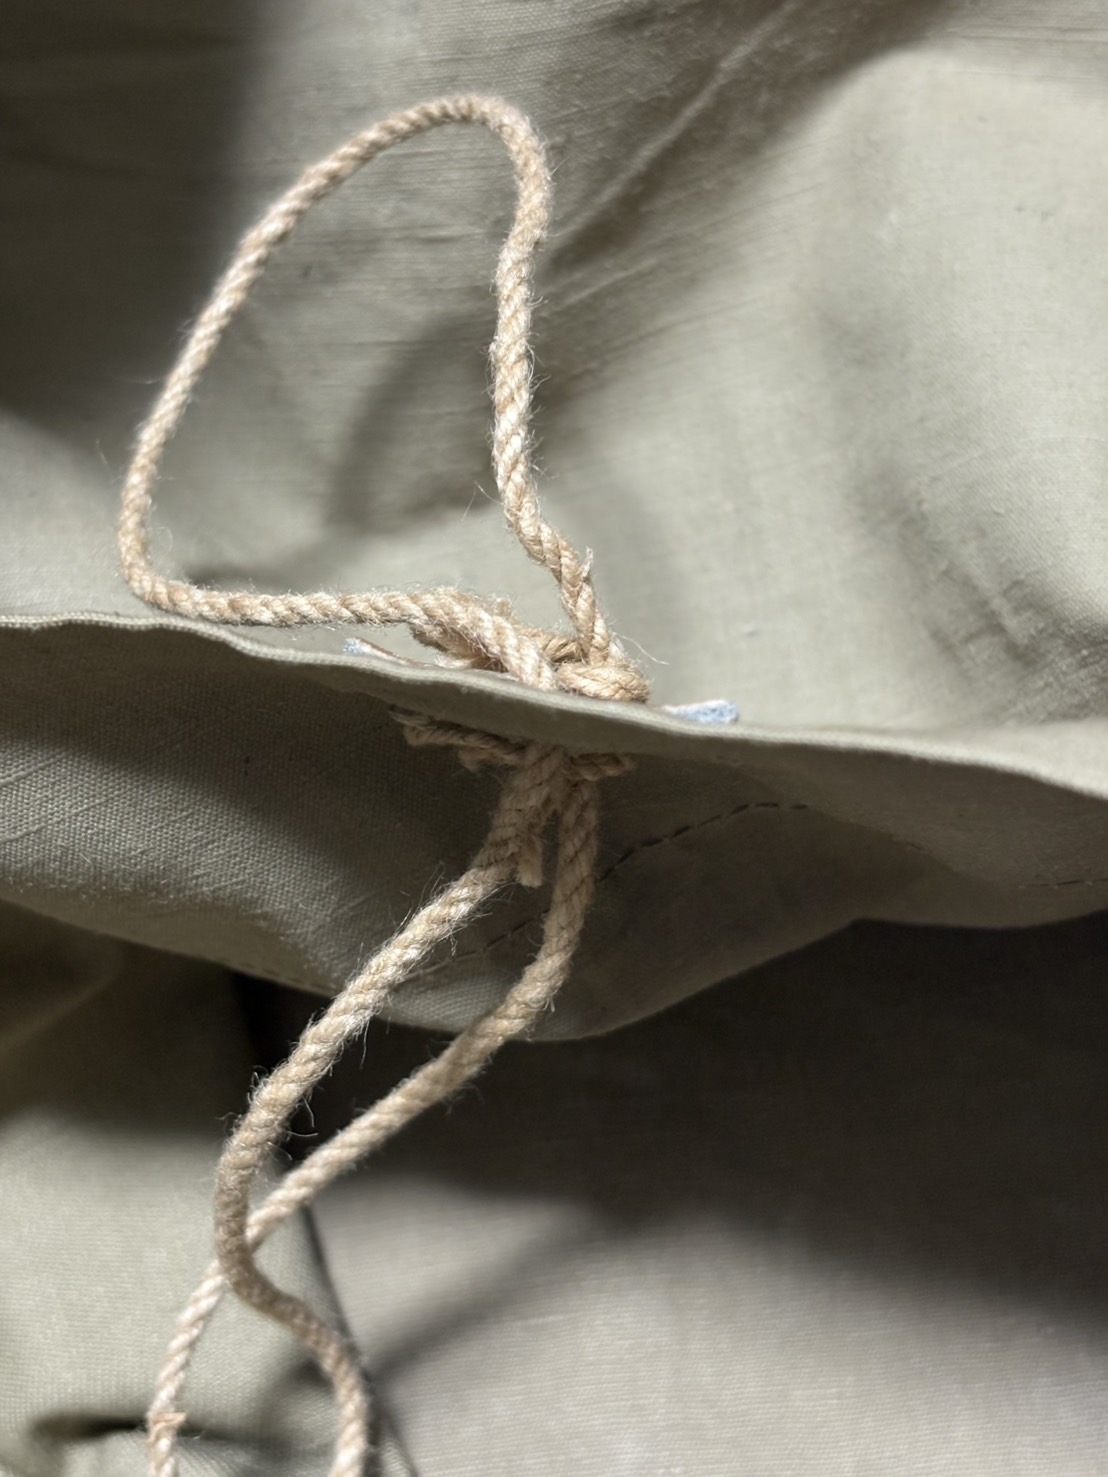
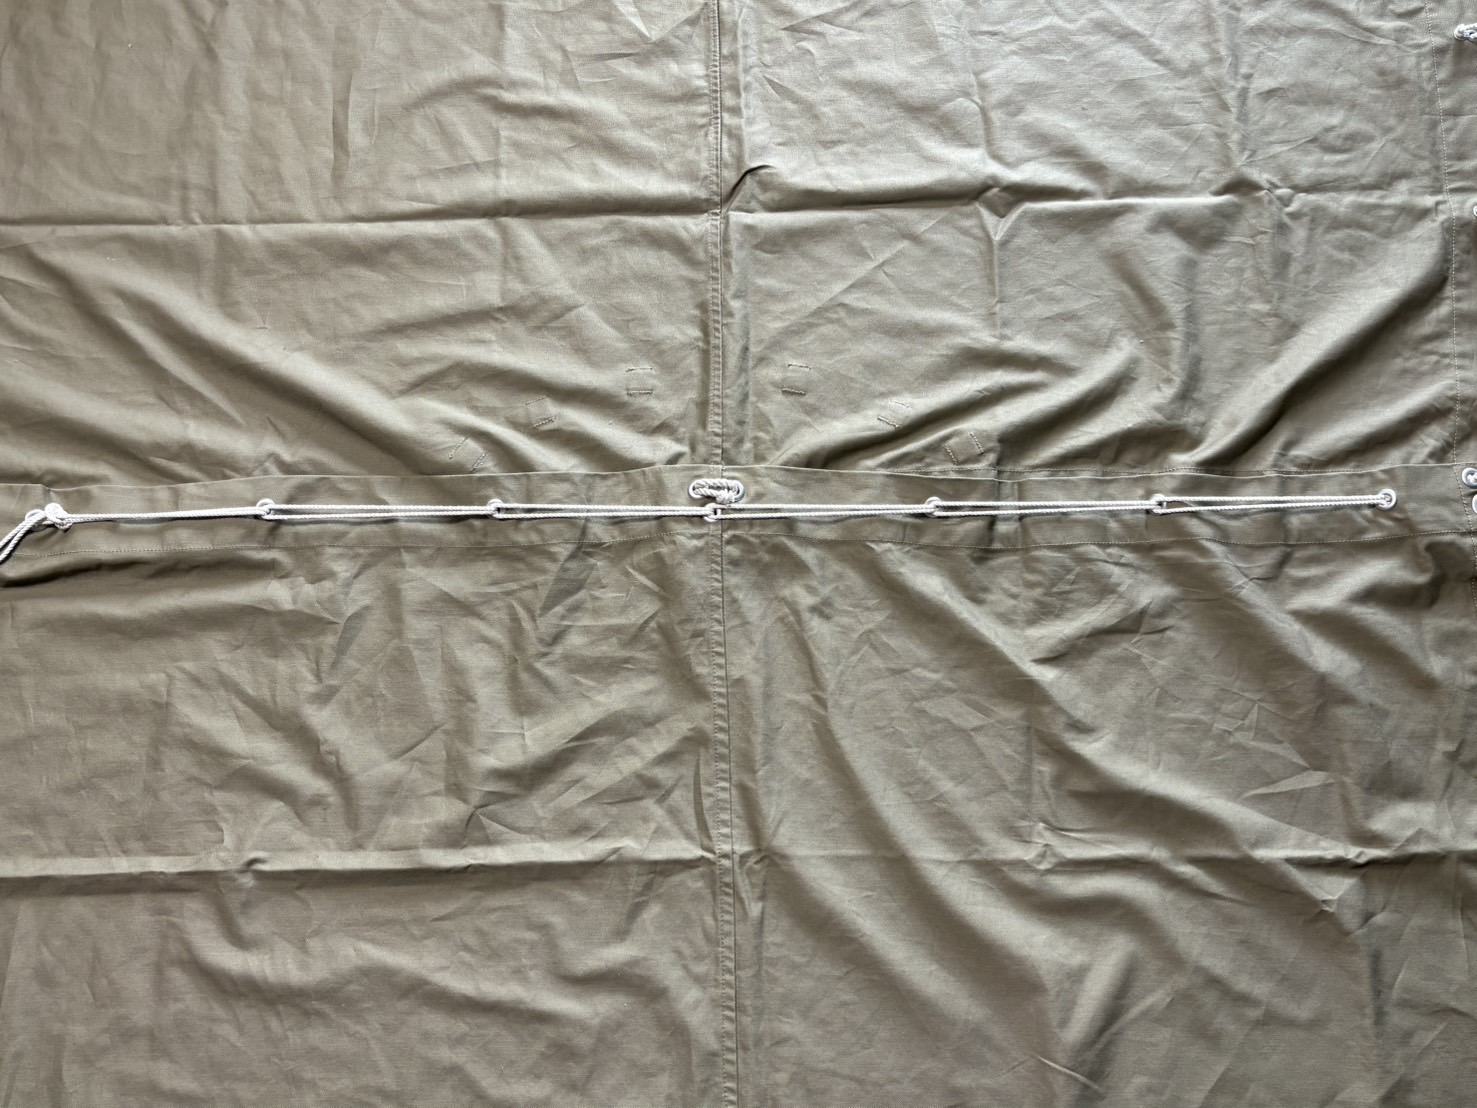
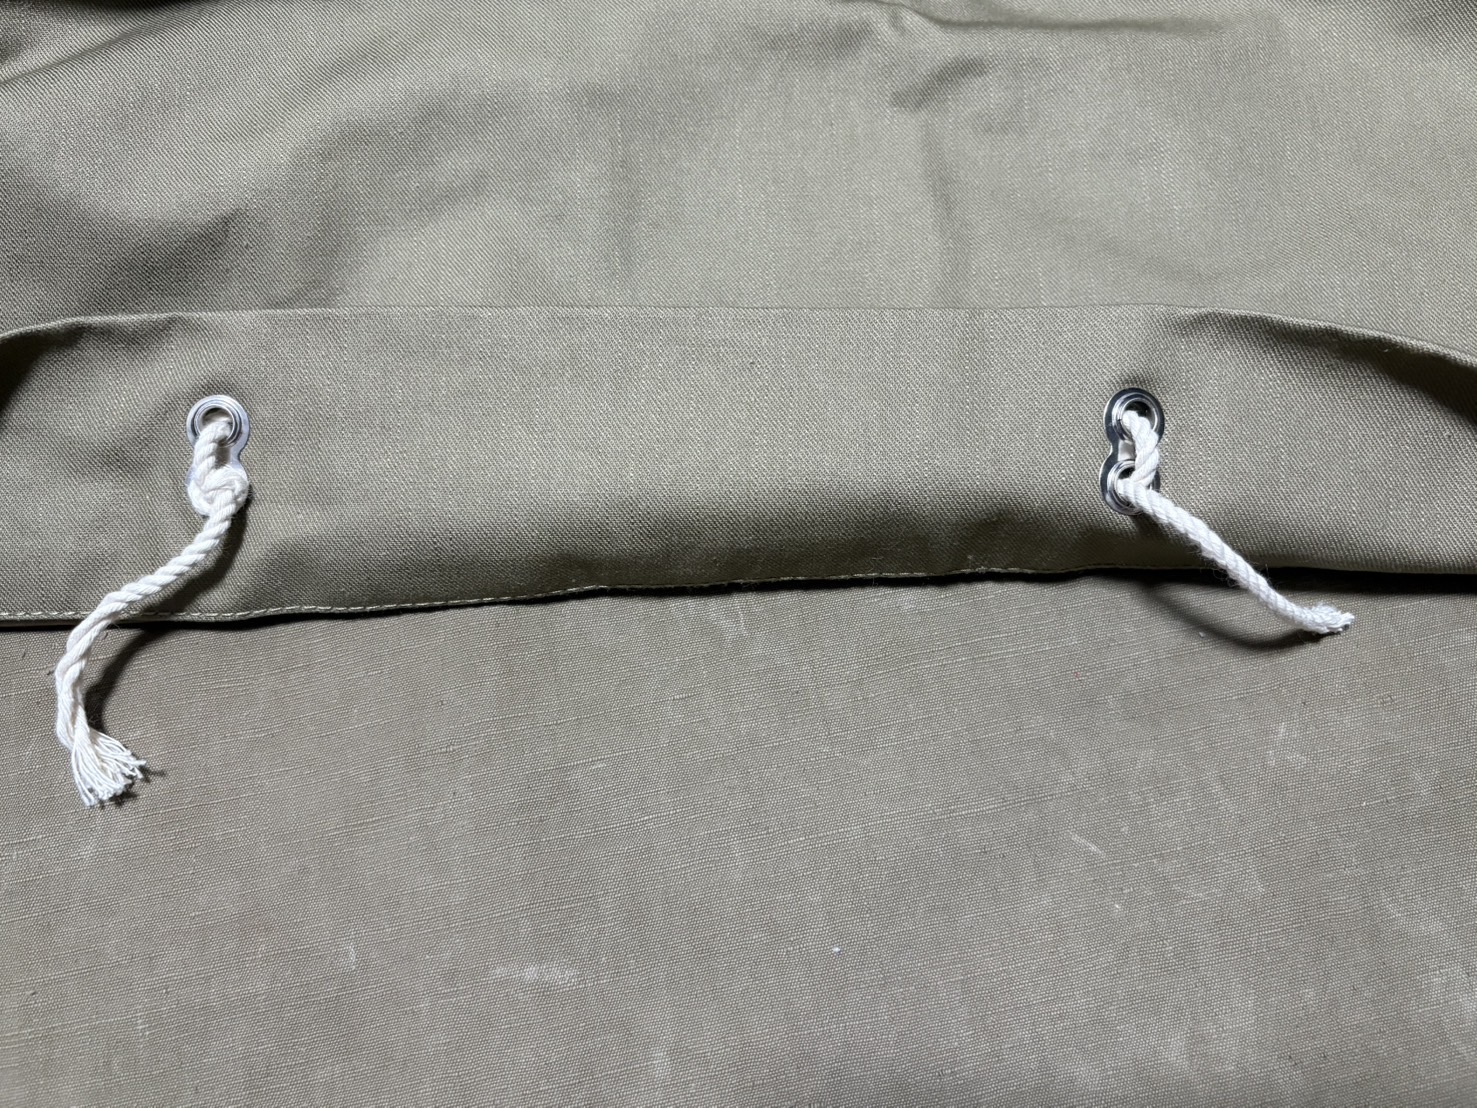
Ropes at the Center of Each Edge
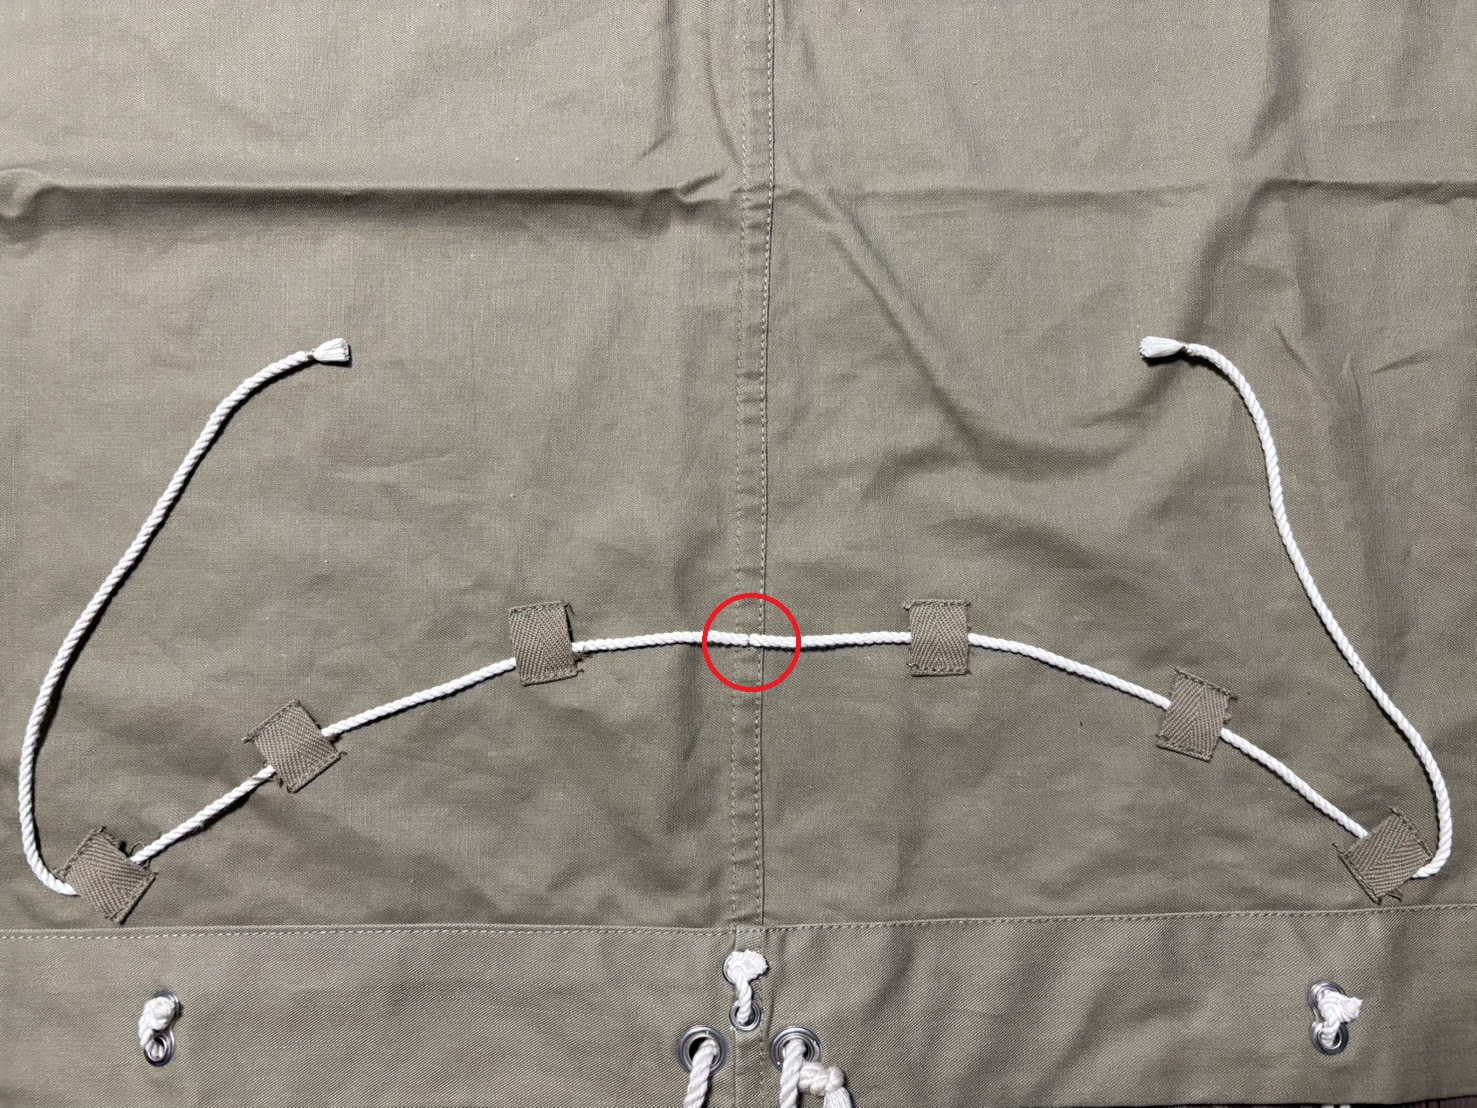
Next, replace the ropes attached at the center of the four edges. On the S&Graf shelter half, ropes are attached to only two sides to begin with. Please refer to Figure B at the lower right of Slide 13 in the “Shelter Half Regulations and Usage.”
Since the later-production model I have is in better condition, I’ve used photos of that one for reference. Please refer to them for the way the rope is threaded and for the length. The knotting method is the same as that used for the corners.
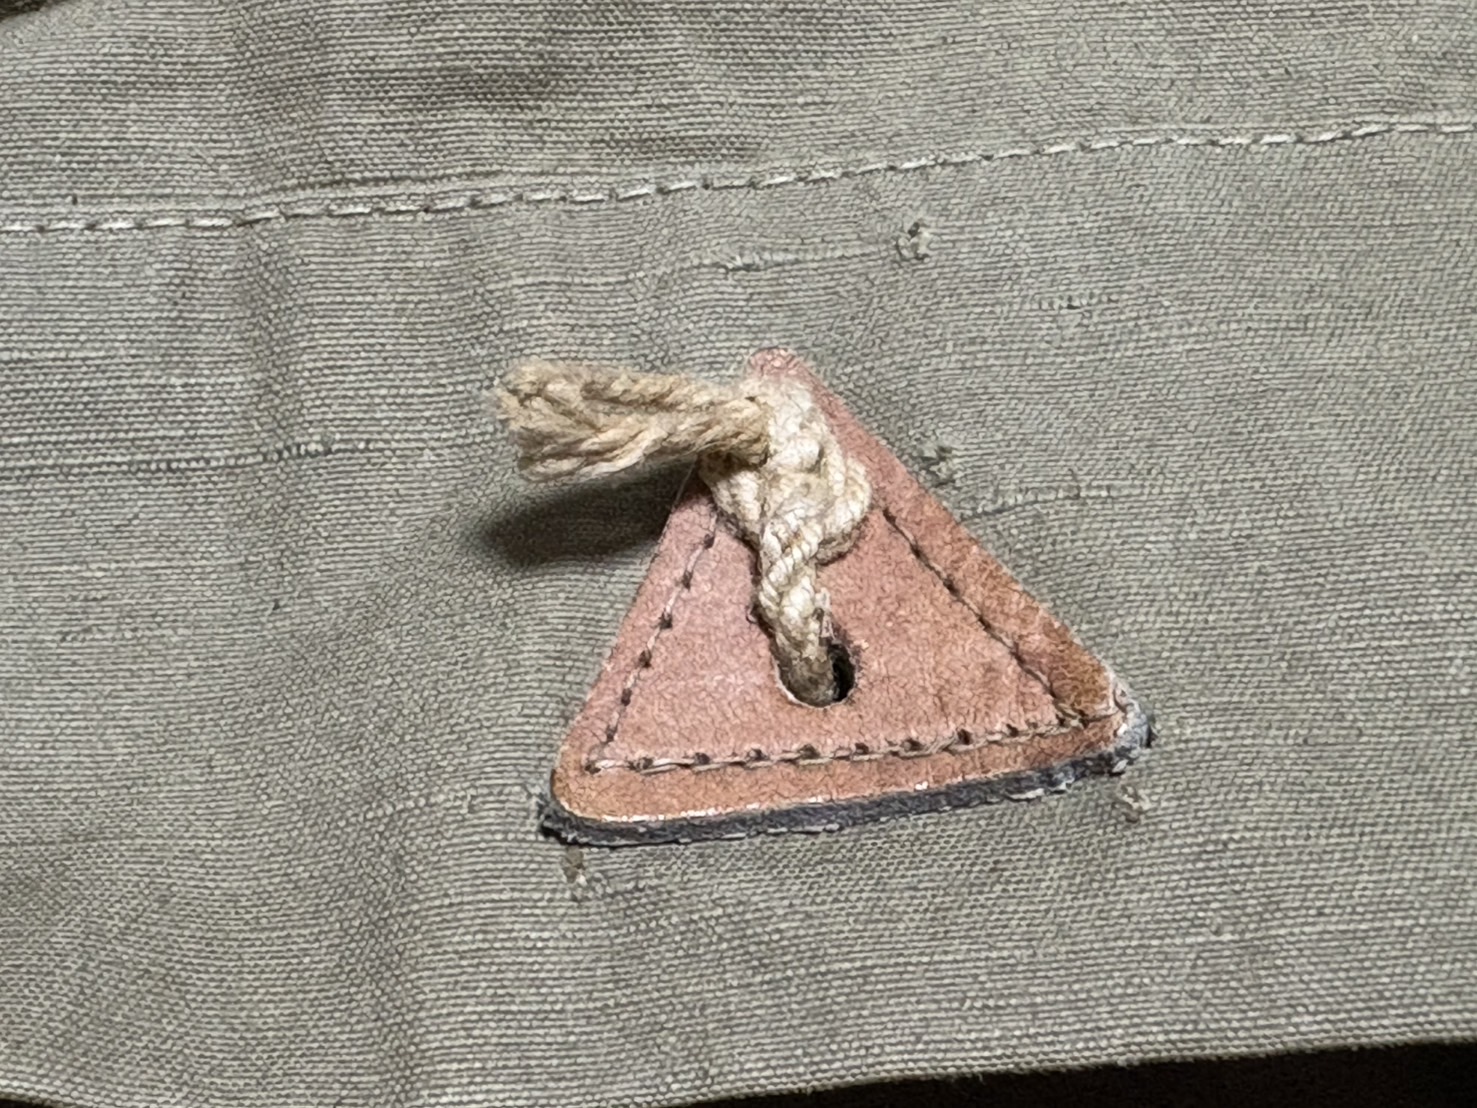
As shown in Image 1, thread the rope through the two holes so that the knot sits on one side. The specific hole where the knot should be placed is indicated by the red circle in the third image. Both of my authentic examples are consistent in this position, suggesting that this was the standard method of assembly.
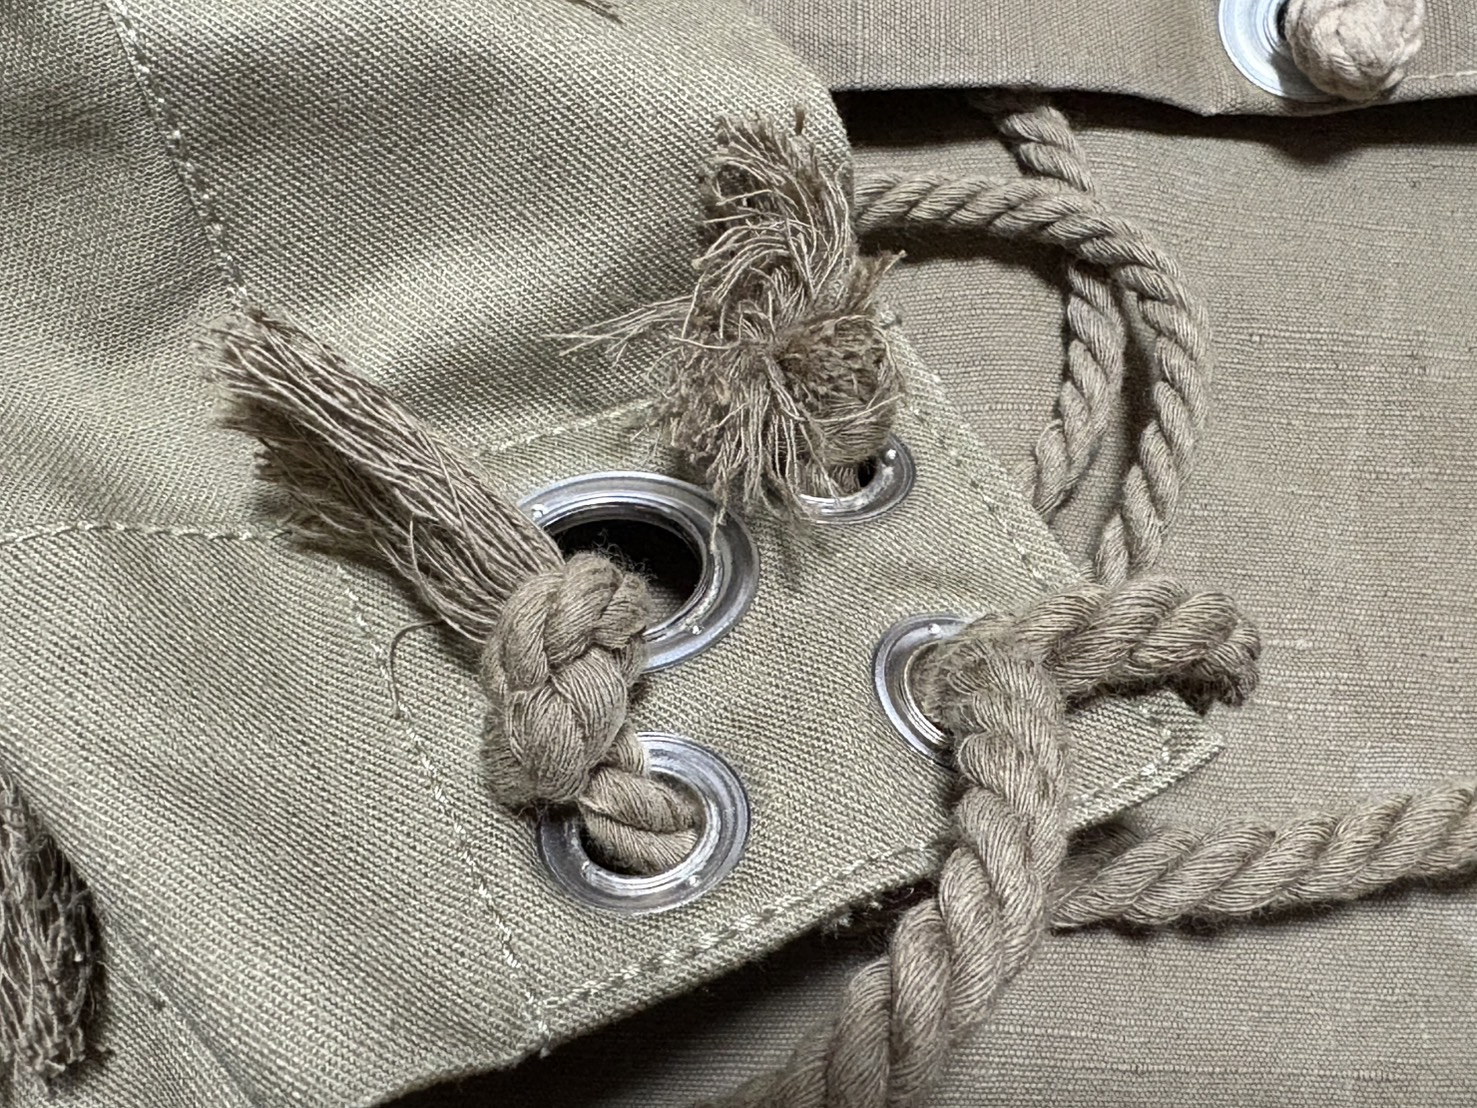
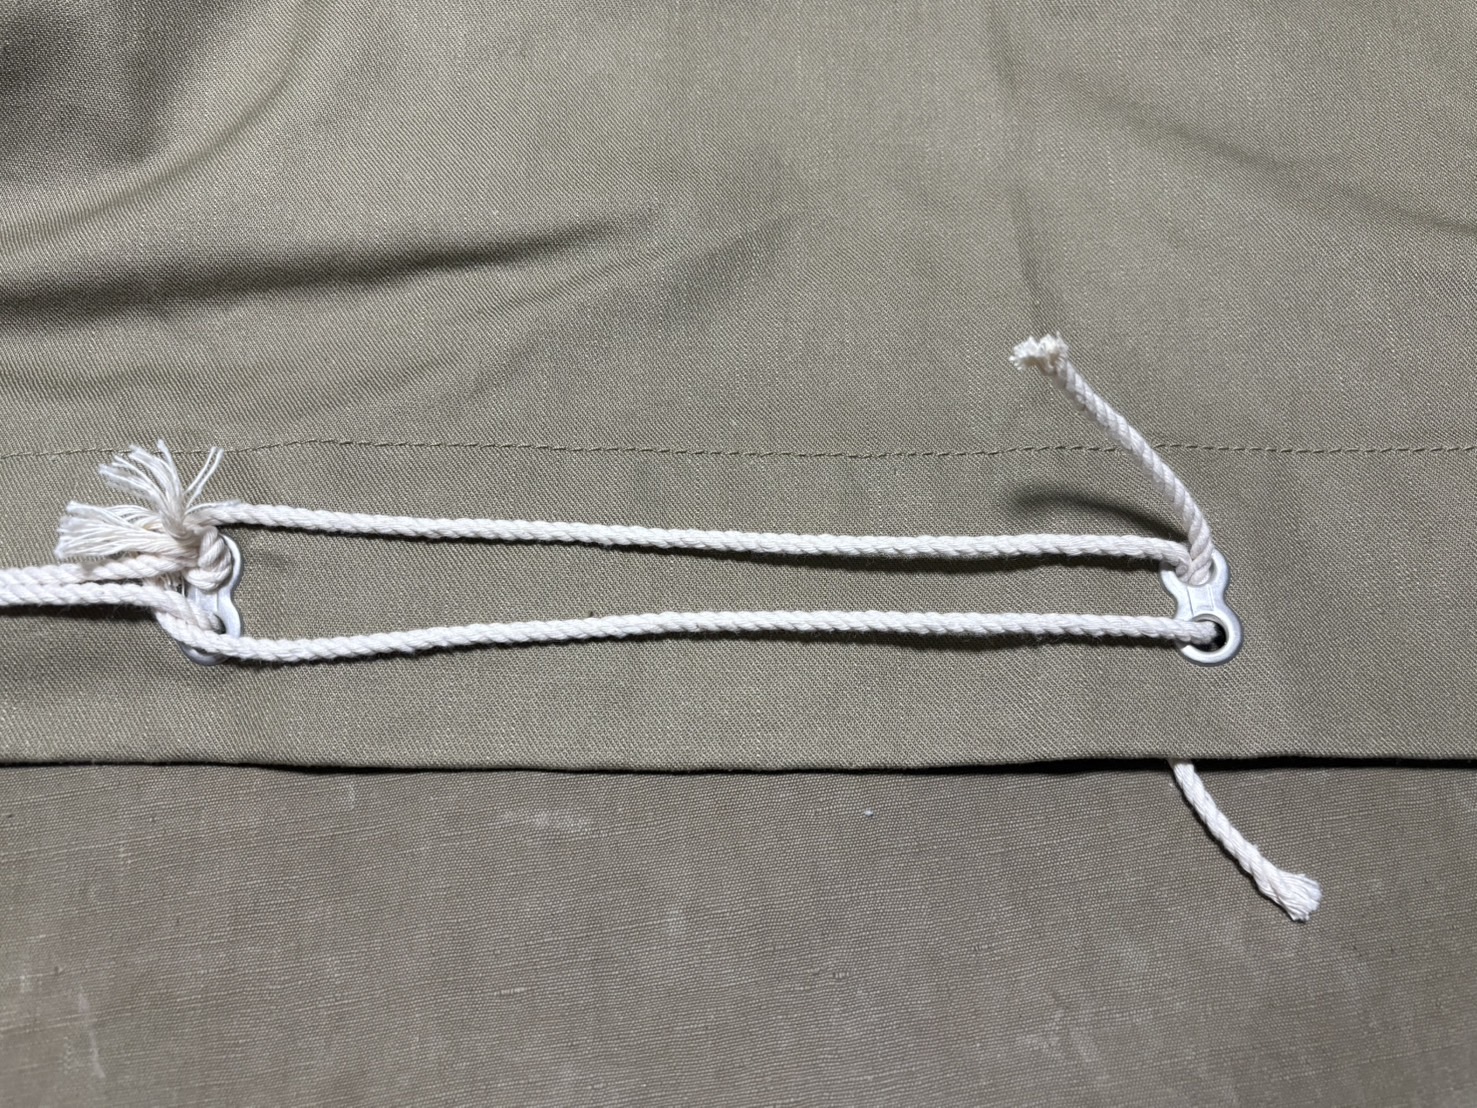
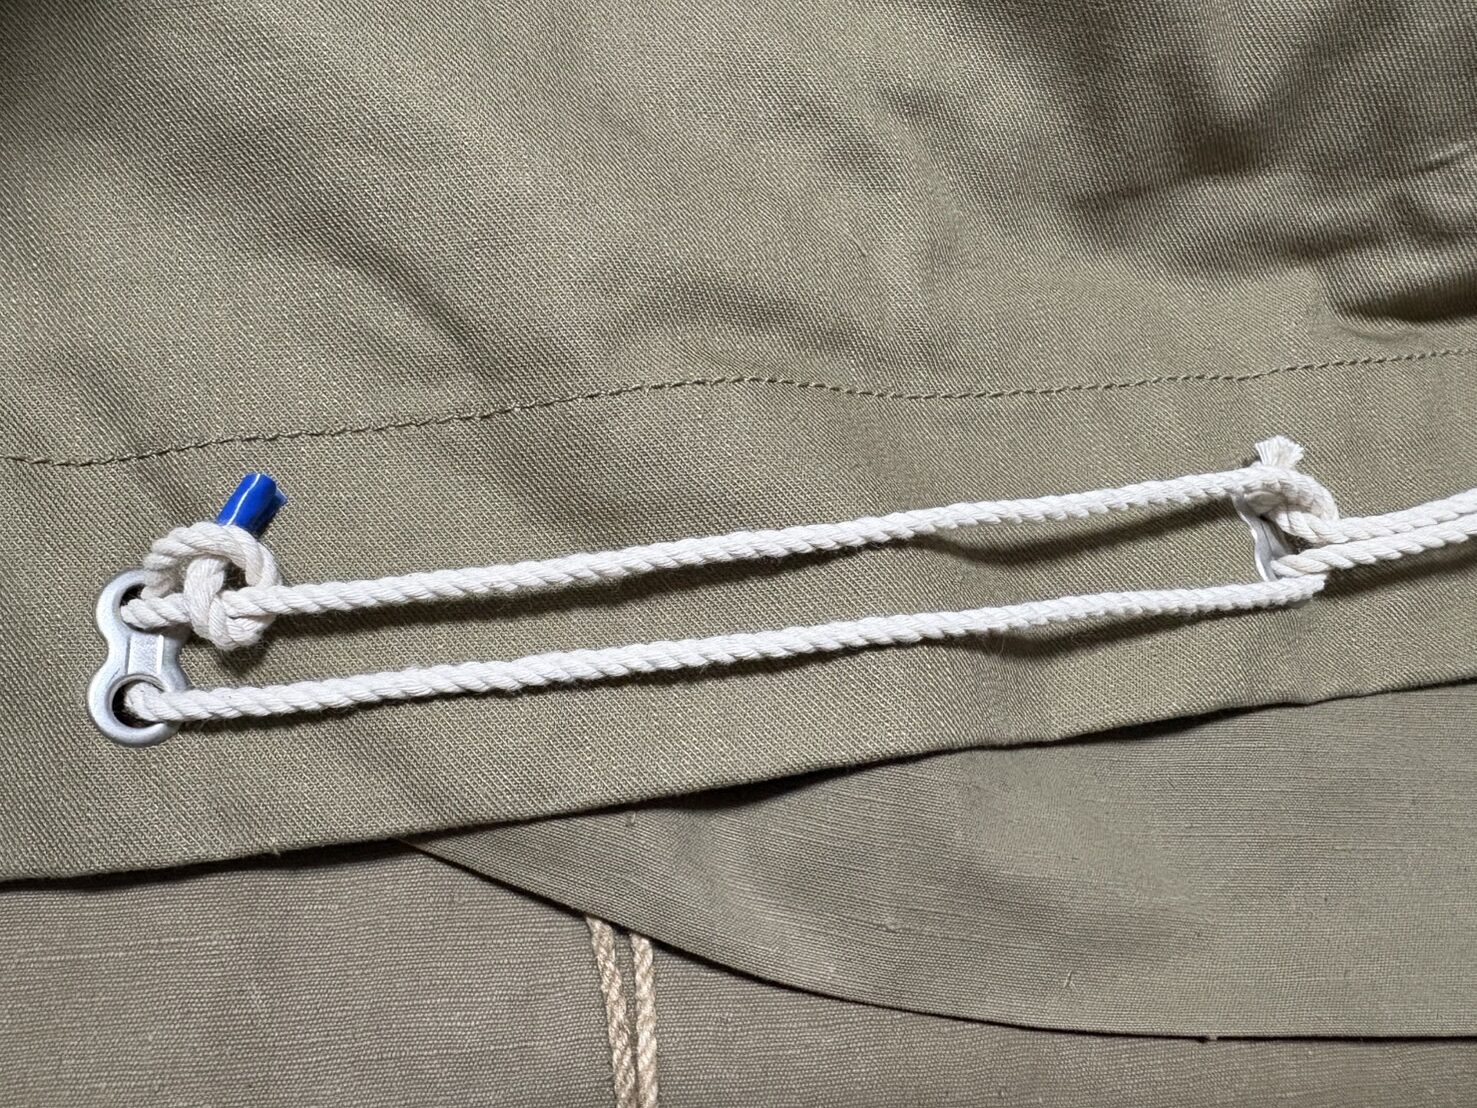
Tie Codes
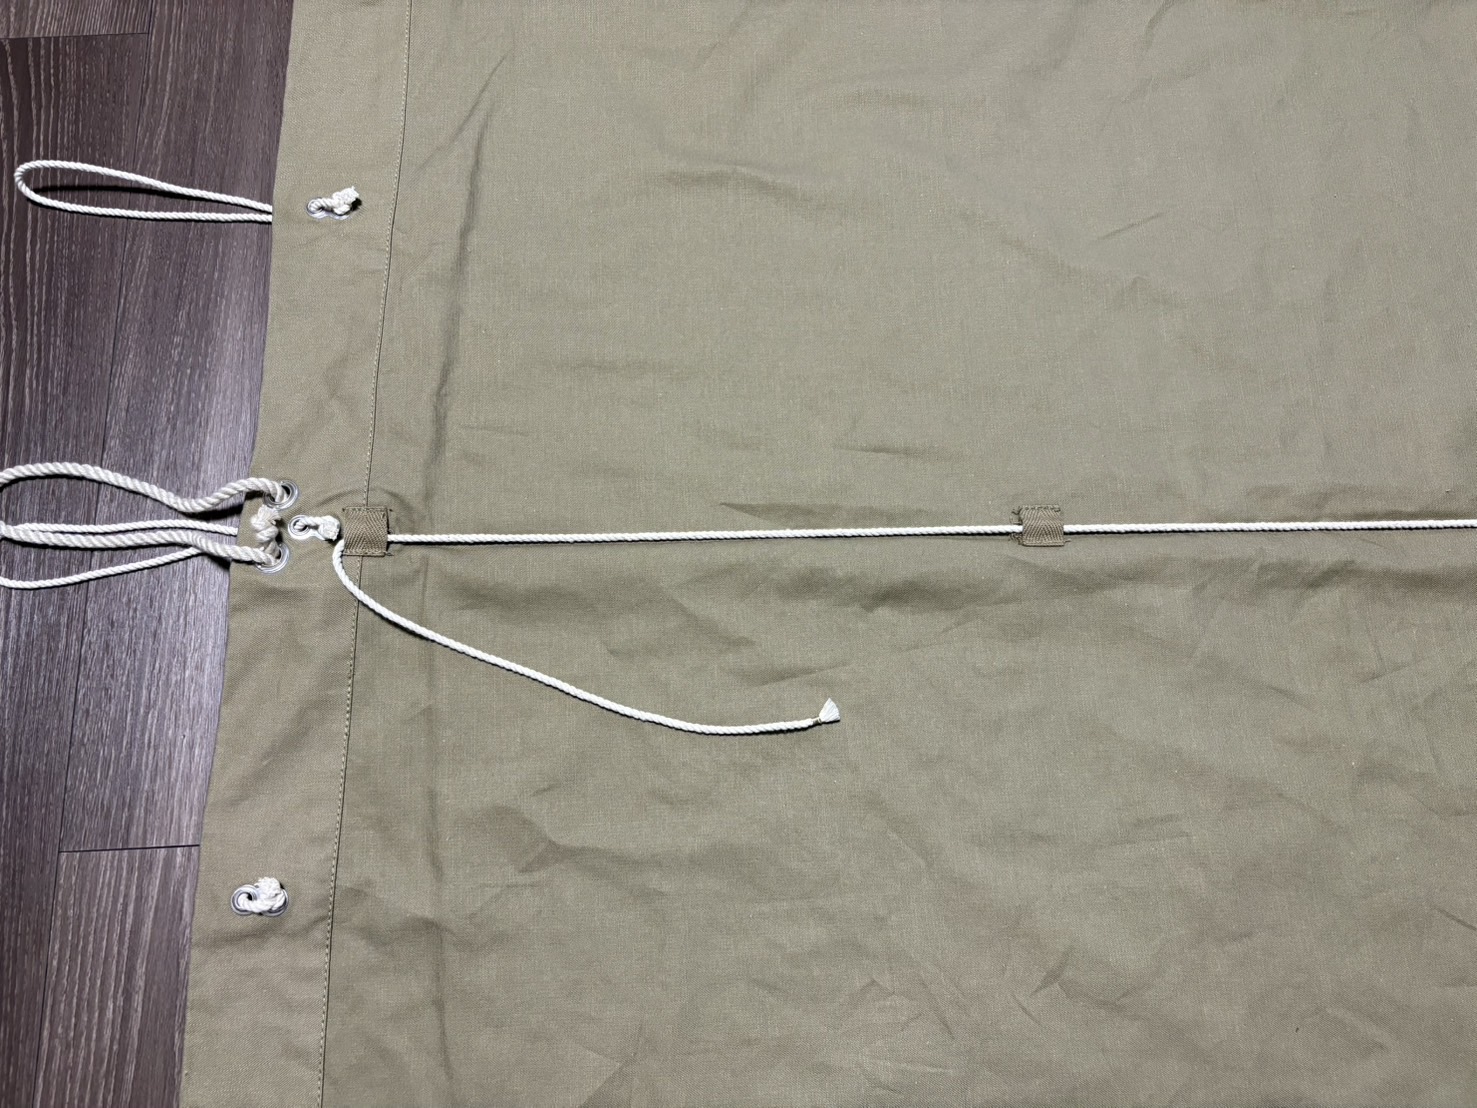
The rope used to connect shelter halves together is called the tie code. Please refer to Figure D at the lower left of Slide 13 in “Shelter Half Regulations and Usage.”
The length of this rope is important—if it’s the wrong length, it cannot be used to join the shelter halves. By the way, the S&Graf version is too long, so it needs to be shortened when connecting the tents.
The tie code uses an unusual knotting method, with knots on both the front and back. This design allows the tie code to be pulled through to either side.
Here’s how the tie code can actually be pulled from the back to the front.
I didn’t make a video because it was cumbersome, so I’ve captured it in a series of consecutive photos instead.

When the shelter halves are connected using the tie codes, they look like this. The length of the rope is important to achieve this configuration.
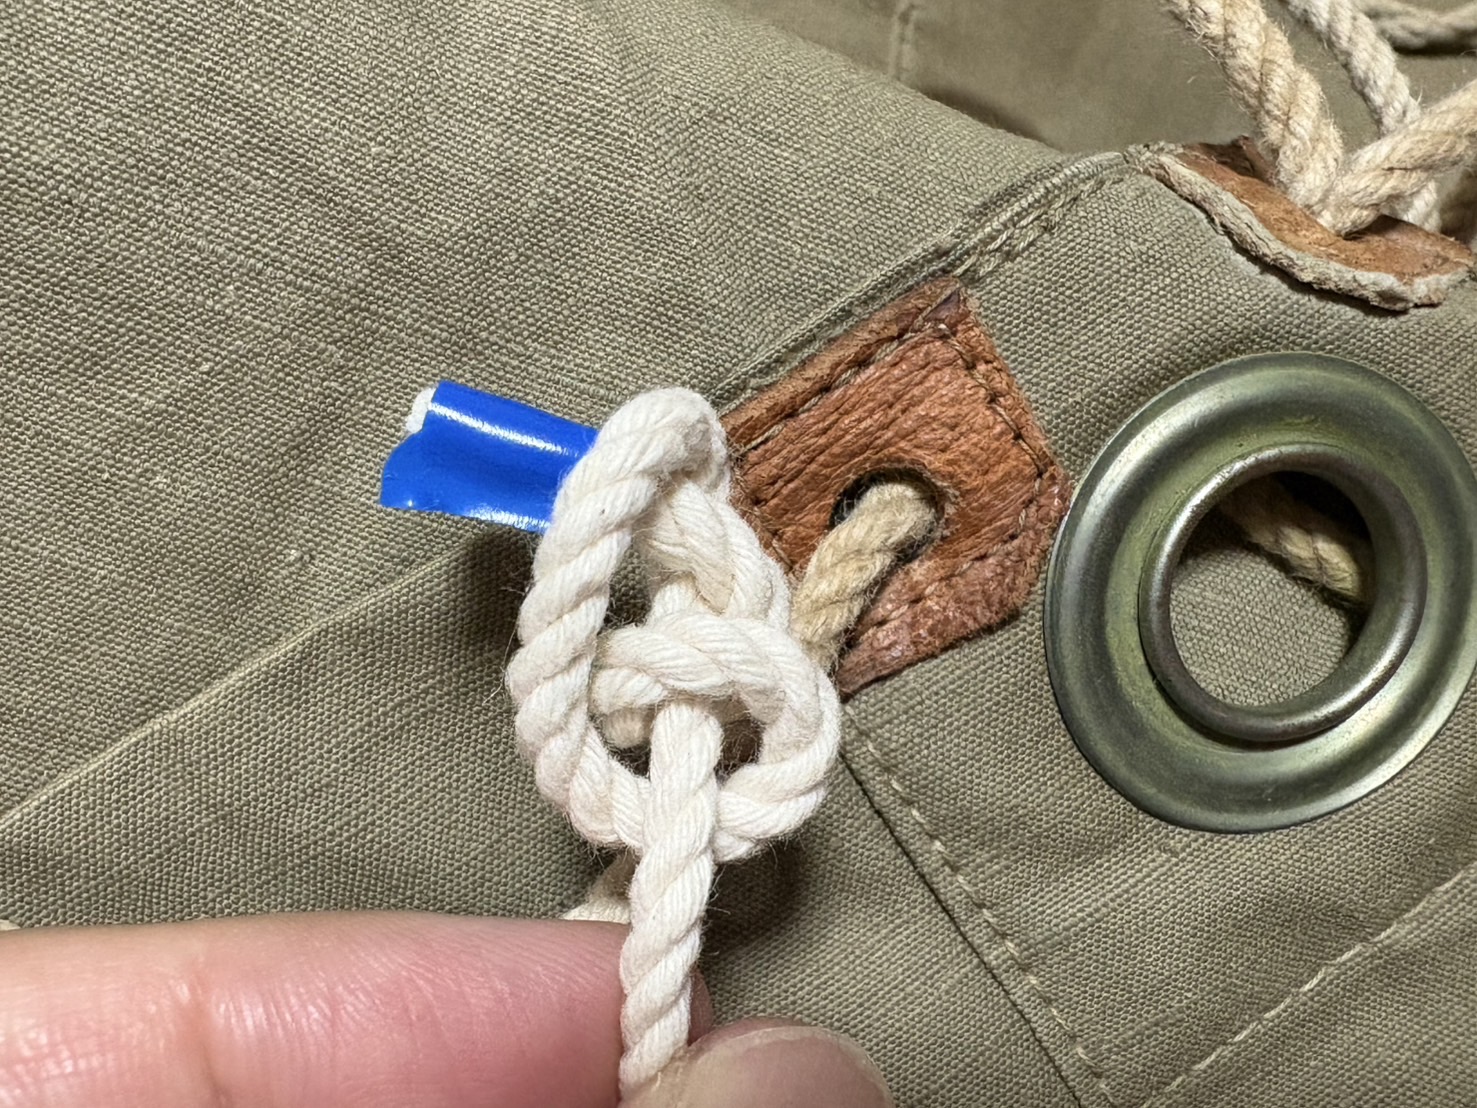
For the knotting, first thread the rope as shown below. The grommet on the right is where you’ll form the new knot, while the grommet on the left is already in place.
Adjust the length as you thread it through the neighboring rope. In practice, you’ll also need to thread it through the grommet of the other shelter half when connecting them, so leave a little extra length. Please keep this in mind.
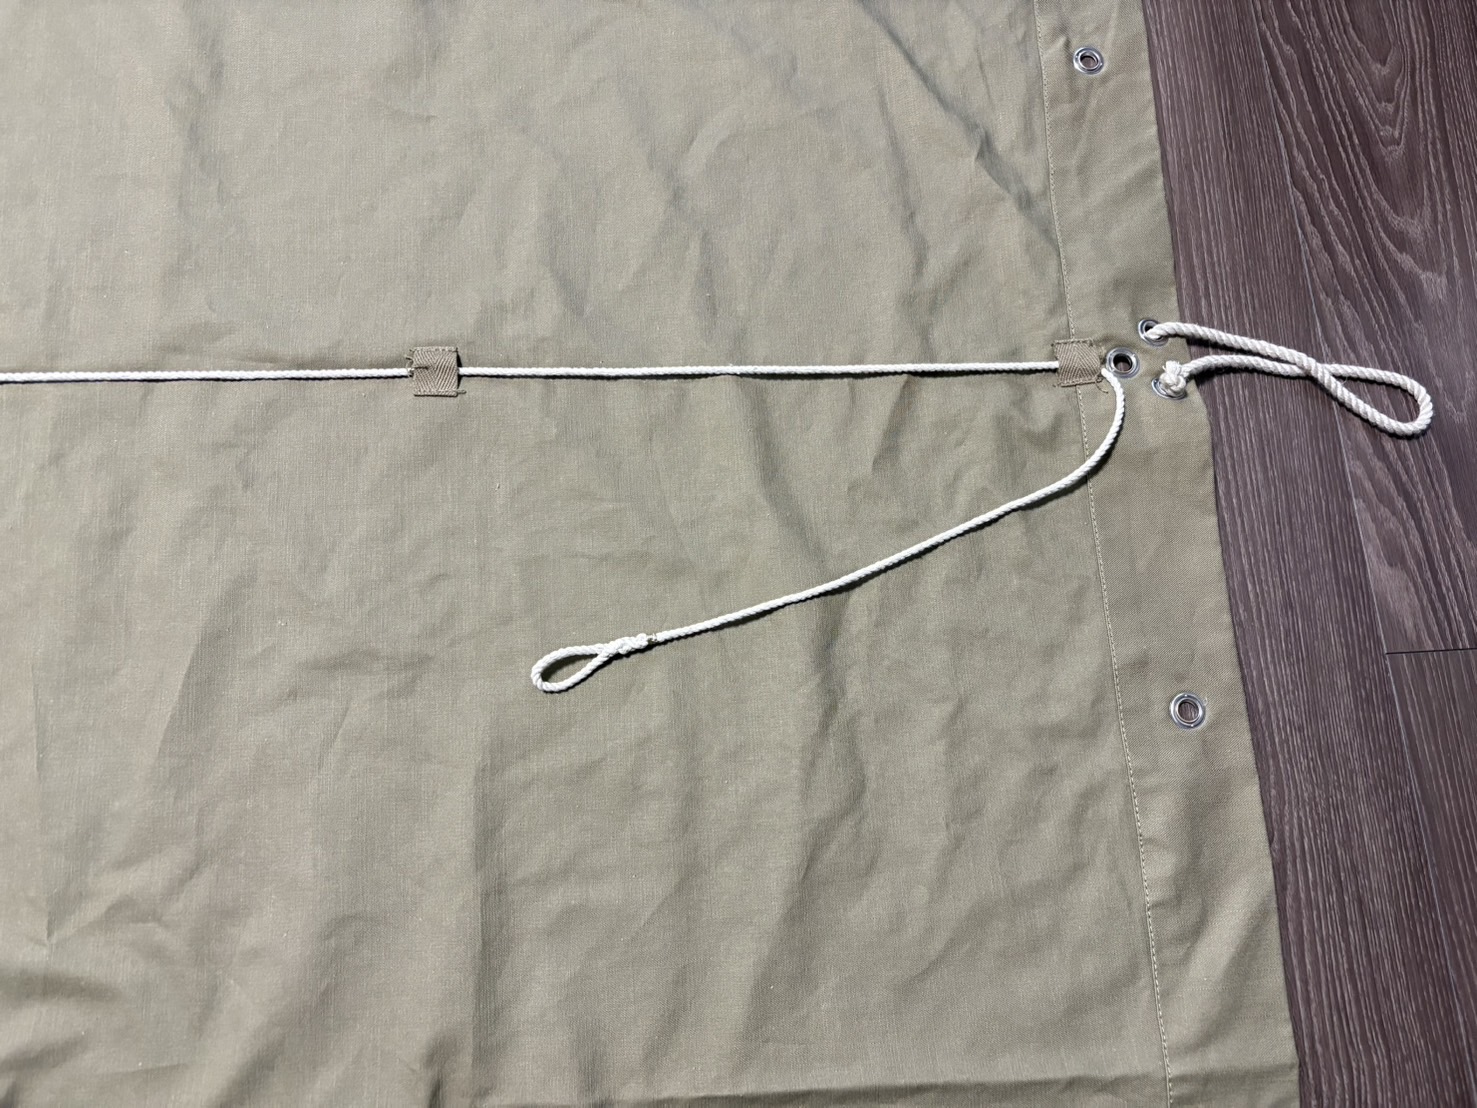
Once the rope is threaded, tie it on both the front and back sides as shown below.
The orientation is opposite to the photo above, so it might be a little confusing—sorry about that.
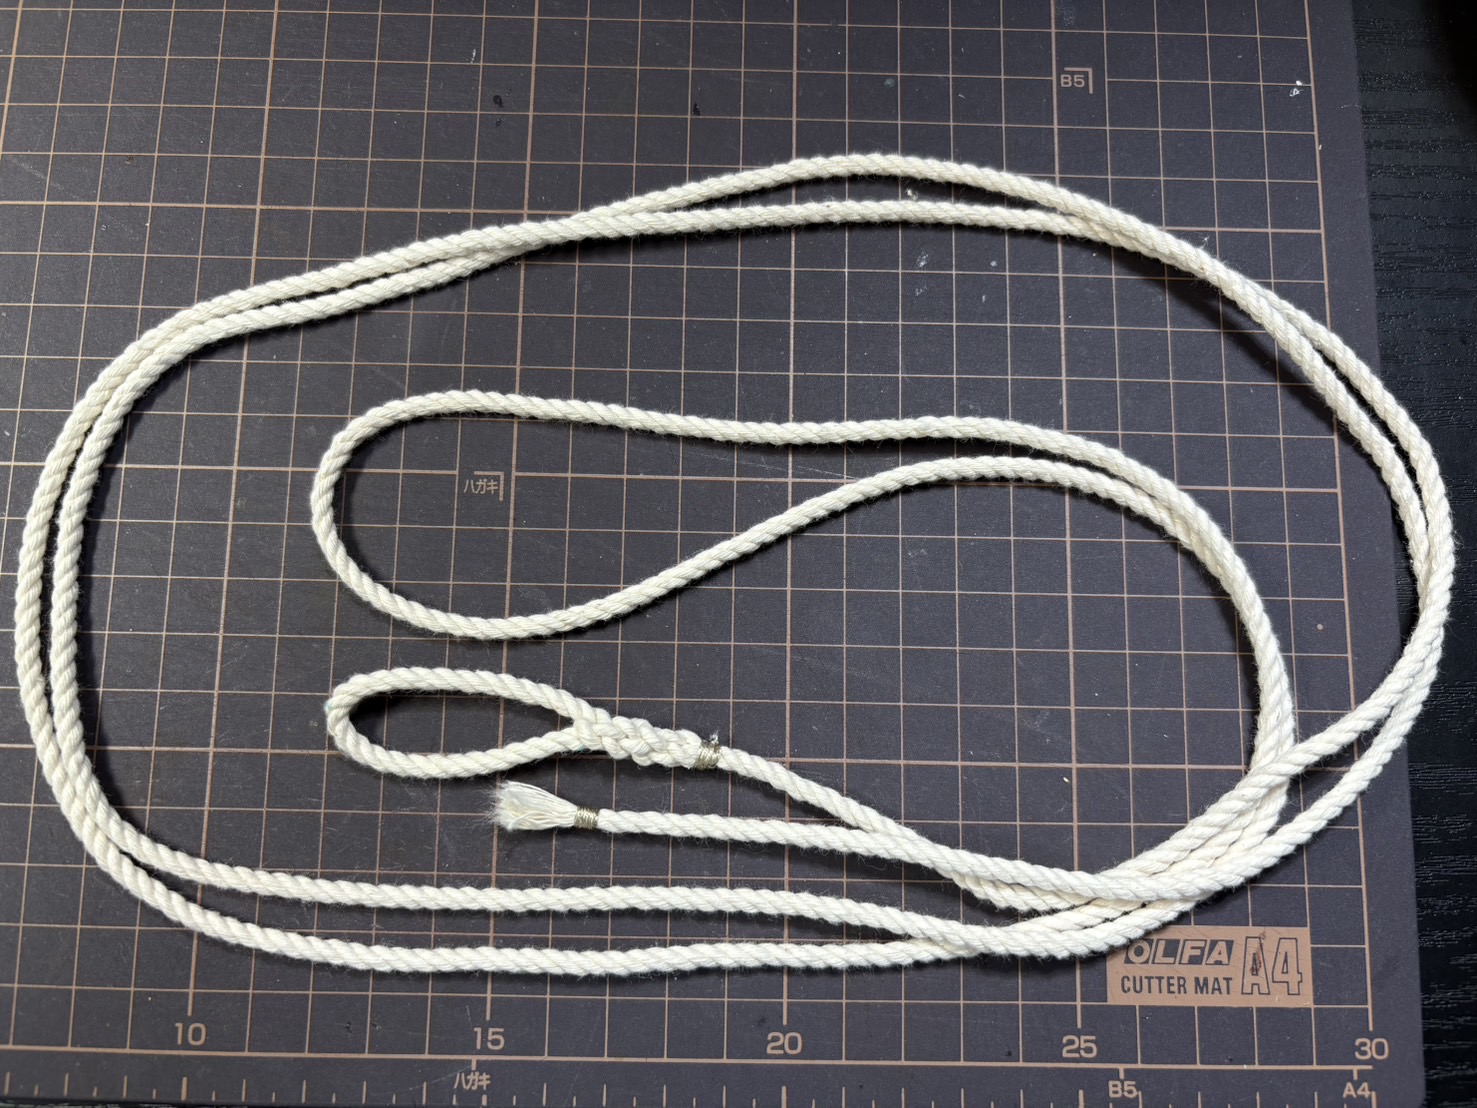
Ridge Code
The ridge code is used when pitching the shelter half or when using it as a rain cover, serving as waist cords. Please refer to Figure F′ in Slide 14 of “Shelter Half Regulations and Usage.”
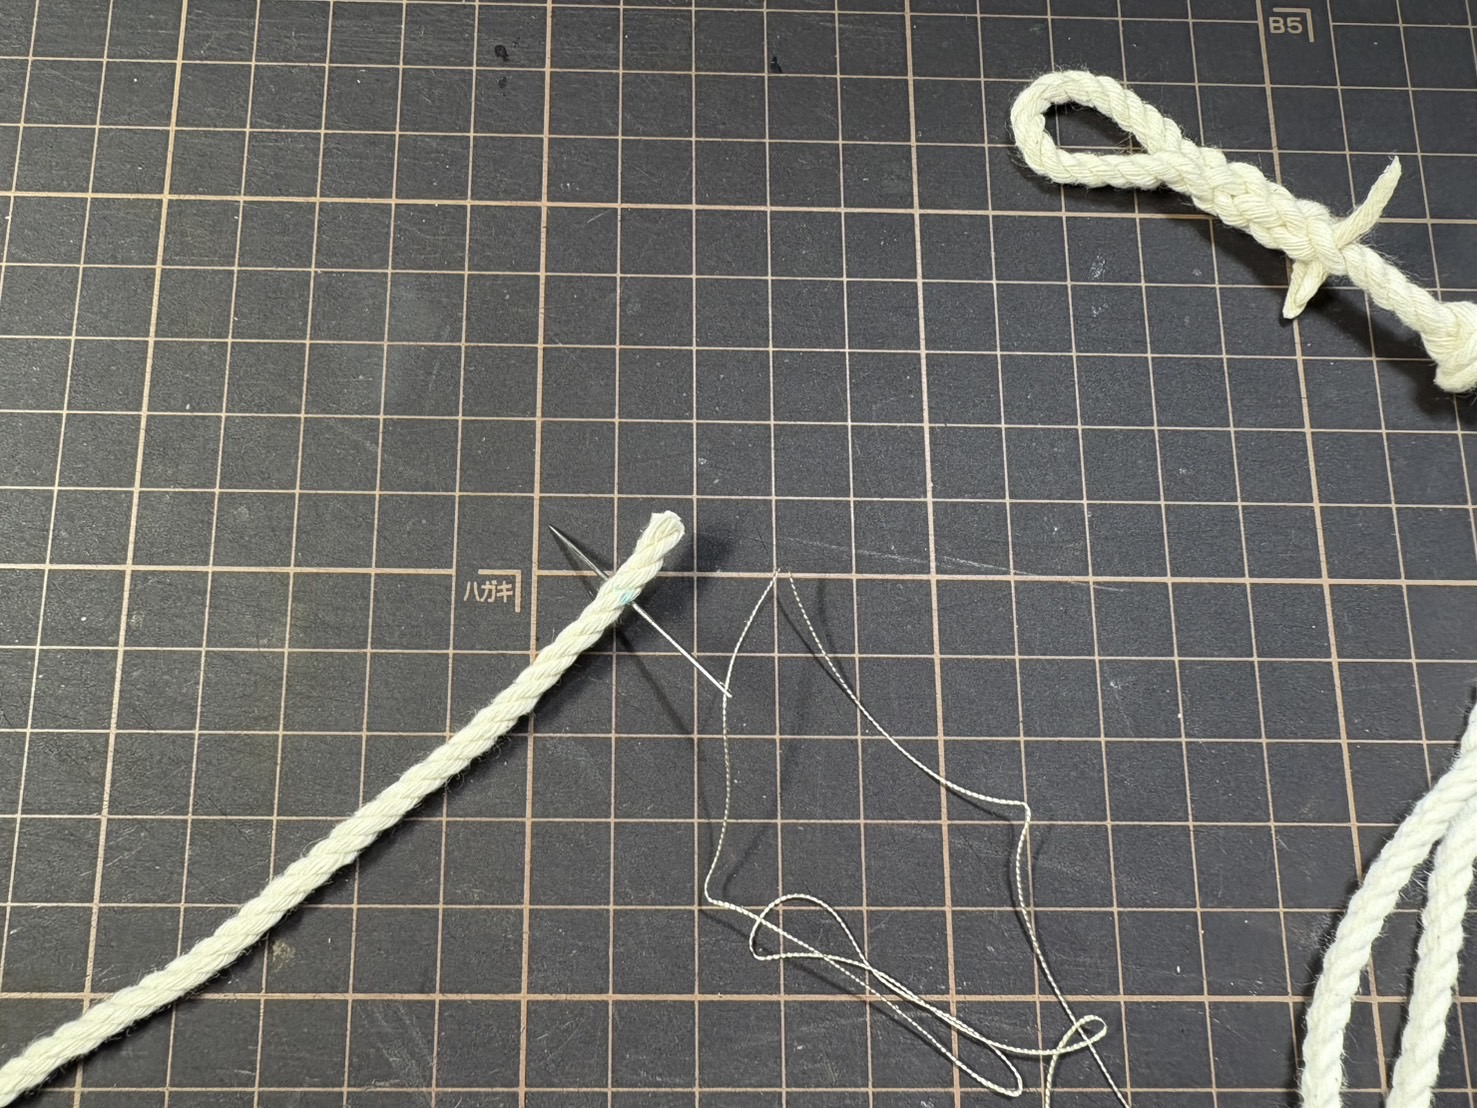
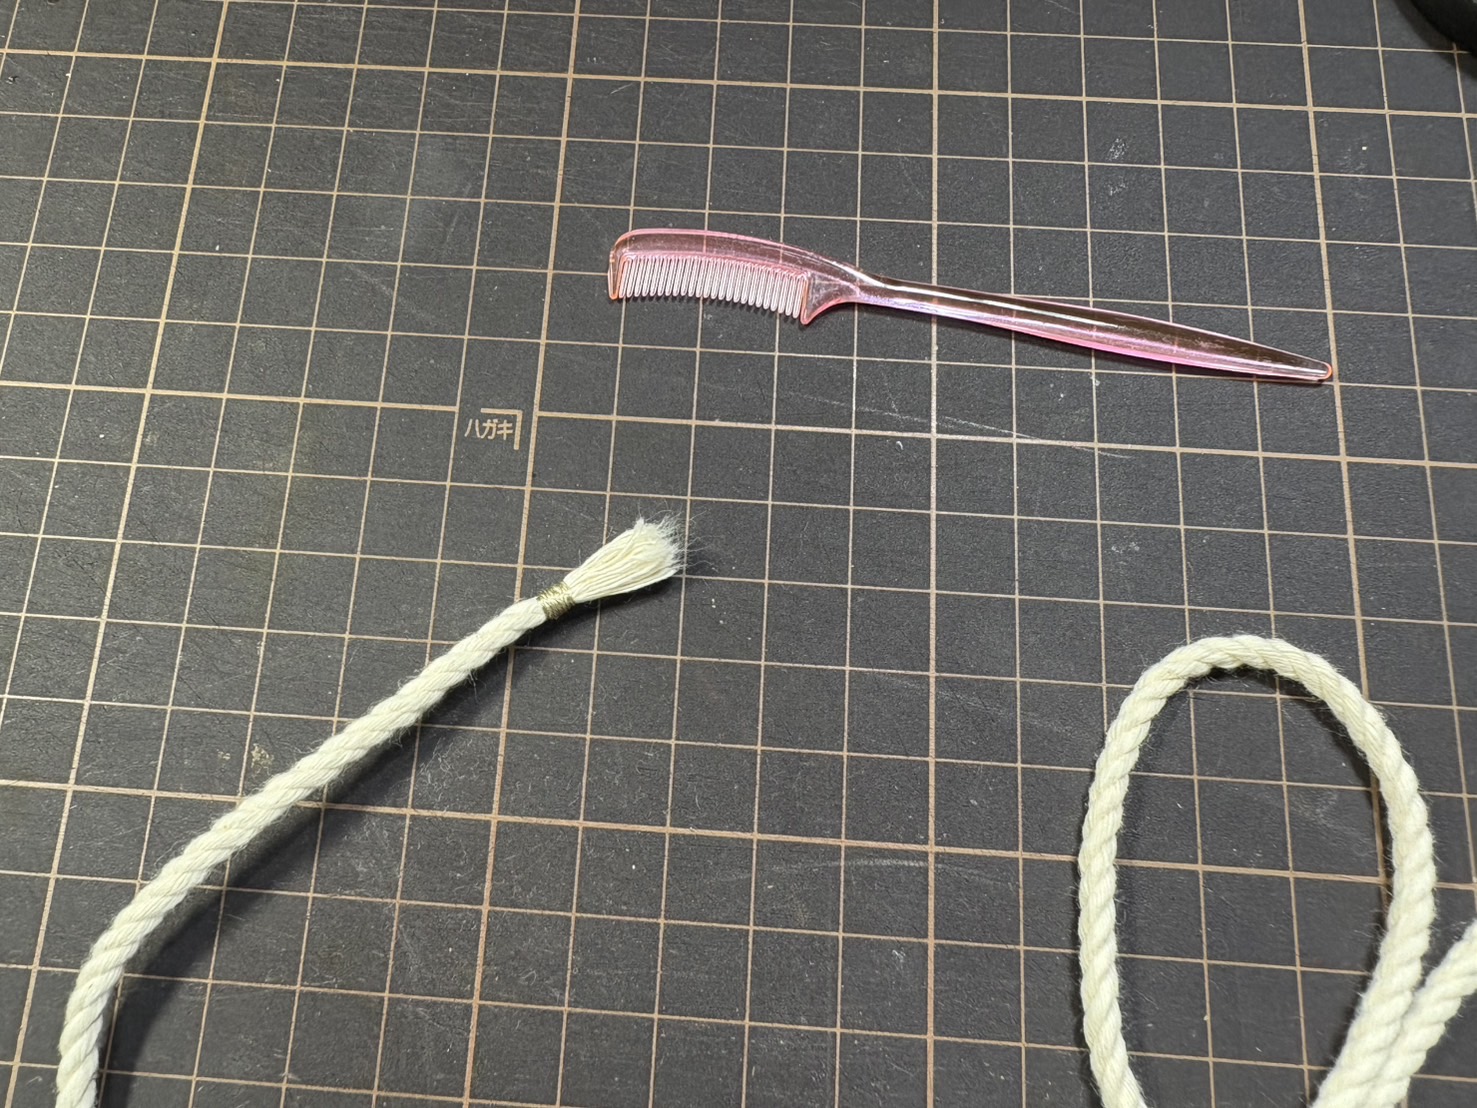
The ridge code is 2,050 mm long, with one end having a tassel and the other end forming a loop.
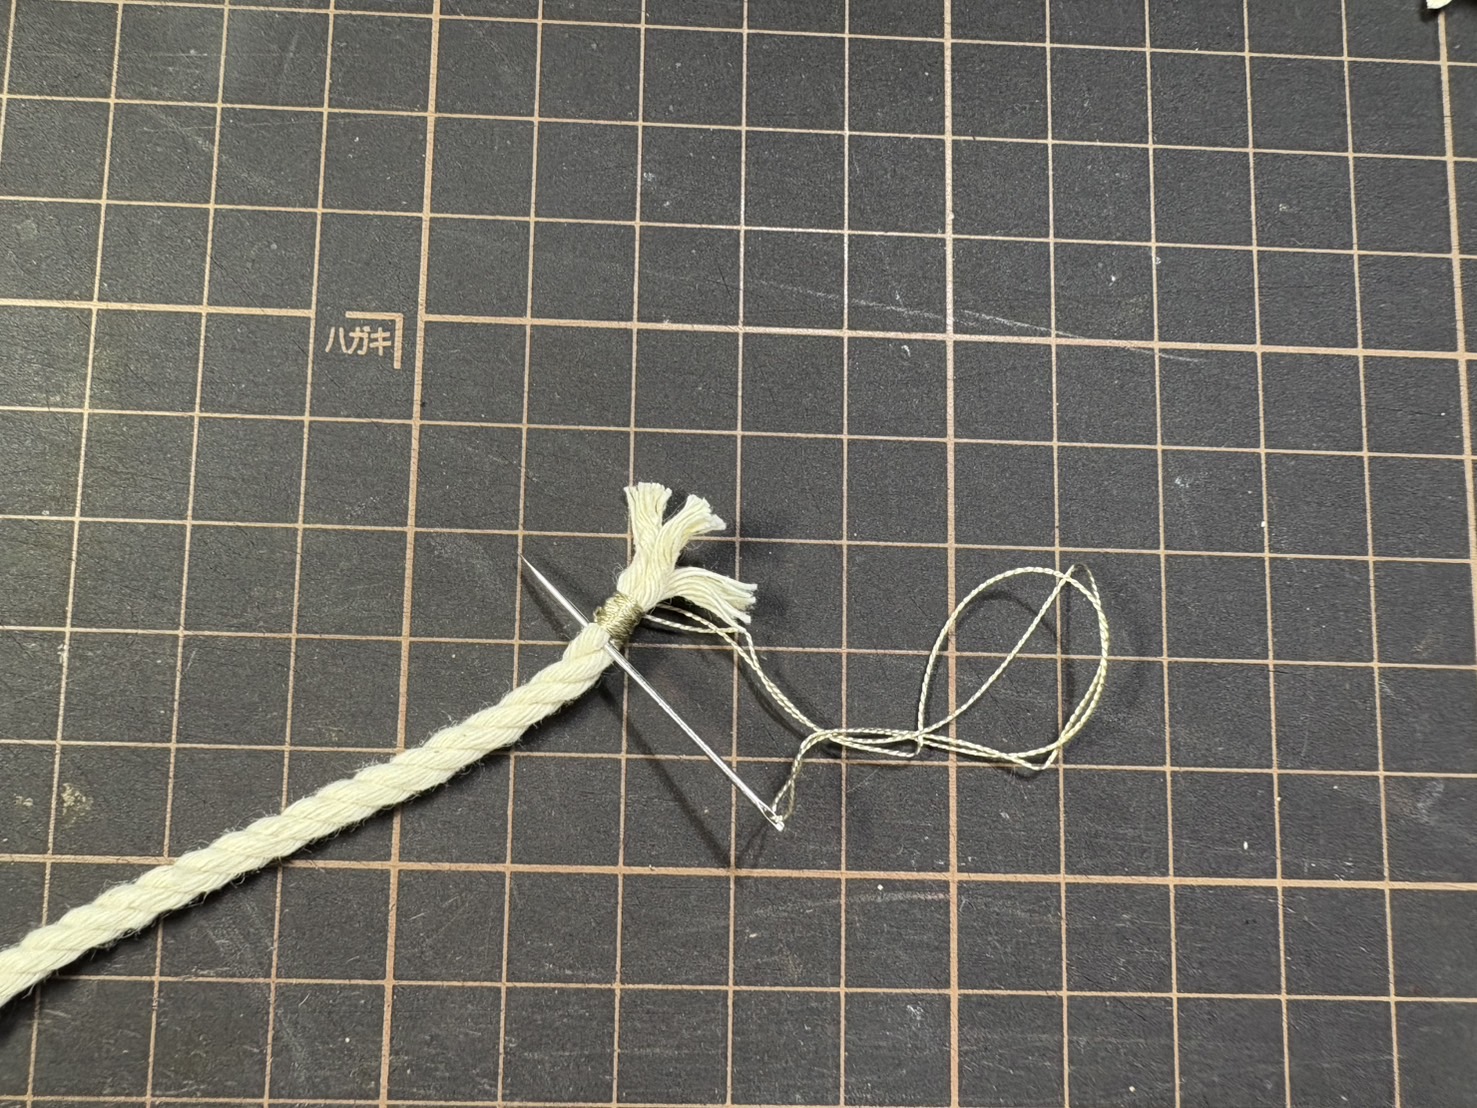
The tassel end is made as shown below. Wrap it tightly with hand-sewing thread, secure it with a knot, and then simply shape the tip neatly.
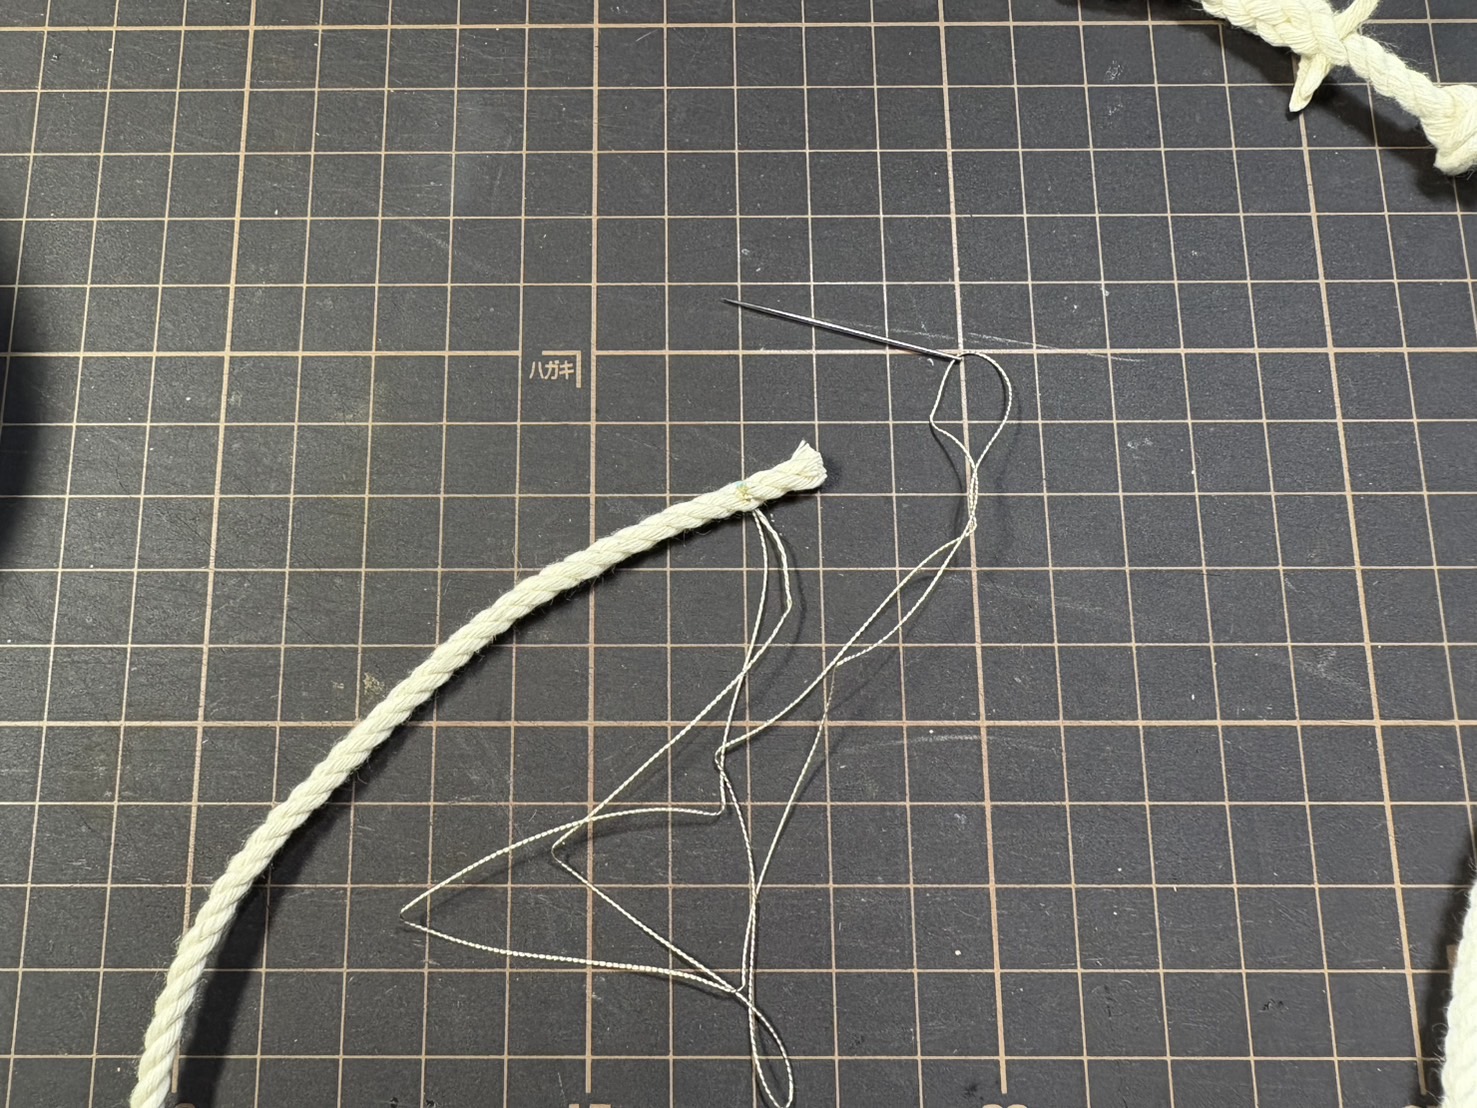
The loop part appeared to use an ice splice, so I tried making it while following instructions from YouTube. I practiced several times until I could do it well.
If you search for “ice splice” (or its Japanese term “さつま編み”), you’ll find plenty of tutorial videos—take a look for reference.
For the end of the splice, wrap it tightly with thread just like the tassel to finish it. I forgot to take a photo, so please refer to the completed ridge code photo I posted at the beginning.
The completed ridge code is threaded through the shelter half as shown below. The ridge code is not fixed in place—it’s simply passed through. Perhaps for this reason, most authentic shelter halves no longer have the ridge code intact.
Neck Code
Next is the neck code, used when the shelter half is employed as a rain cover. Please refer to Figure F in Slide 14 of “Shelter Half Regulations and Usage.” Both ends of the neck code are finished with tassels, like the ridge code, and the total length is 1,060 mm.
Sew the central part, marked with a red circle in the photo below, to secure the neck code. Both of my authentic shelter halves had the neck code sewn in this way, likely to prevent it from being lost.
With this, the modification of the S&Graf-made Shelter Half is complete.
Creating the loop for the ridge code can be a bit tricky, but I’ve also covered the rope lengths and knotting methods, so you can give it a try on your own Shelter Half.
Footnote
- “Standard type and usage of portable tent” JACAR (Japan Center for Asian Historical Records) Ref.C08070626900, Meiji 36, Rikudatsu Collection (National Institute for Defense Studies, Ministry of Defense) ↩︎