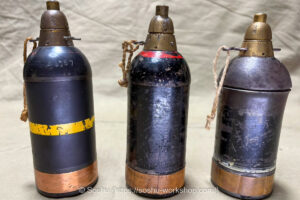
This is an authentic Type 91 Hand Grenade.
As part of the deactivation process, the explosive charge and percussion cap have been removed, and two holes have been drilled into the body. The firing pin and other components are present, and the original paint remains in good condition, making this a very nice example.
Prior to 9/11 in 2001, regulations were relatively relaxed, and deactivated military items could cross borders without much difficulty. This example was likely brought back to Japan during that period.
After 9/11, export controls on items with potential military applications were significantly tightened across many countries, and deactivated weapons and explosives came under stricter customs and air cargo screening as items that “look the part.” While collectors were not the intended target of these measures, the practical result is that repatriated pieces like this have all but stopped appearing on the market. At this point, the only option is to wait for items to surface from existing collections.
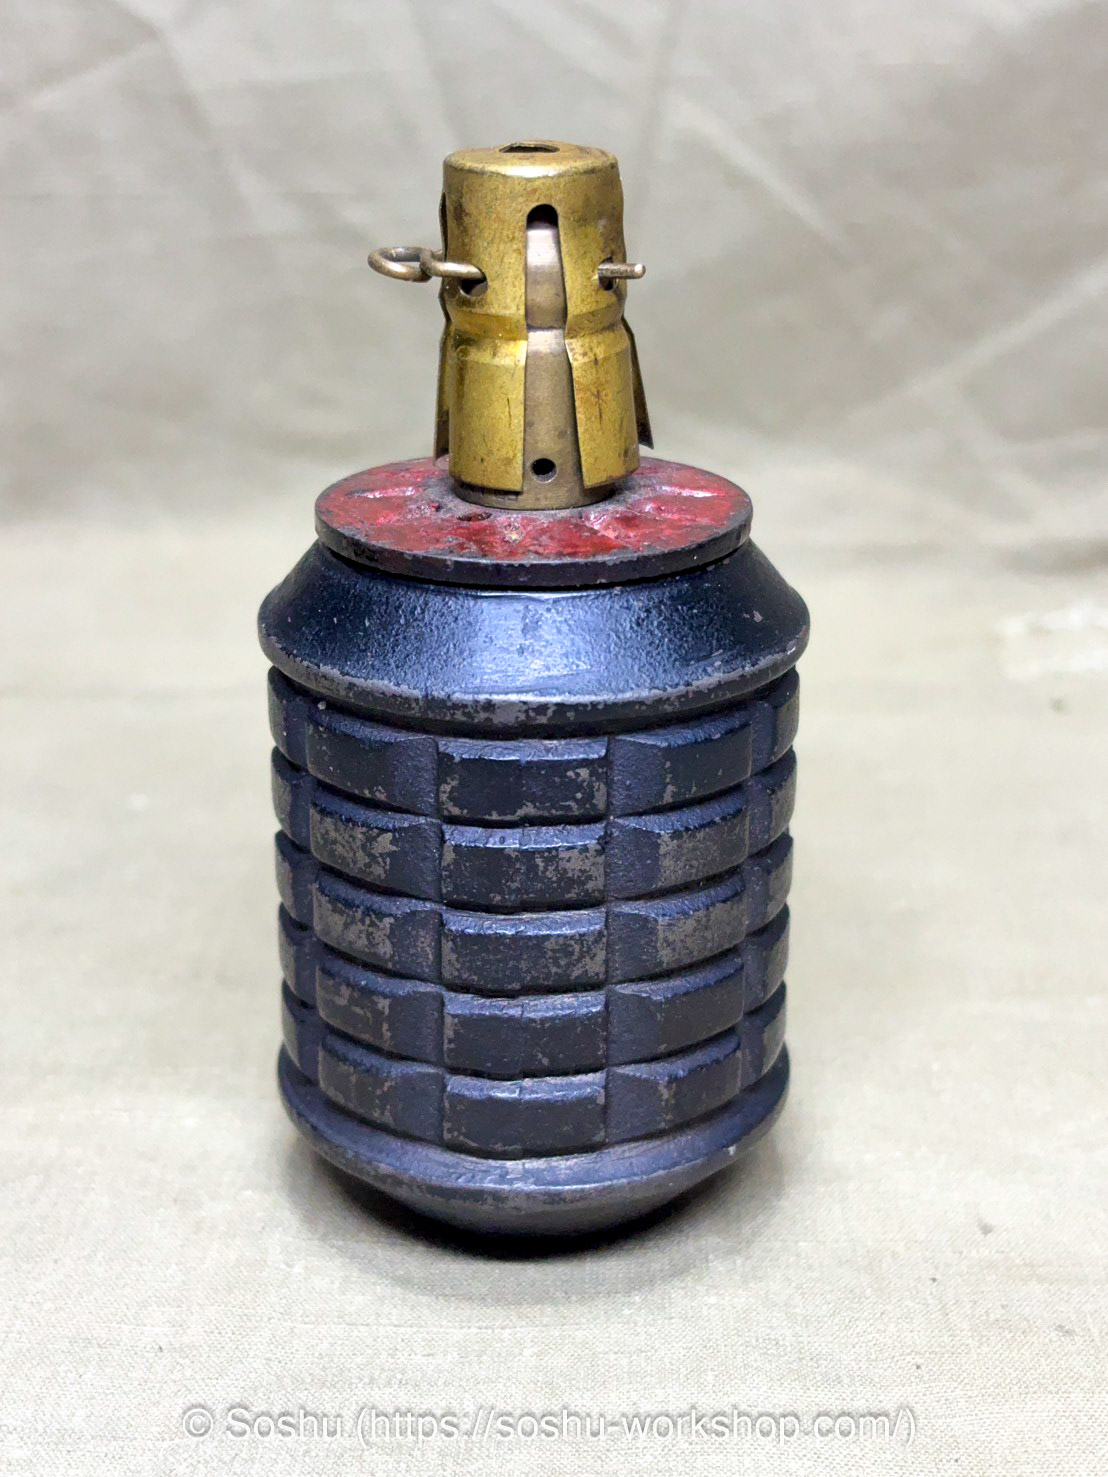
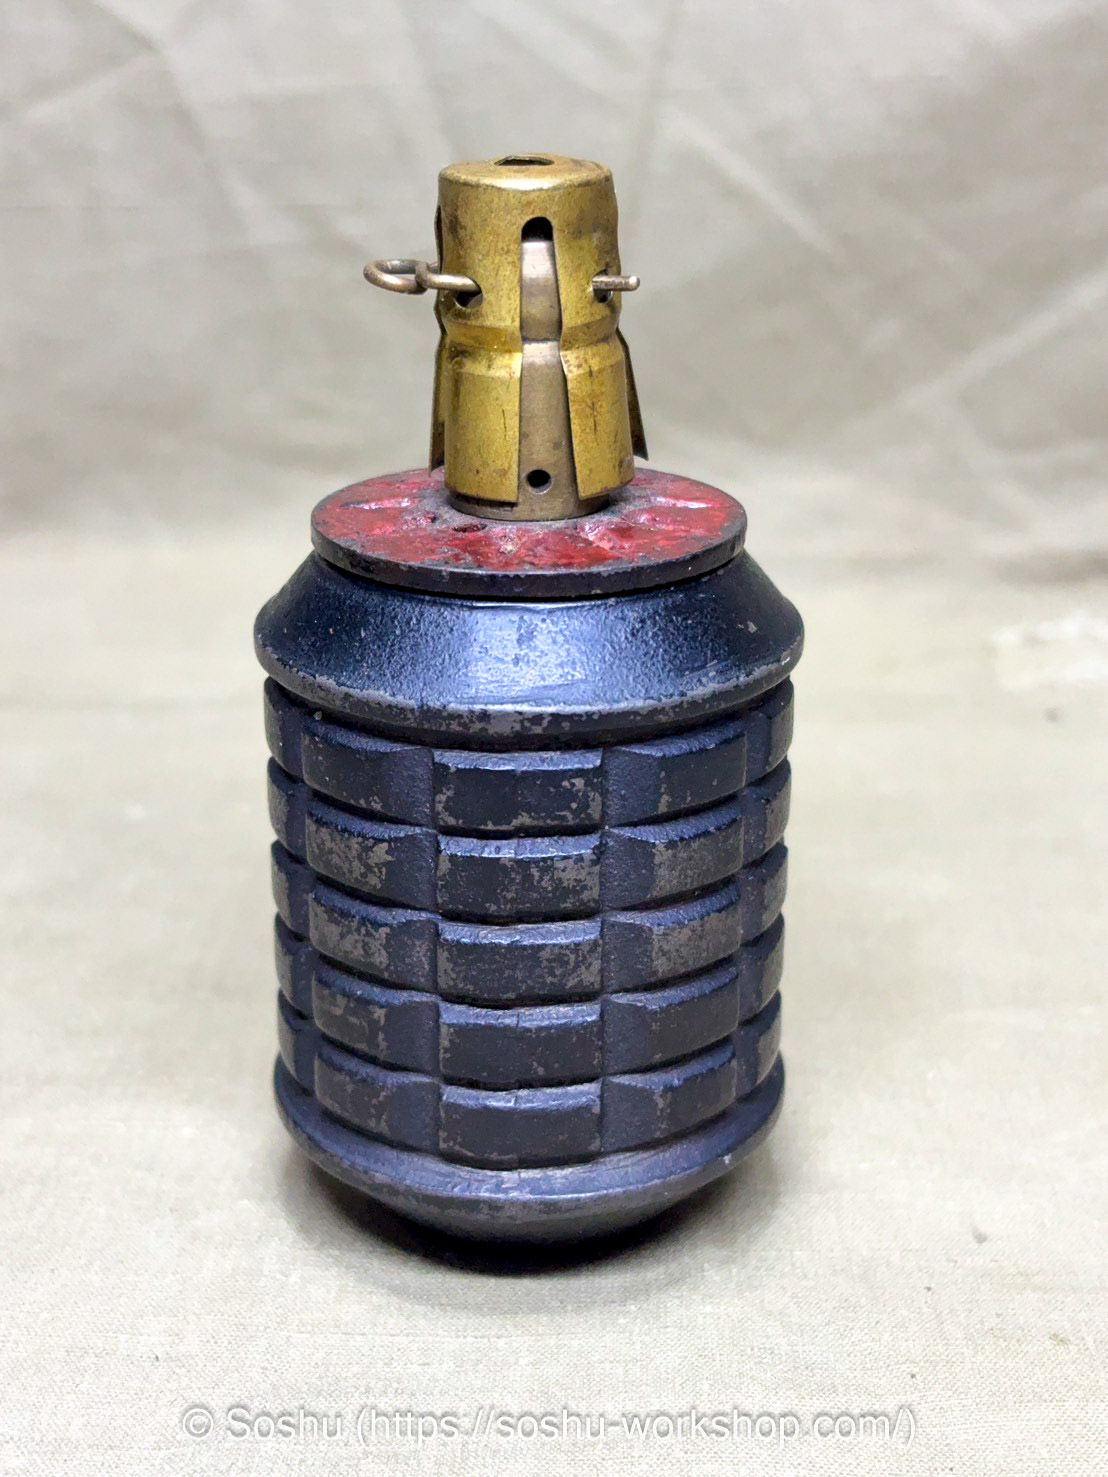
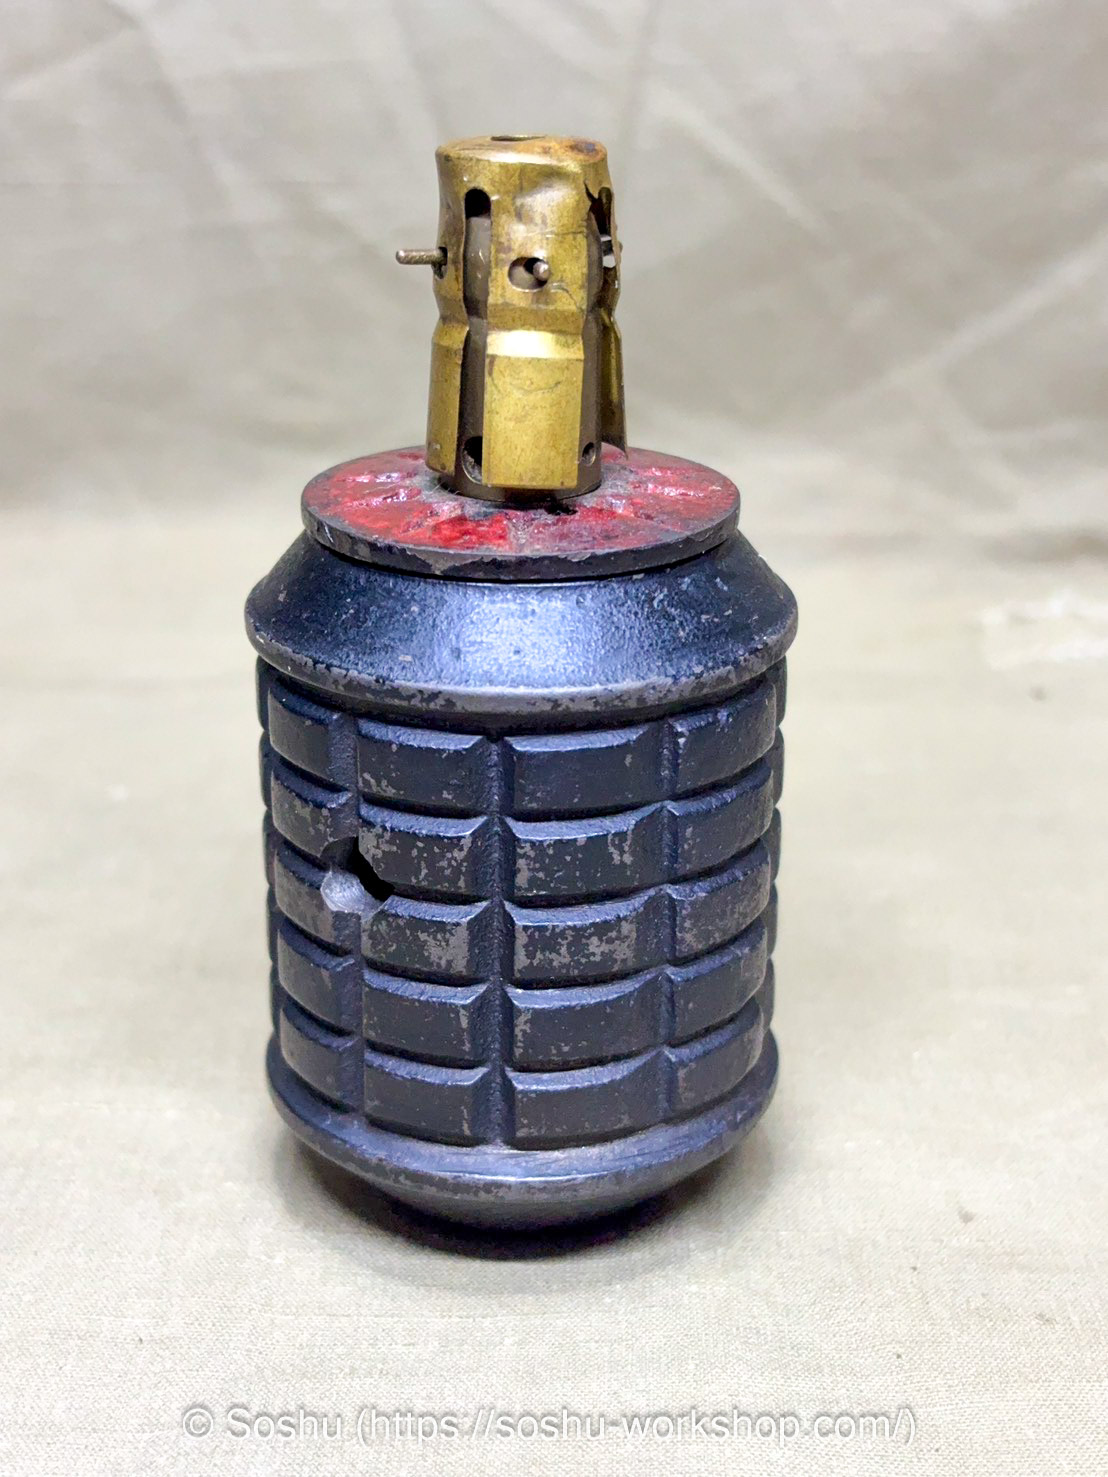

The Type 91 Hand Grenade could be thrown by hand, launched from the Type 10 Grenade Discharger or the Type 89 Heavy Grenade Discharger, and was also used as a booby trap in certain situations. When used with a grenade discharger, an auxiliary propellant chamber was attached to the base — this example is missing that component.
The fuze delay was set to 7–8 seconds as standard, reflecting its intended use with grenade dischargers. In practice, however, this long delay reportedly gave enemies time to throw the grenade back, and some examples were later modified to reduce the delay to 4–5 seconds.
On modified examples, the female thread on the base was removed and a protrusion was added to prevent chambering in a grenade discharger. No such modifications are visible on this example, so it is likely a standard 7–8 second type.
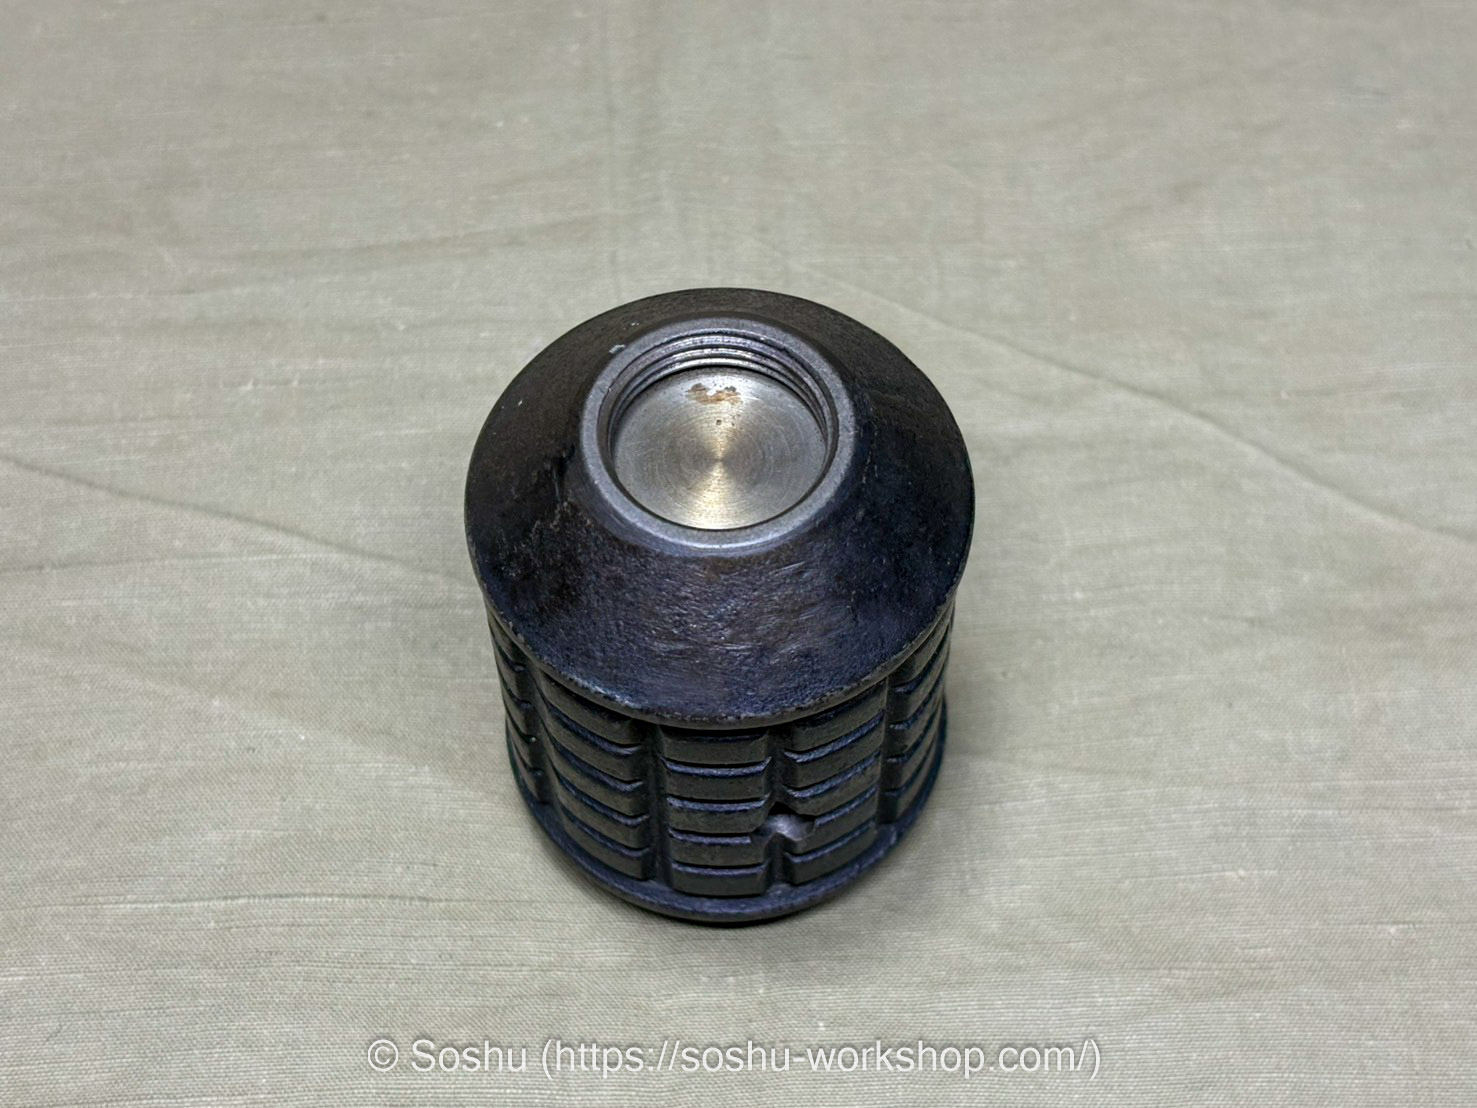
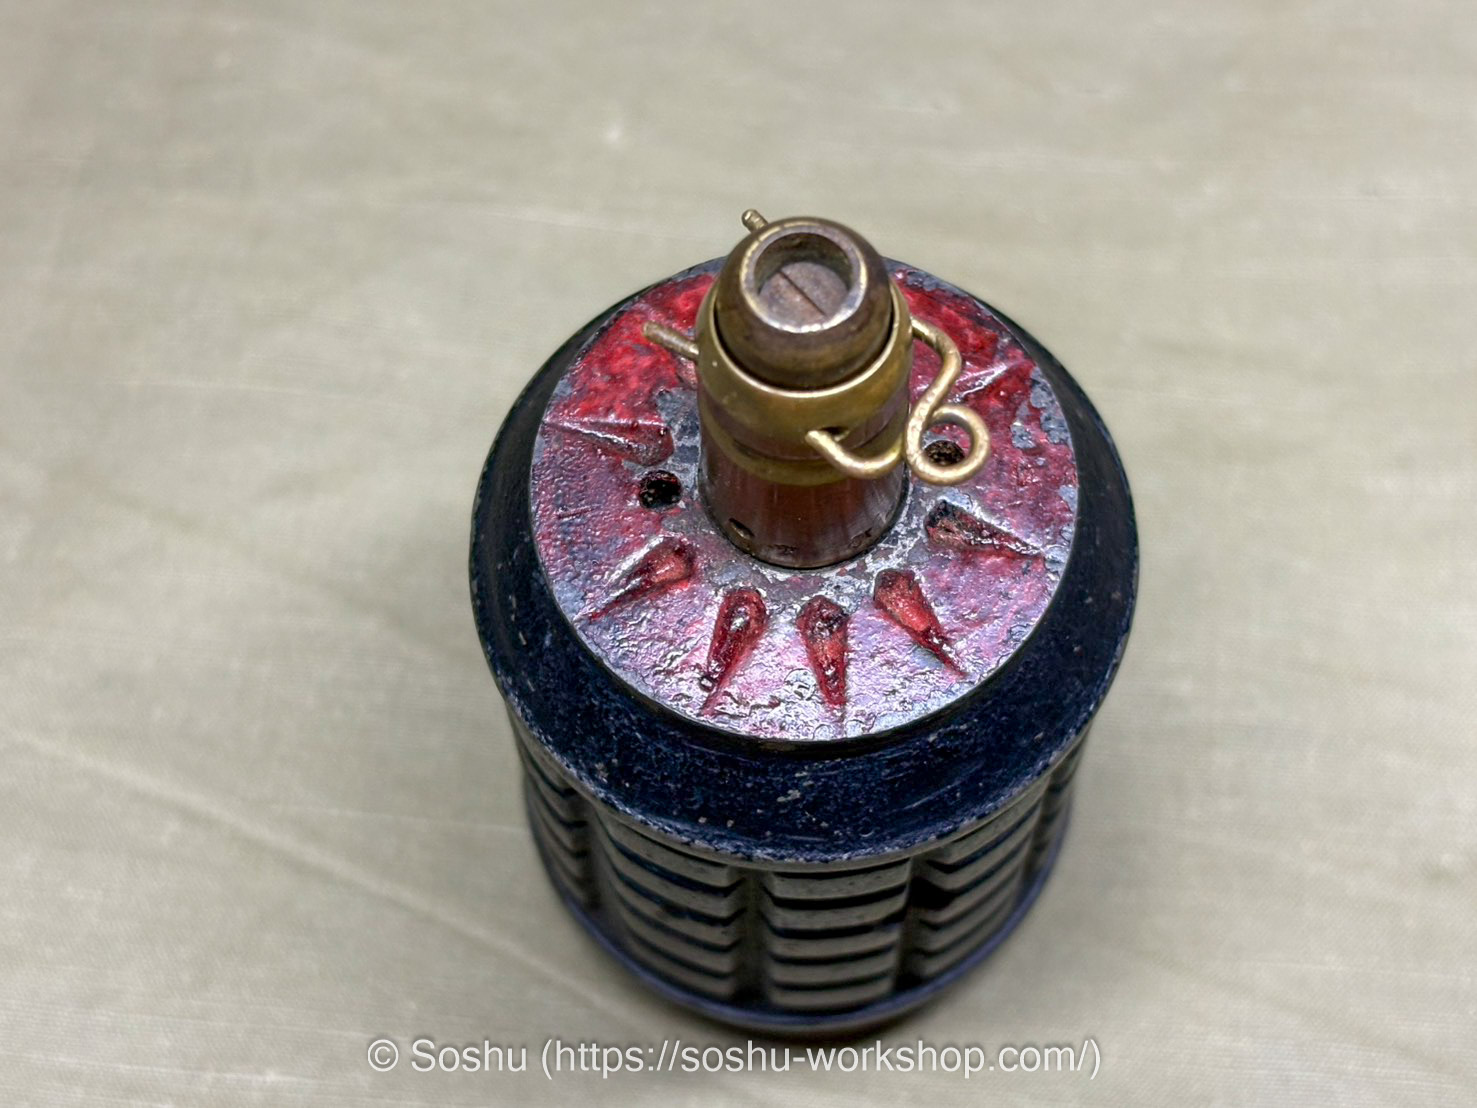
The base appears to have been machined in the final stage of production and was left unpainted, with the bare metal exposed and polished to a shine. The segmentation grooves on the body also appear to have been cut by hand, as there is noticeable variation in the size of each block and the angle of the grooves.
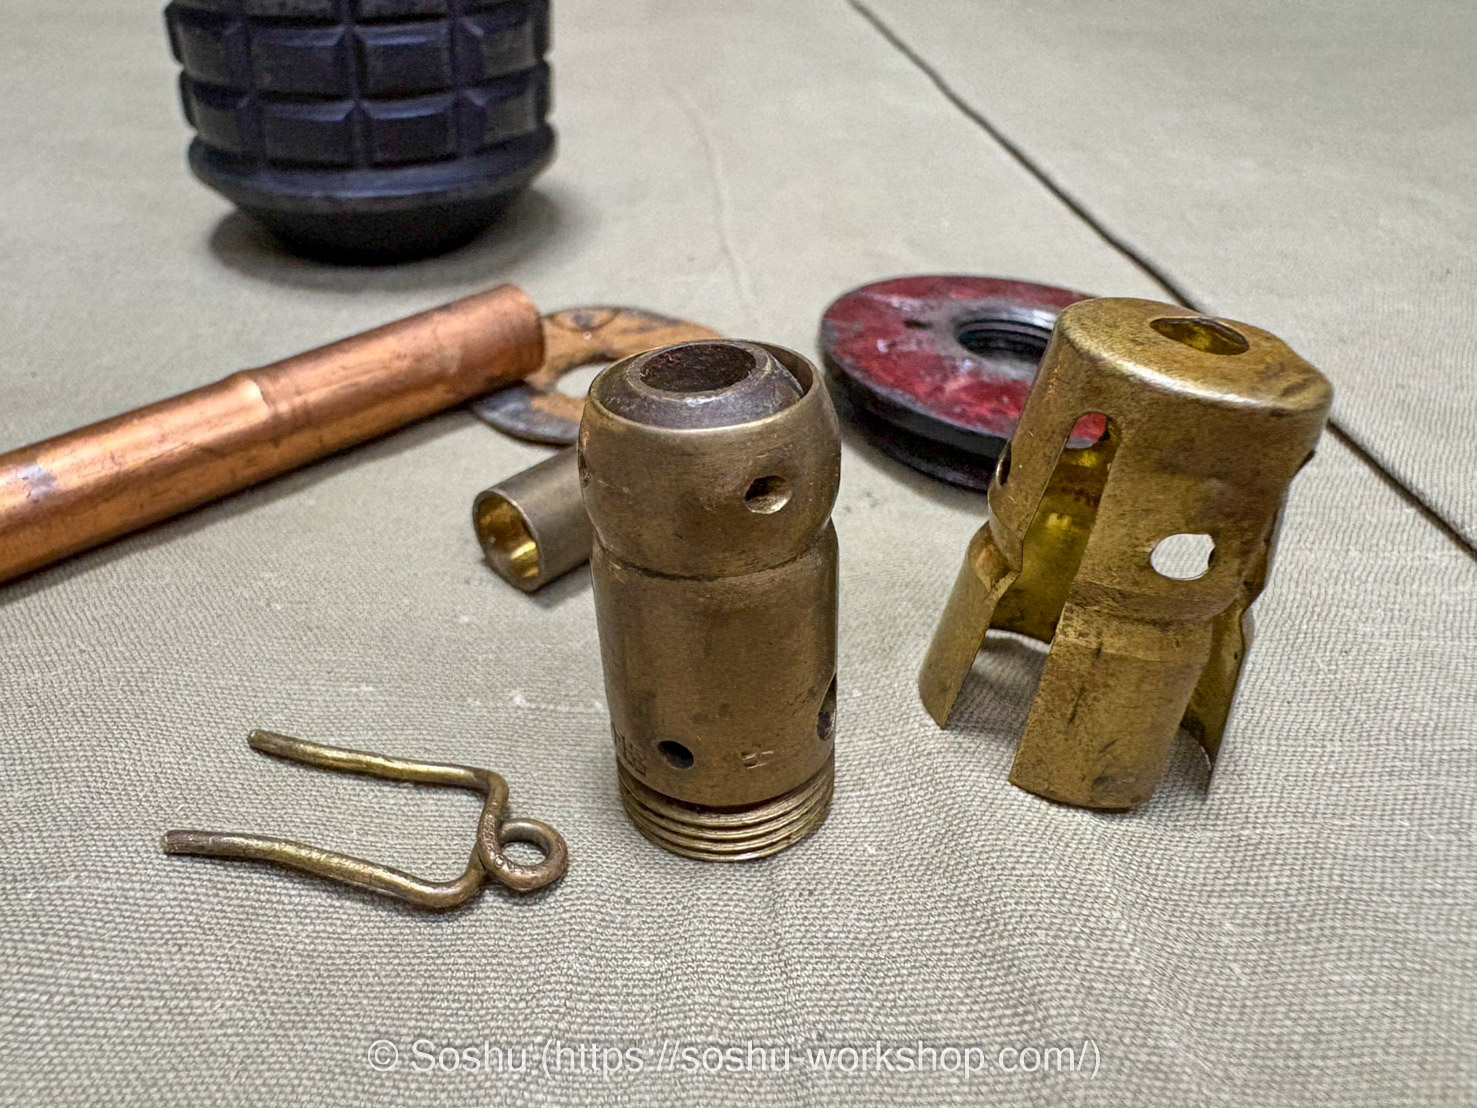
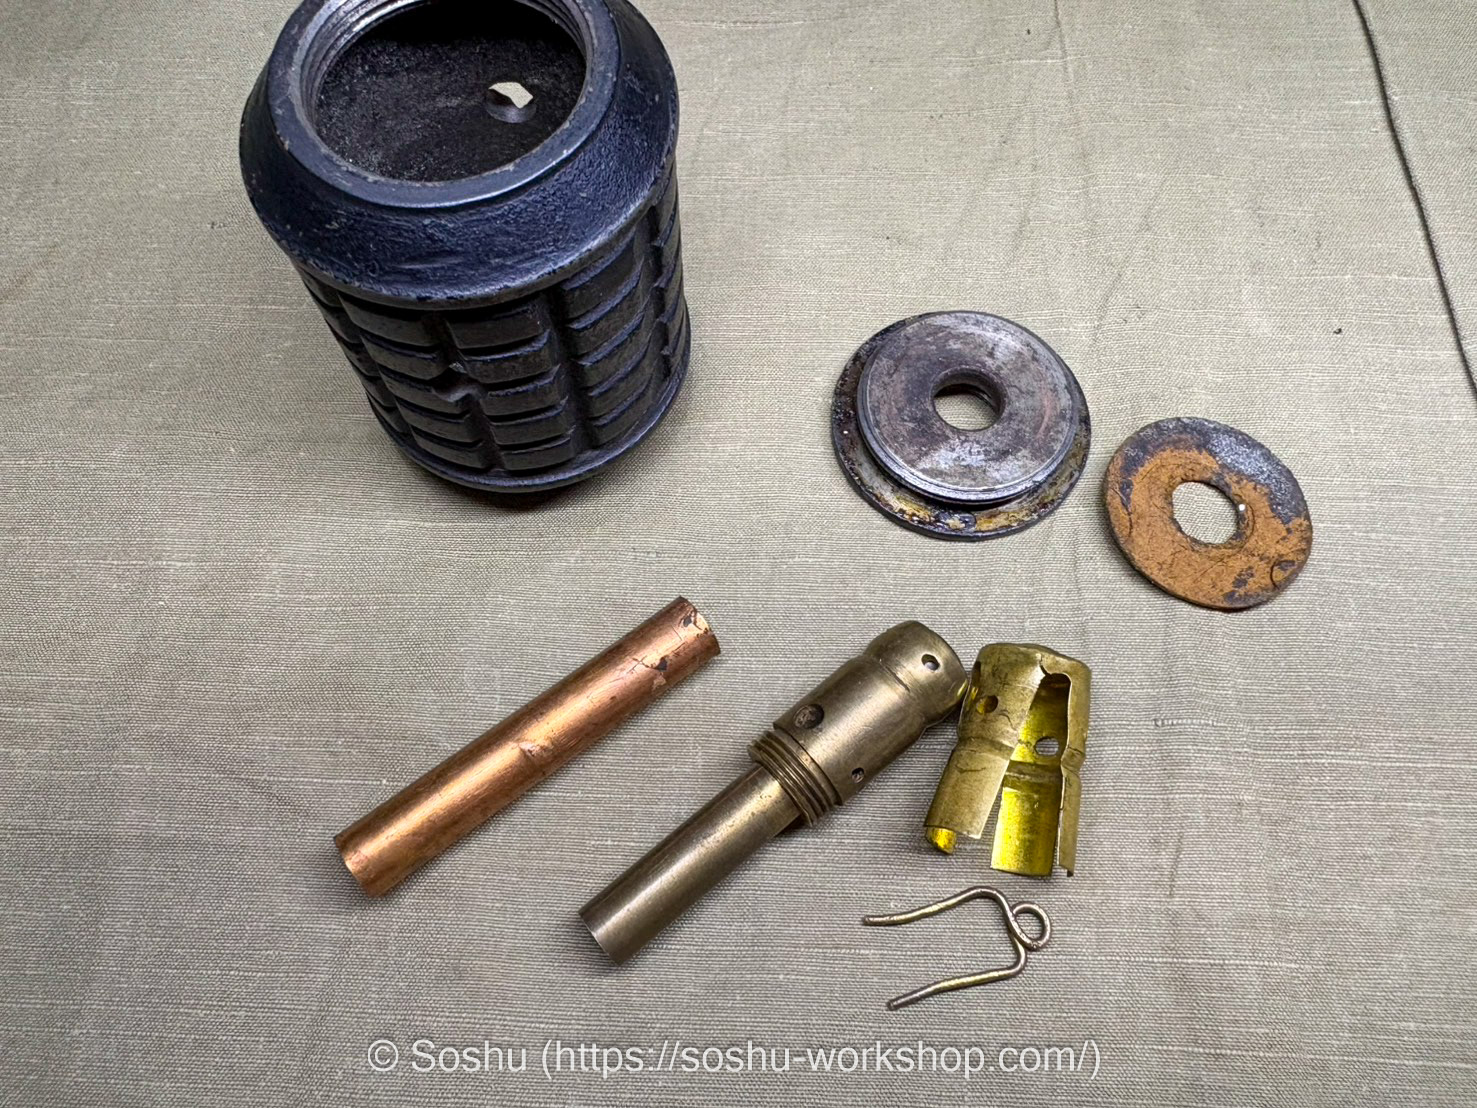
Opening the body cap reveals that nearly all of the fuze components are present.
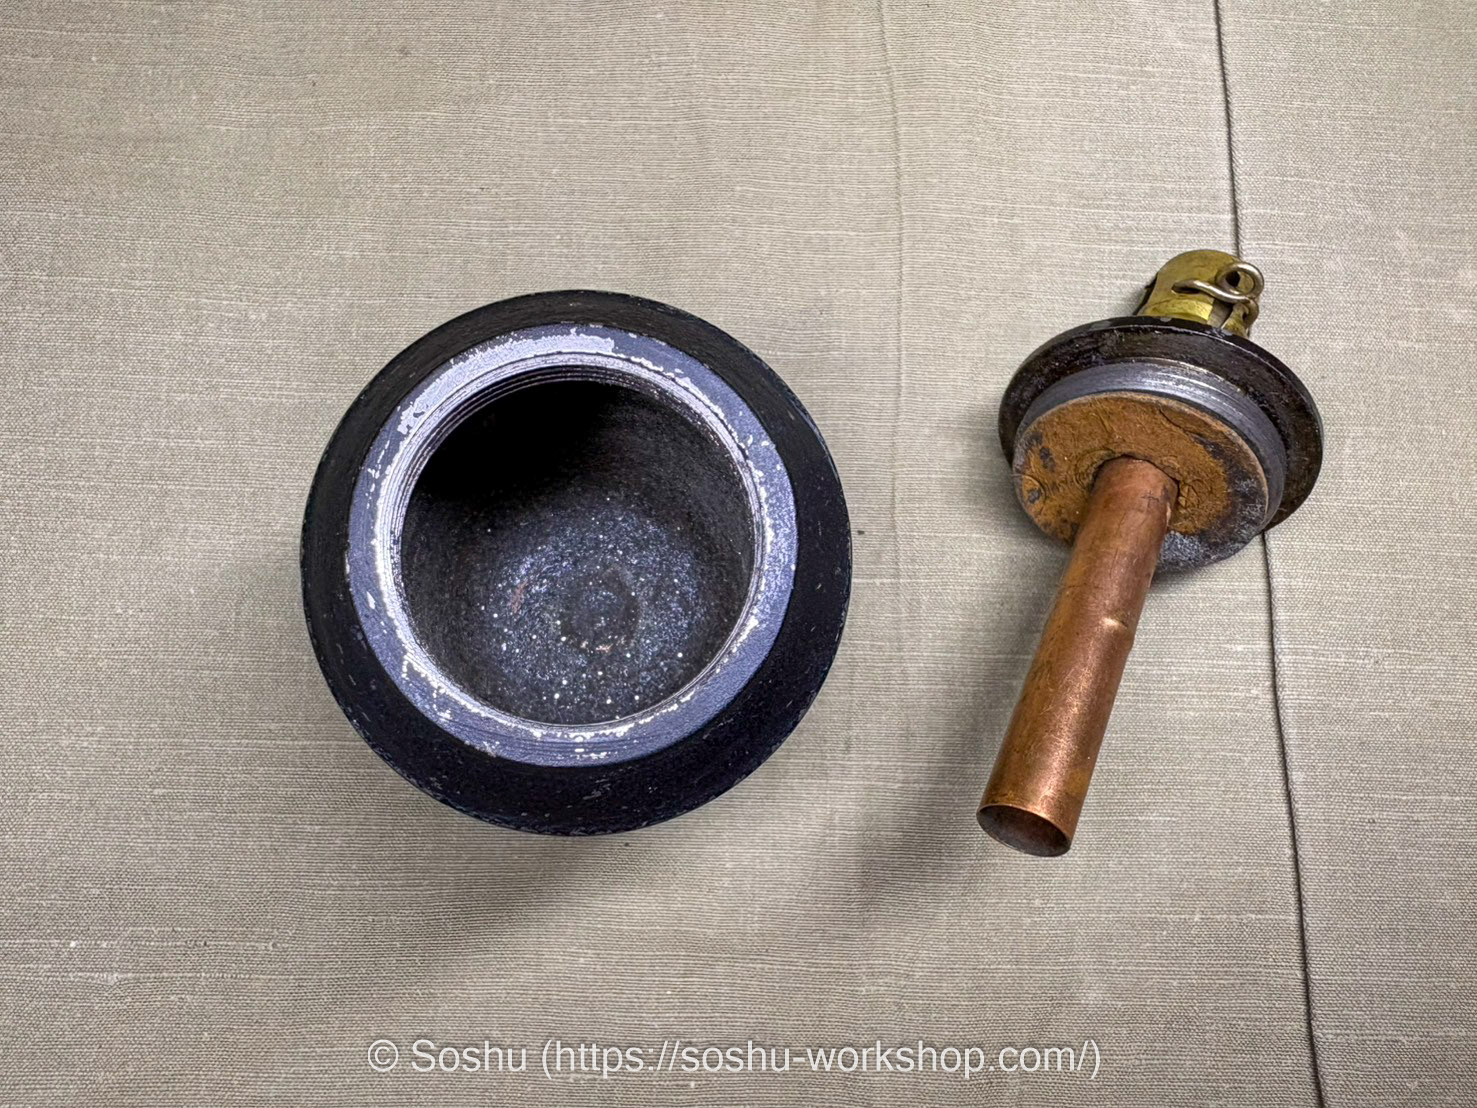
The thin copper tube is the detonator, which contains the explosive charge responsible for initiating detonation.
Removing the detonator reveals a brass tube with a narrow channel running through it, which was filled with a slow-burning powder that takes 7–8 seconds to burn through before transmitting the flame to the detonator charge.
At the tip of this assembly sits the fuze assembly.
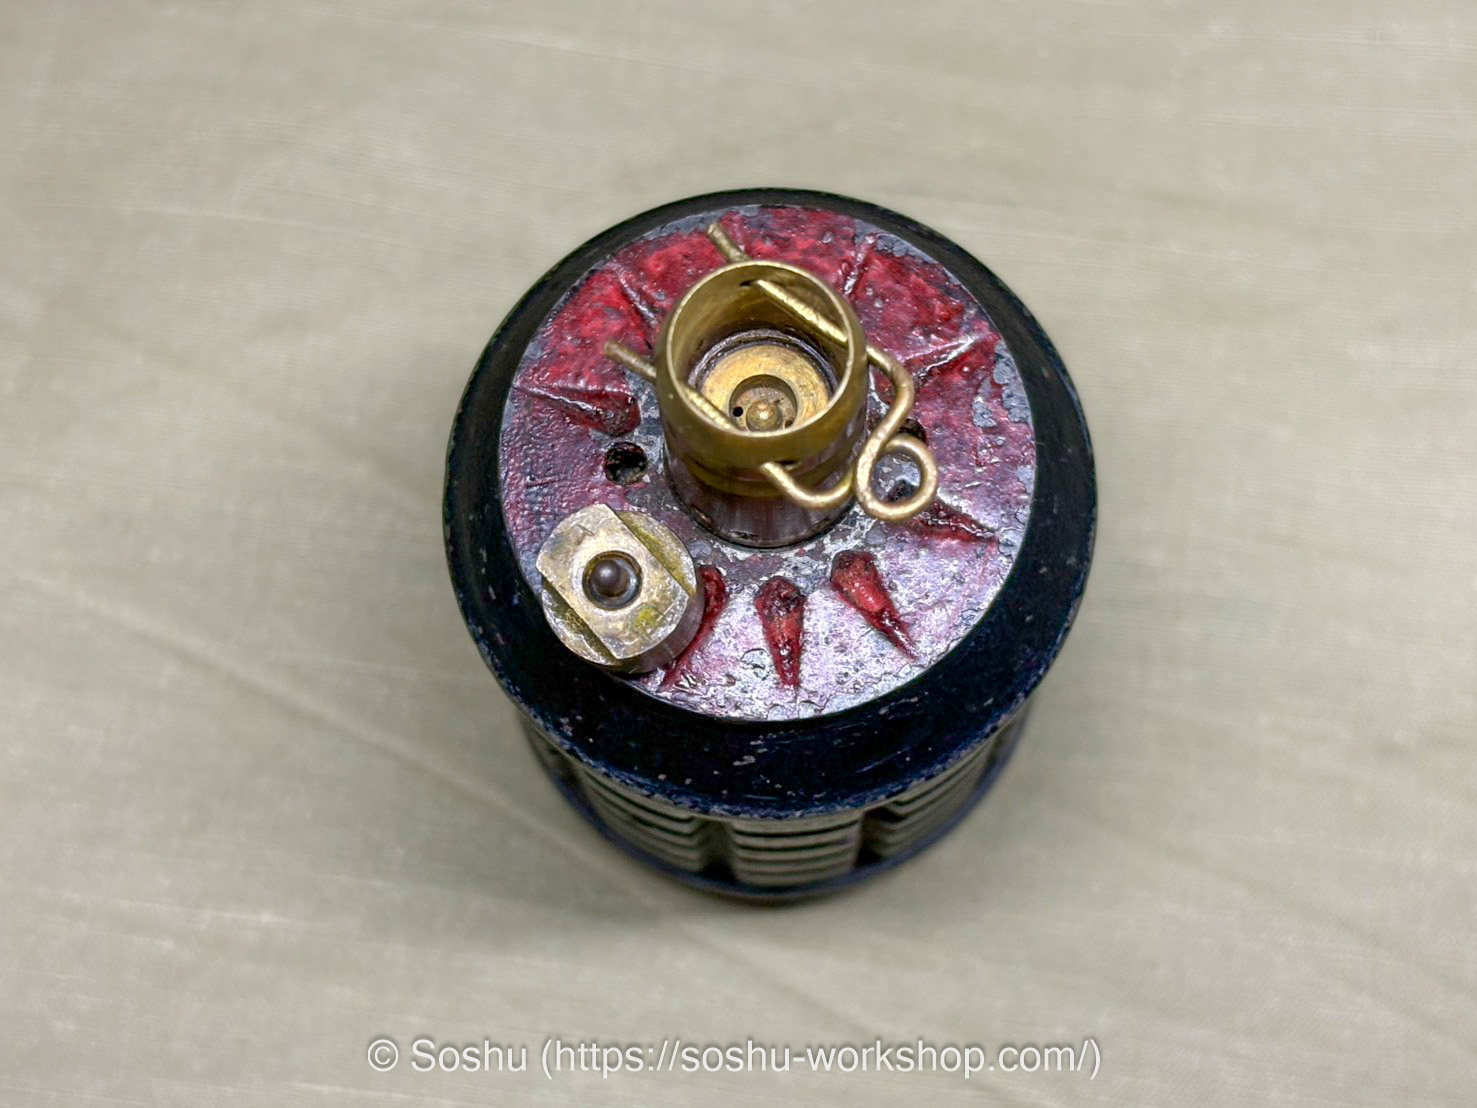
Now let’s disassemble the fuze assembly. Here the safety pin has been removed and the safety cover taken off.
The firing-pin holder is slightly visible protruding from the center.
Here the firing-pin holder has been removed, allowing a view into the interior from above. In an intact example, this cavity would house the percussion cap and the creep spring.
The percussion cap has been removed as part of the deactivation process, and the creep spring is also missing.

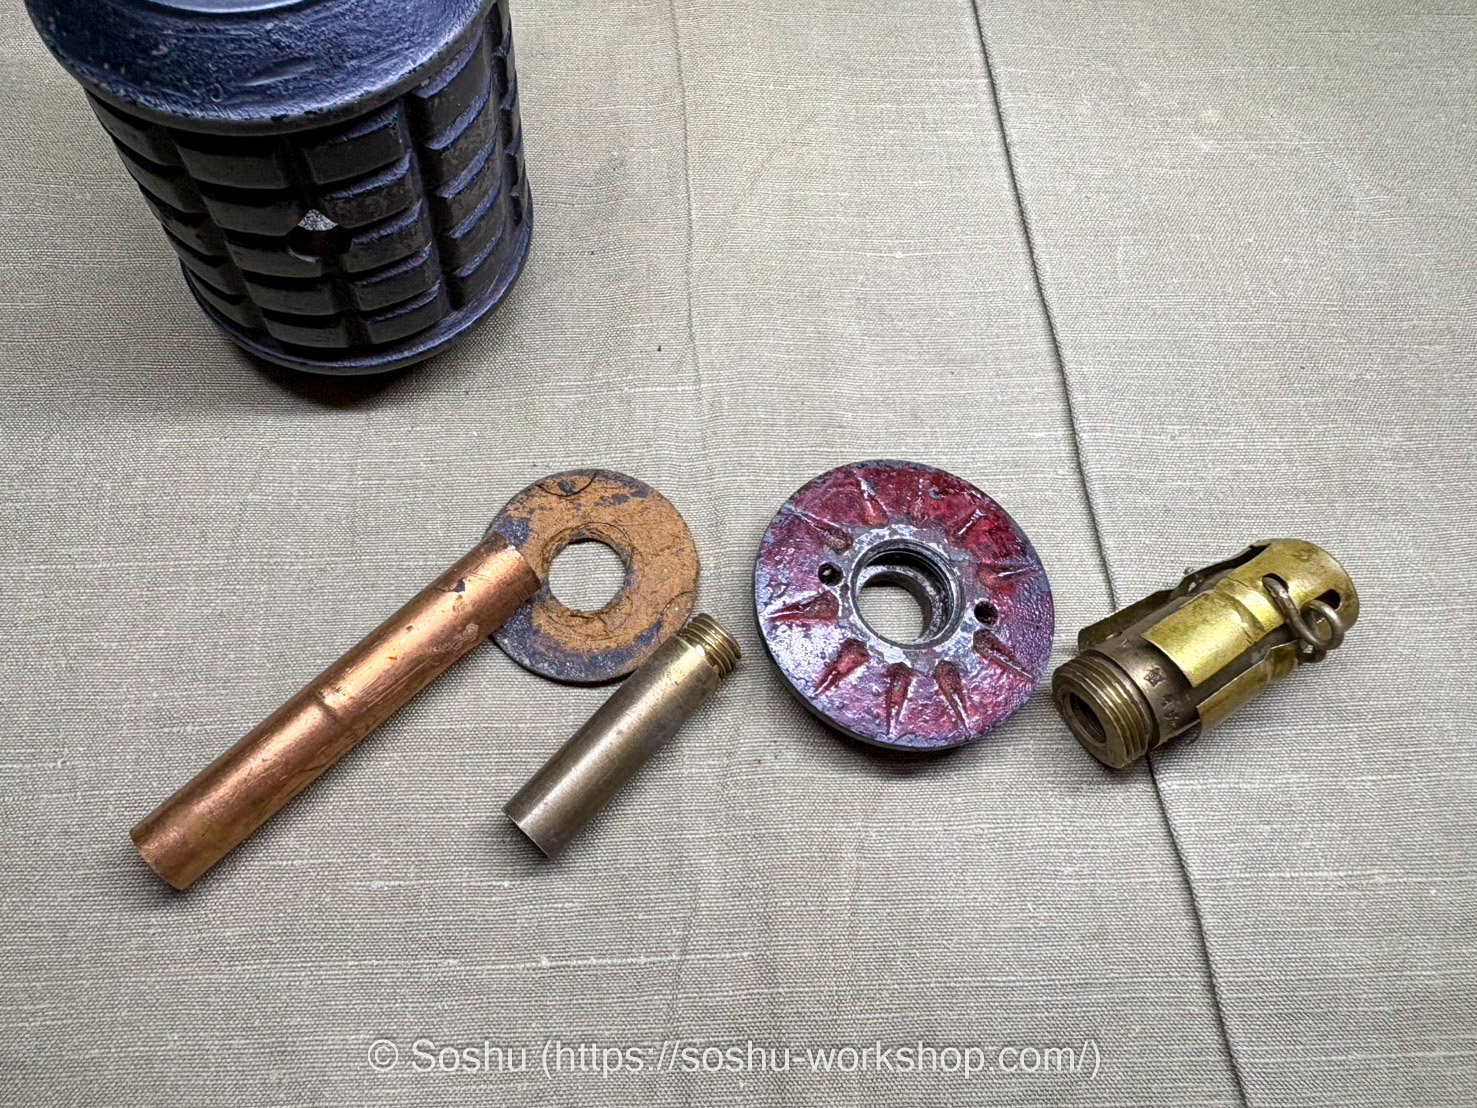
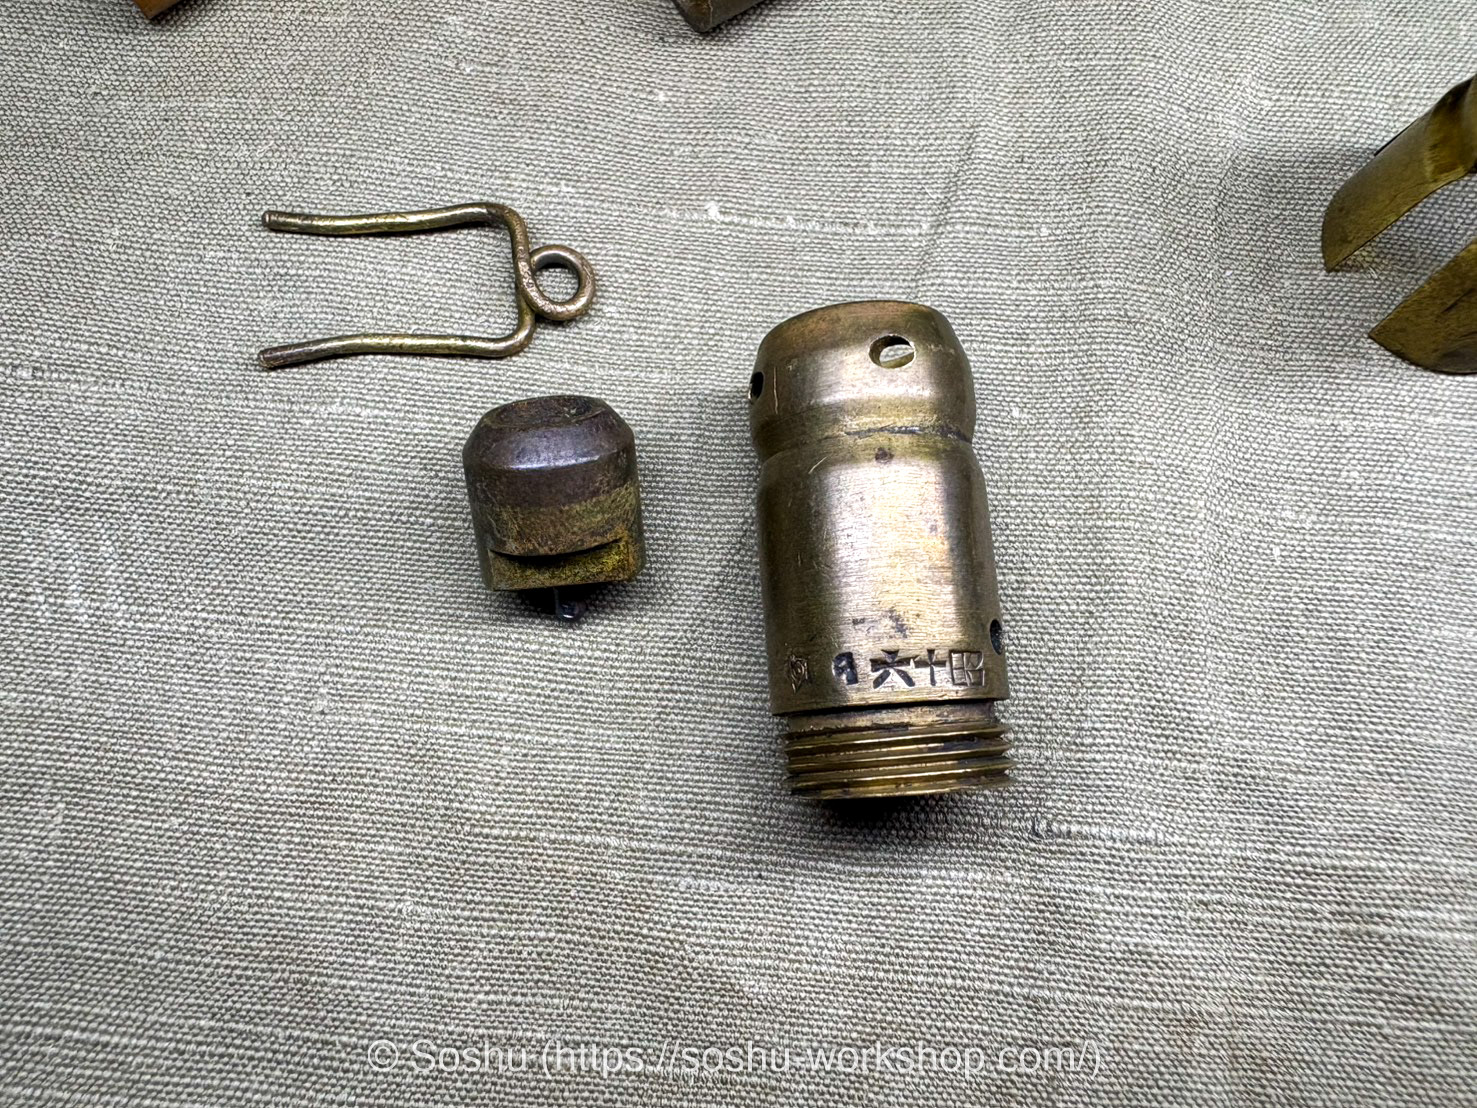
Pictured here are the safety pin, firing-pin holder, and fuze assembly. A short firing pin protrudes from the firing-pin holder. The fuze assembly body is stamped with “昭十六” and “東.”
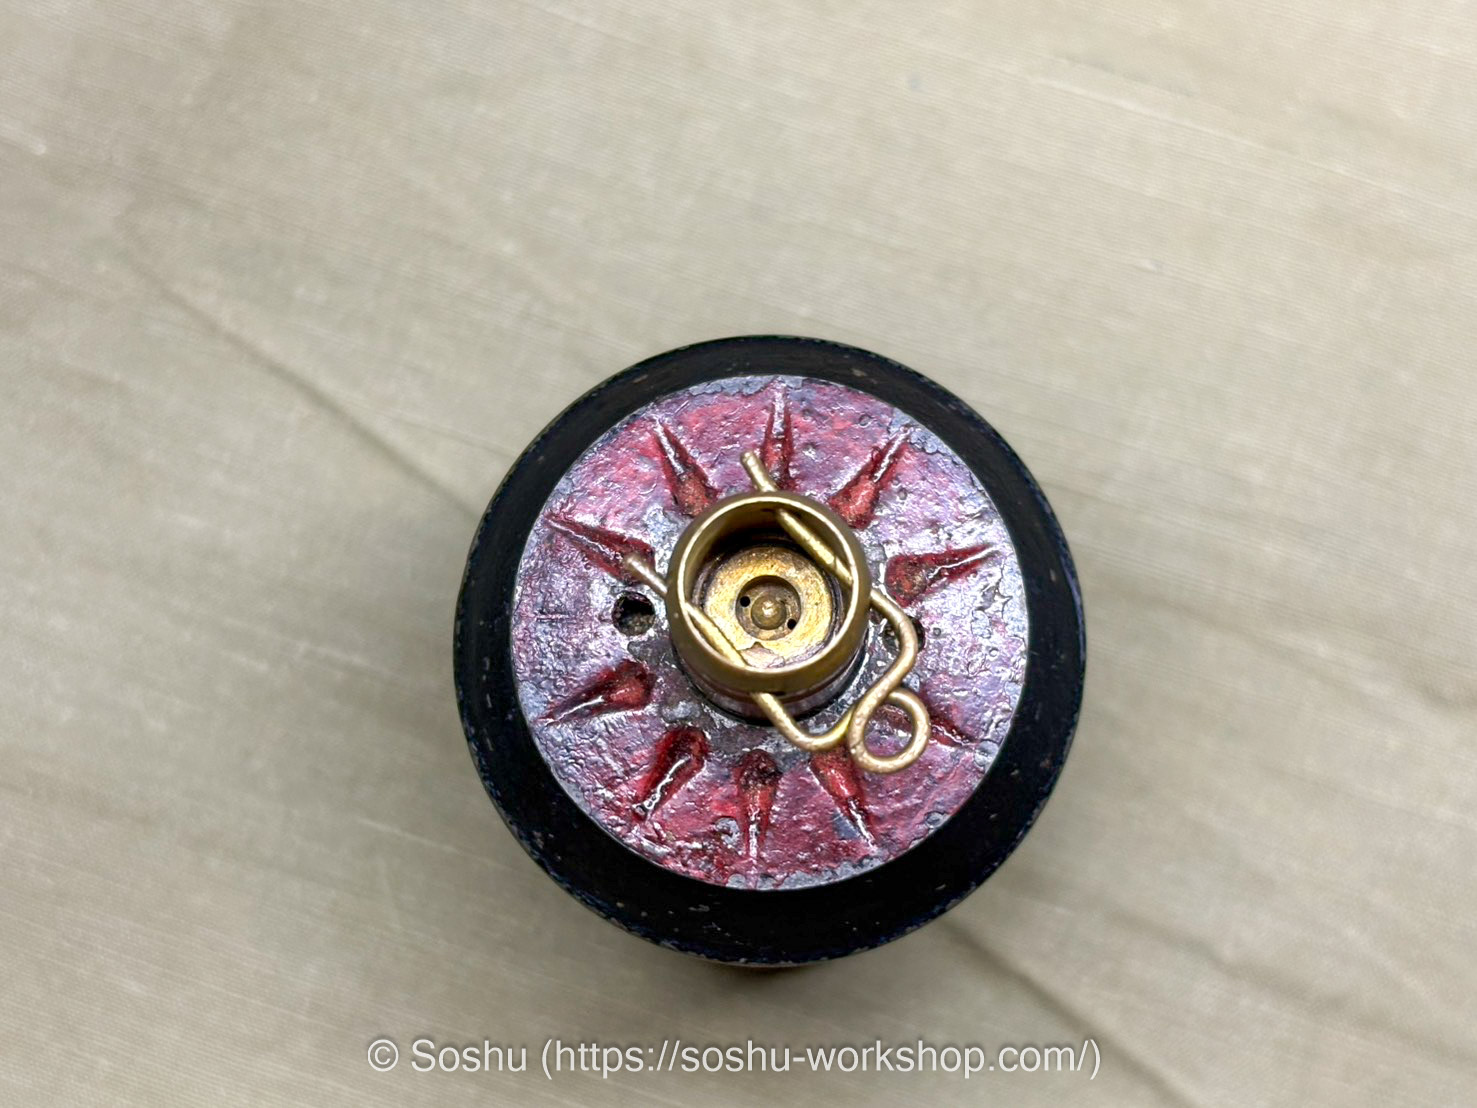
IJA hand grenades are designed to be activated by pulling the safety pin and then striking the head of the fuze assembly against a hard surface — such as a helmet or the heel of a lace-up boot — to initiate ignition. The fuze assembly features a gas vent, through which smoke is reportedly expelled after ignition.
When fired from a grenade discharger, the fuze is activated by the shock of firing, so there is no need to strike the fuze before loading.

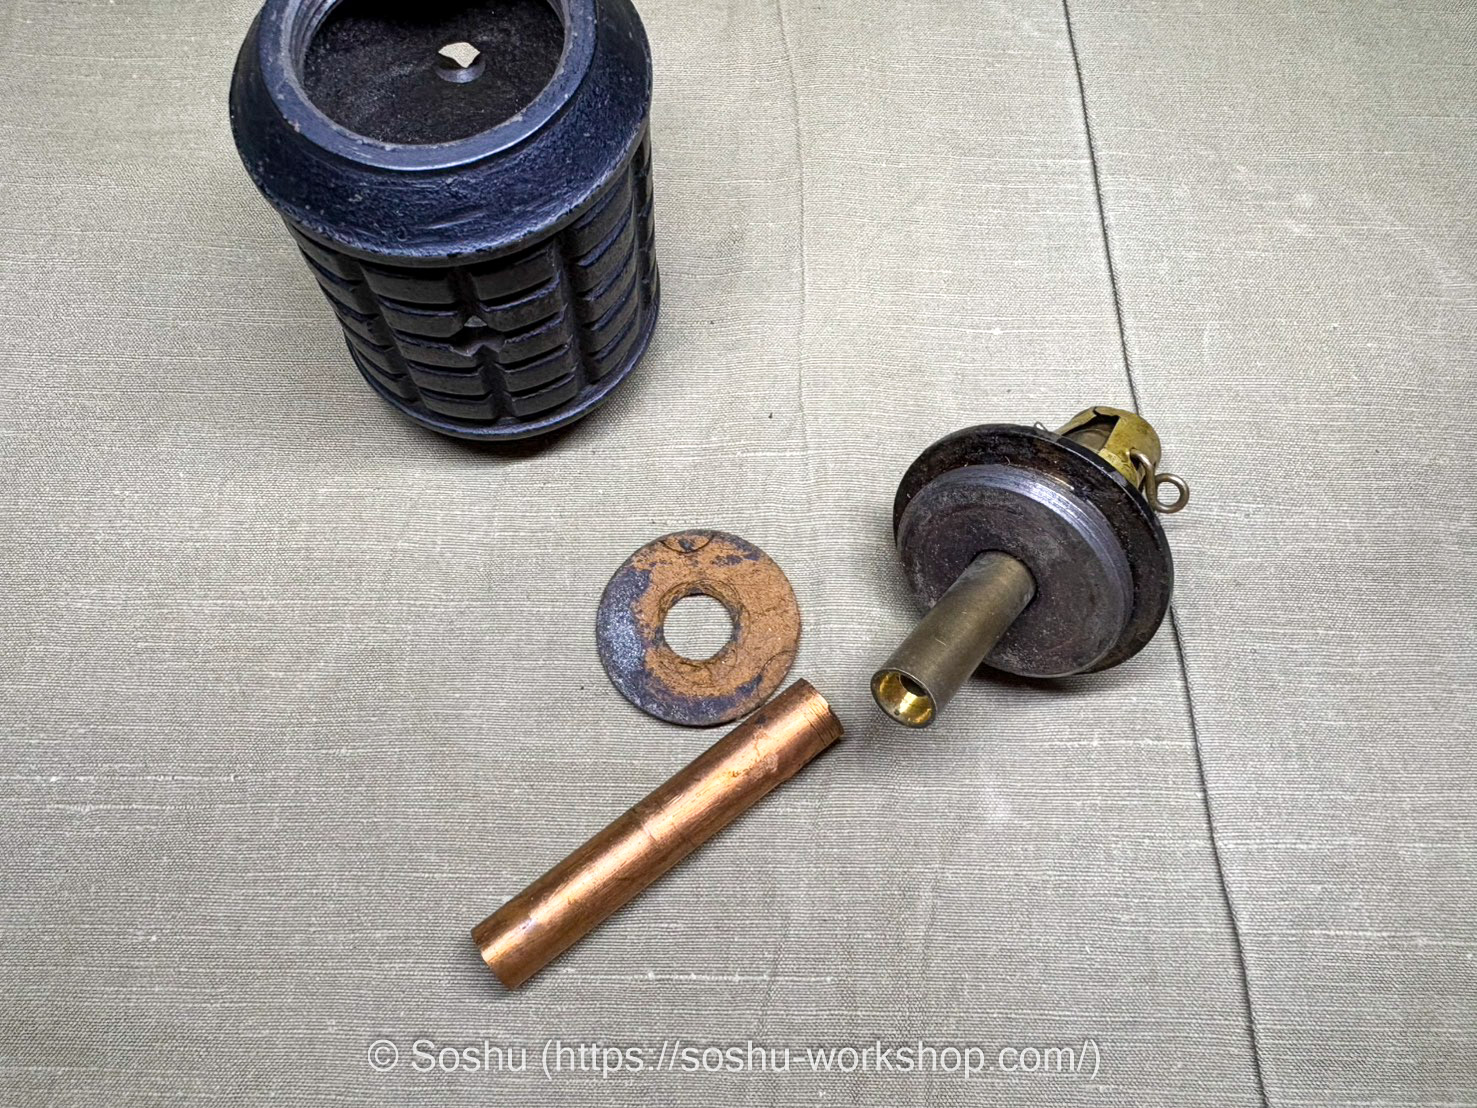
Here the components have been laid out again for a clearer view of the structure.
The fuze assembly has one large hole and two small holes. The large hole is the gas vent mentioned earlier; on unused examples, it was sealed with a small circular tin foil seal resembling a silver sticker.
The two small holes, on the other hand, do not pass through to the interior of the fuze assembly and are instead shallow depressions. These are not noted in the drawings I have on hand, and their purpose is unclear.
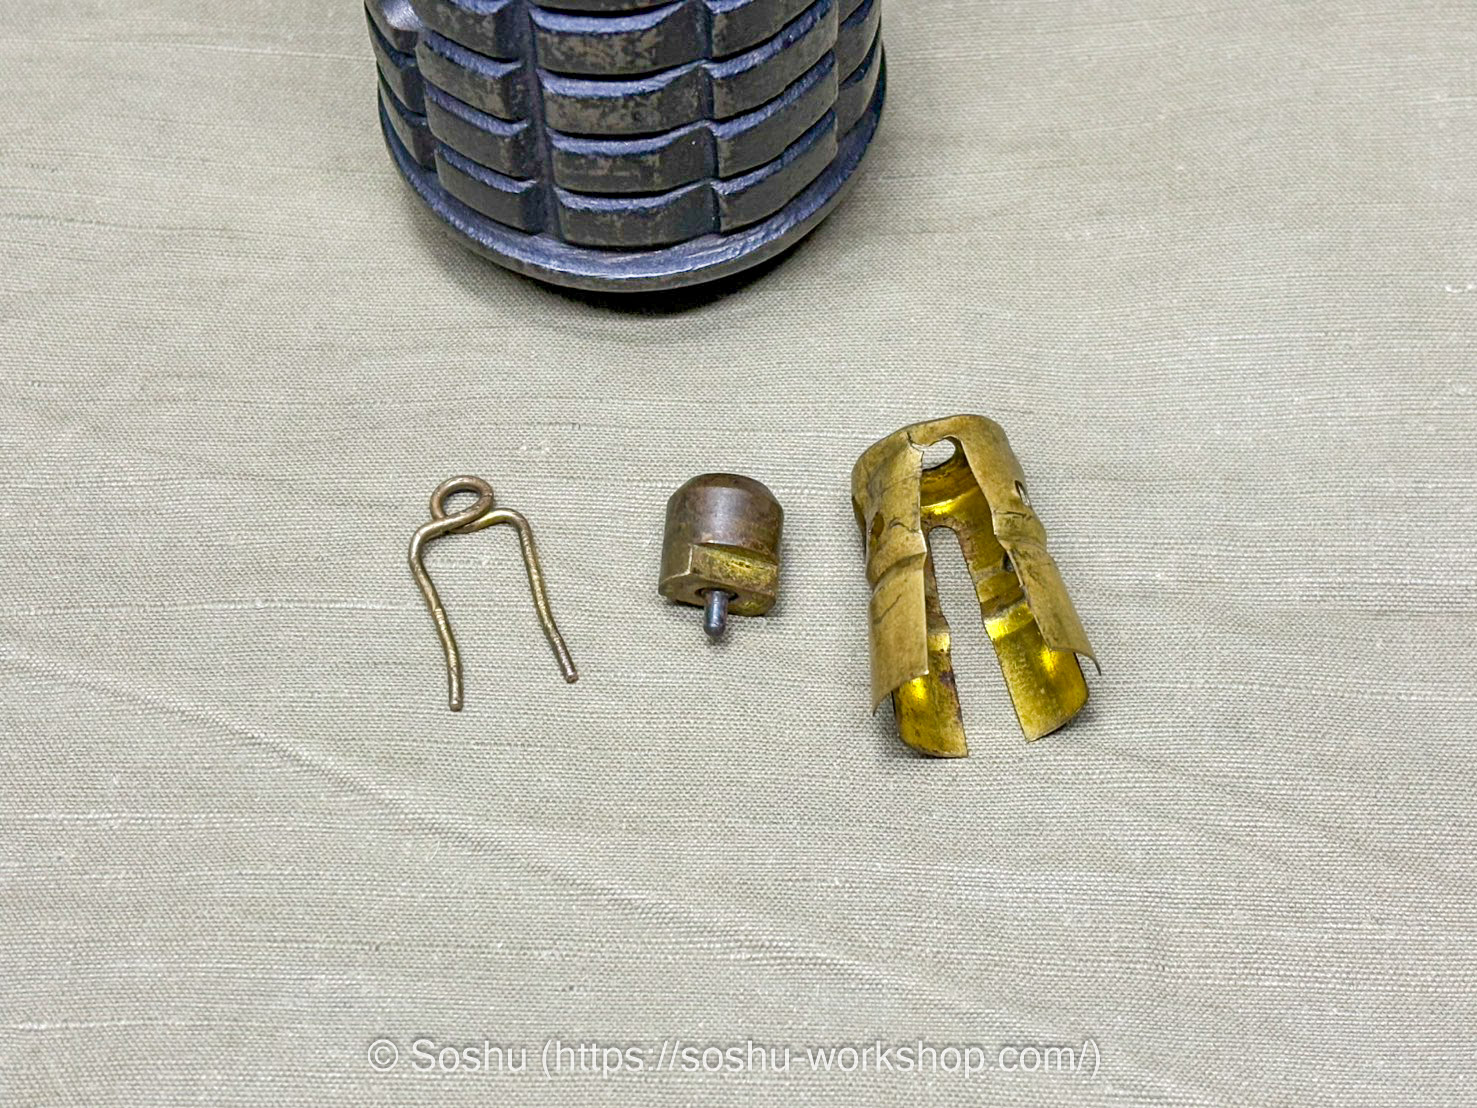
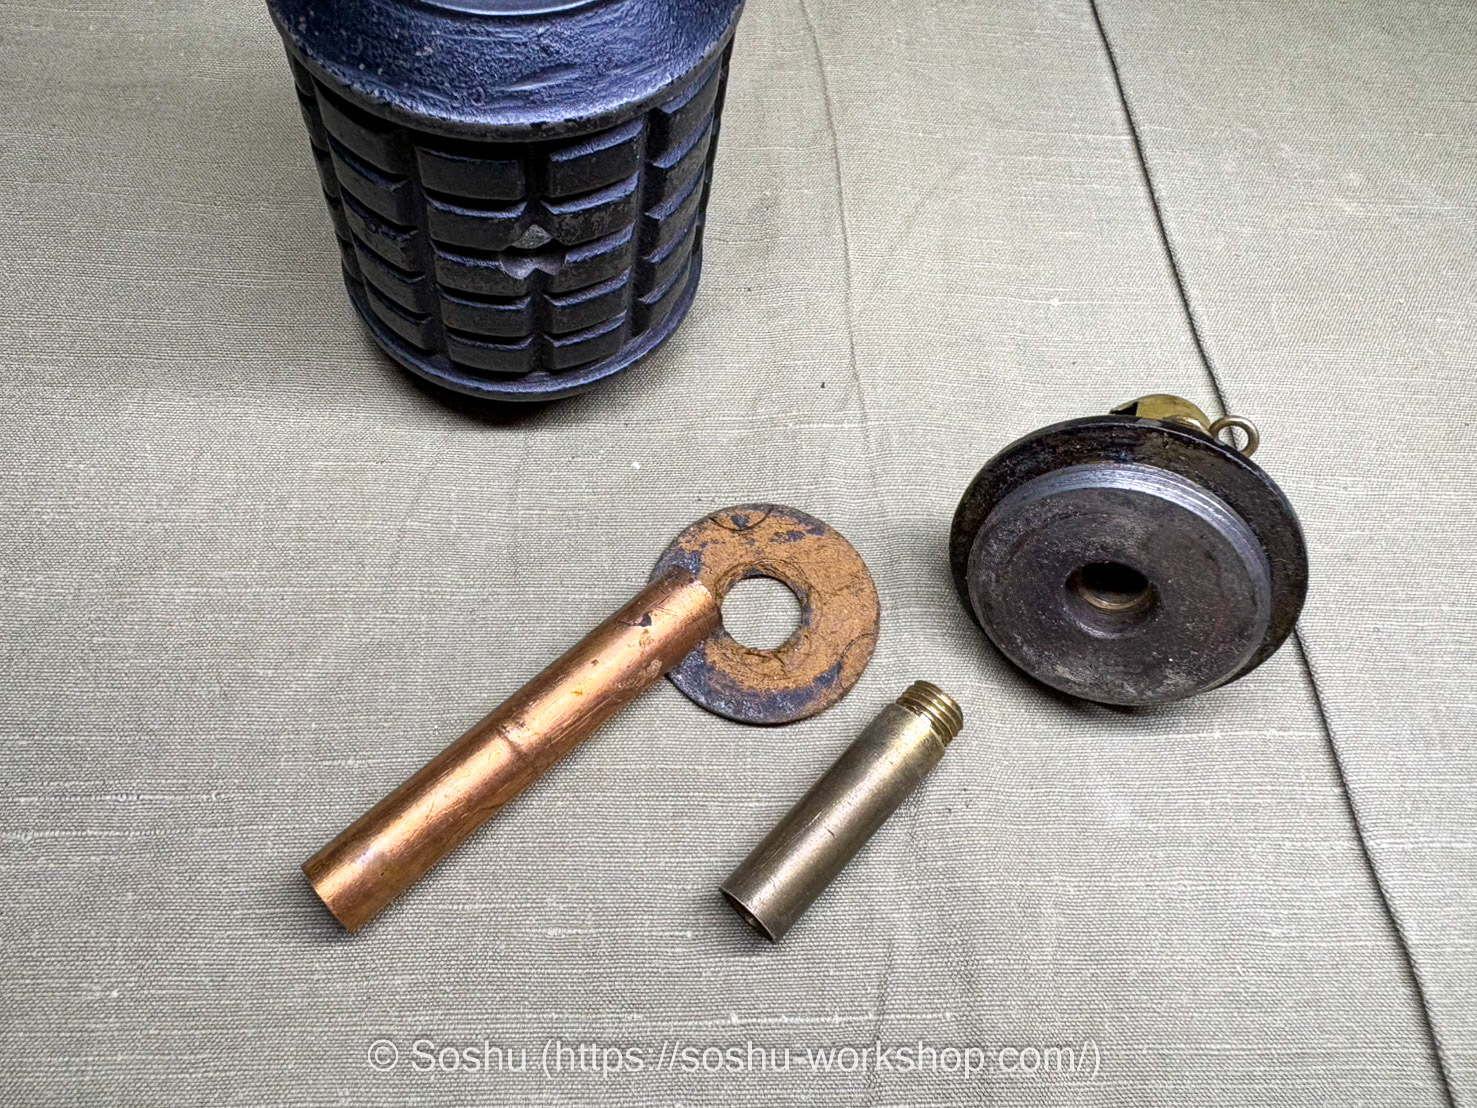
Here the components have been arranged for a clearer view of the firing pin mechanism. The firing-pin holder features a groove into which the safety pin engages, restraining the firing-pin holder and preventing it from striking the percussion cap.
n the first photo, a single slot — resembling a flathead screw — is visible on the firing-pin holder. This is because the base of the firing pin is actually threaded, and at the time of manufacture the tip of the firing pin is recessed inside the firing-pin holder. Before use, the safety cover is removed and this screw is tightened, causing the firing pin inside the firing-pin holder to advance and protrude outward.
The dedicated tool used to turn this screw is called the “撃針螺廻”, firing pin screwdriver.
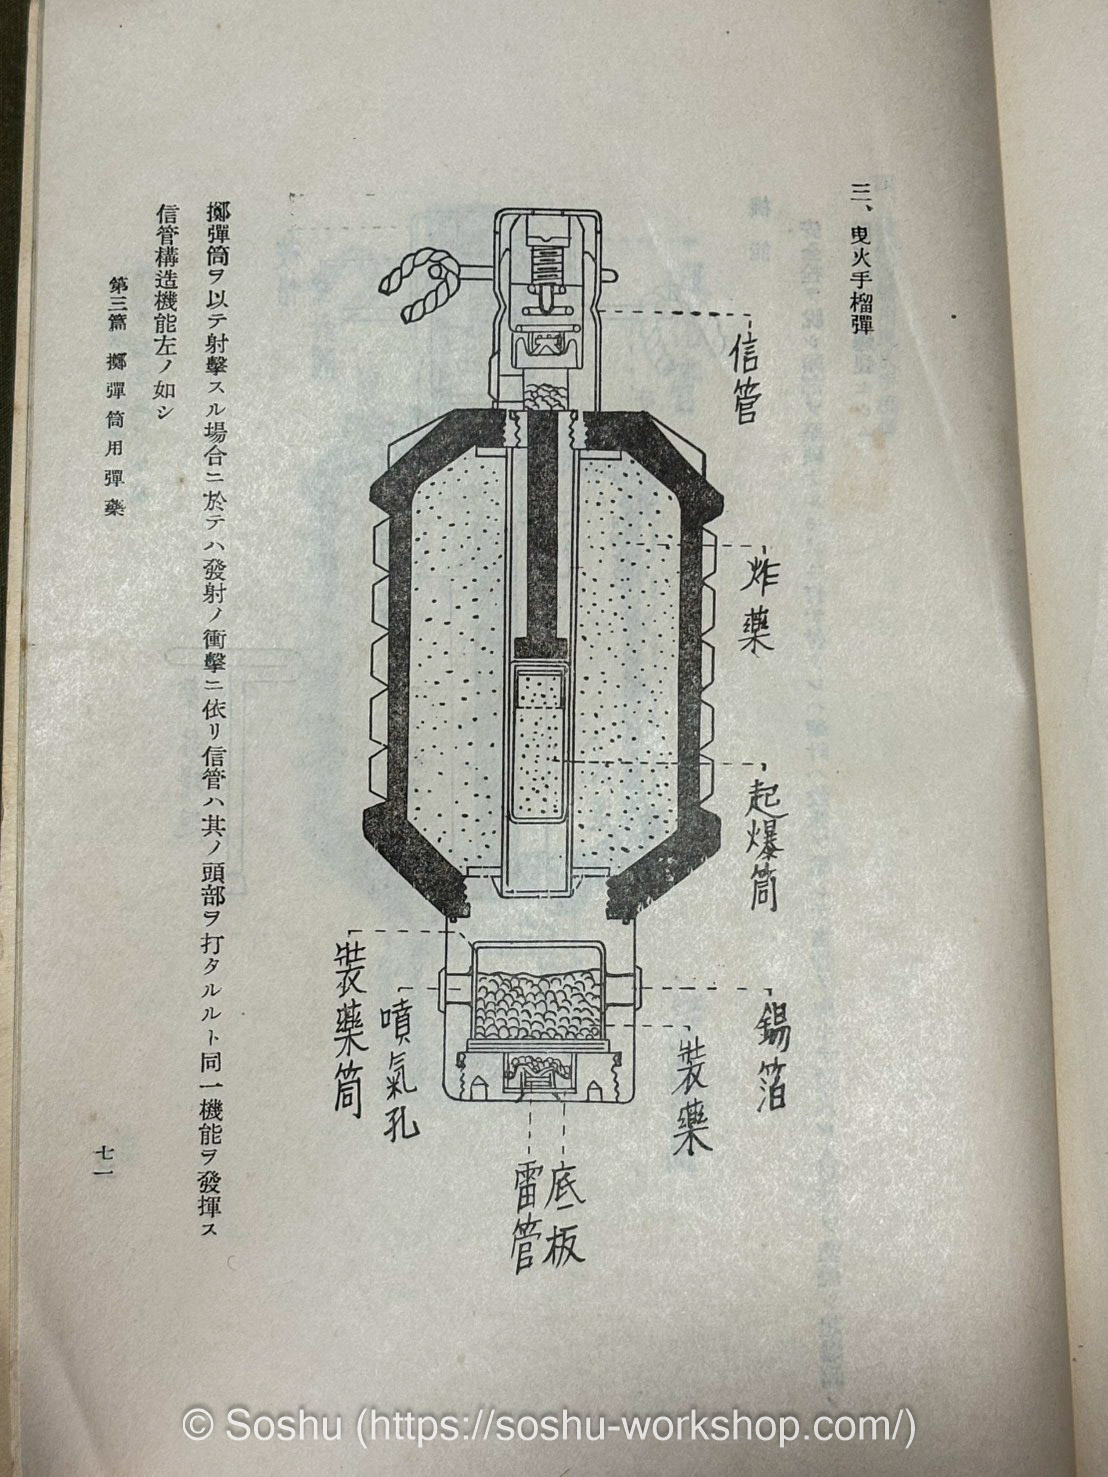
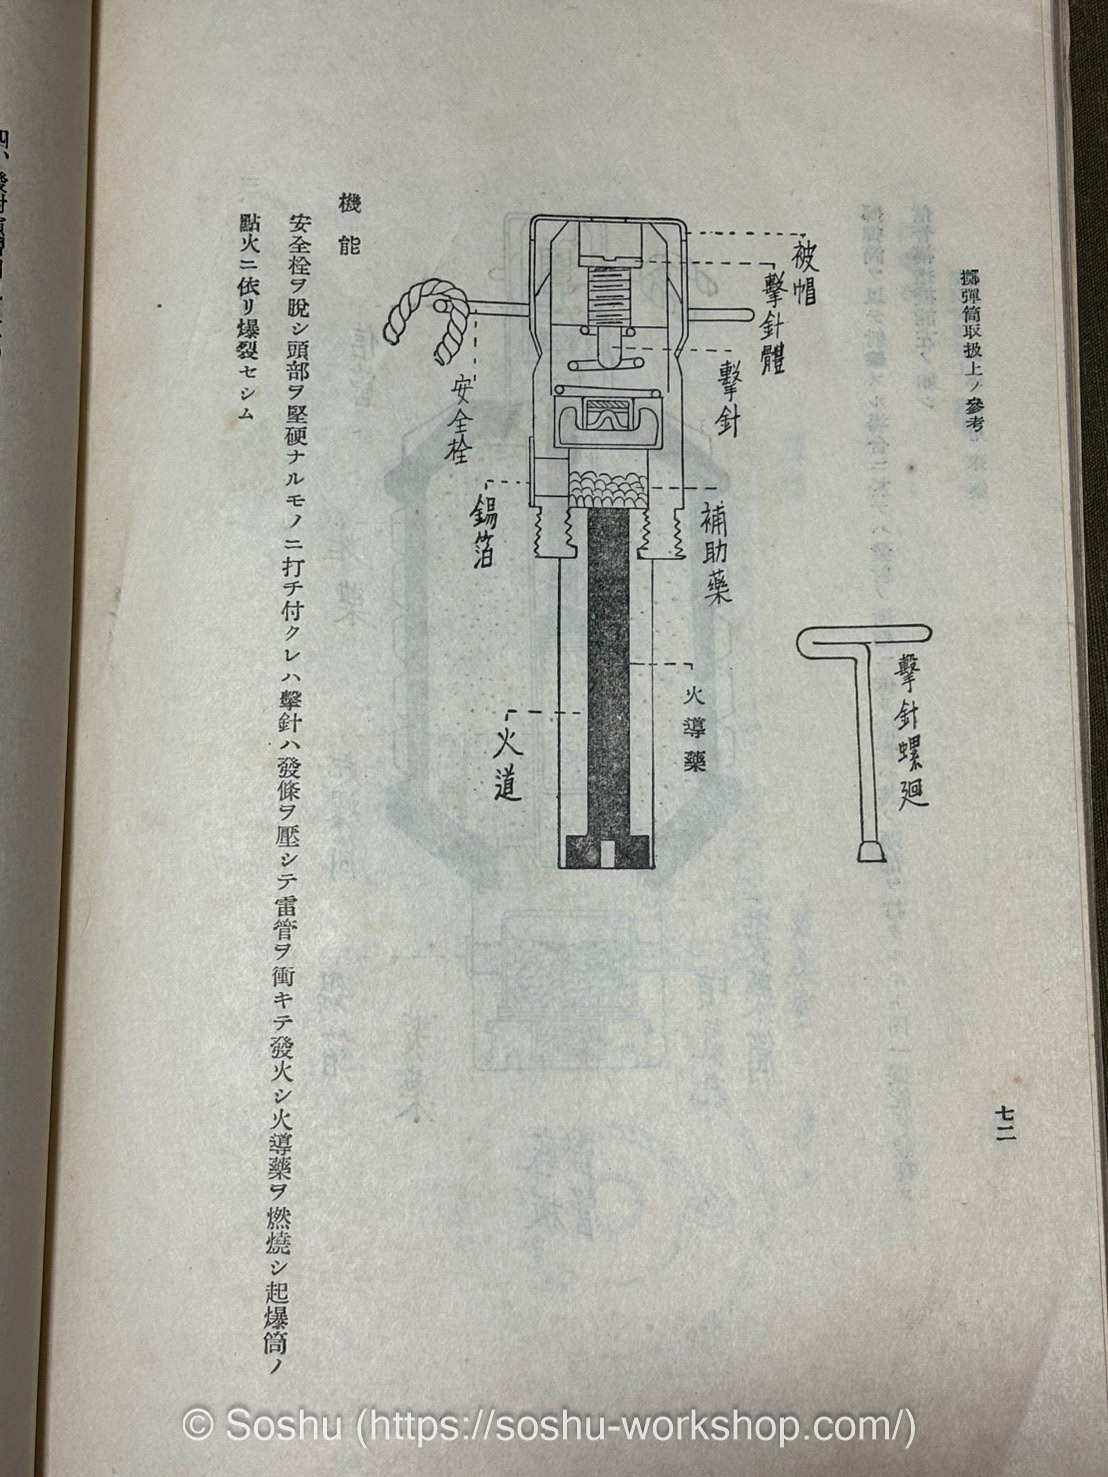
For reference, I have included the relevant pages on the burning-fuze hand grenade from “擲弾筒取扱上の参考” (Reference on the Handling of Grenade Dischargers), compiled by the Army Infantry School. I hope this helps in understanding the structure and operation of the grenade.
I have already begun capturing the geometry using a 3D scanner.
The scanner I use is the Revopoint Metro Y Pro, which can capture object geometry at a nominal accuracy of 0.01mm. It takes a bit of practice to get consistent results, but I have been getting the hang of it and am now able to scan with reasonable reliability.
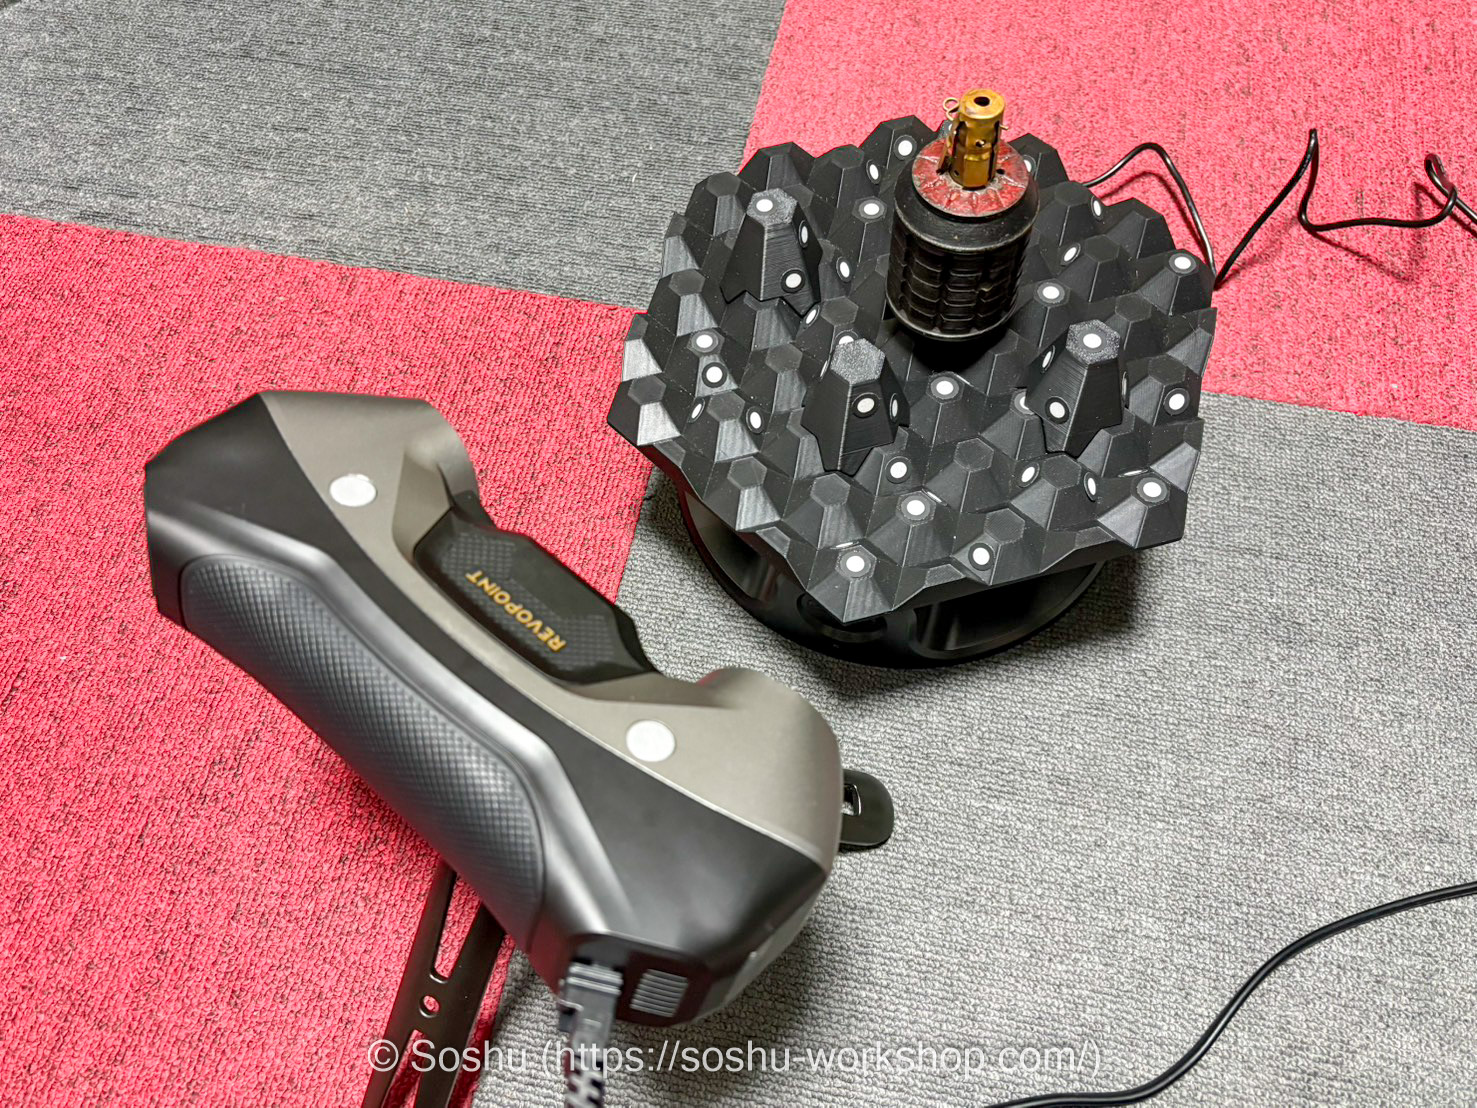
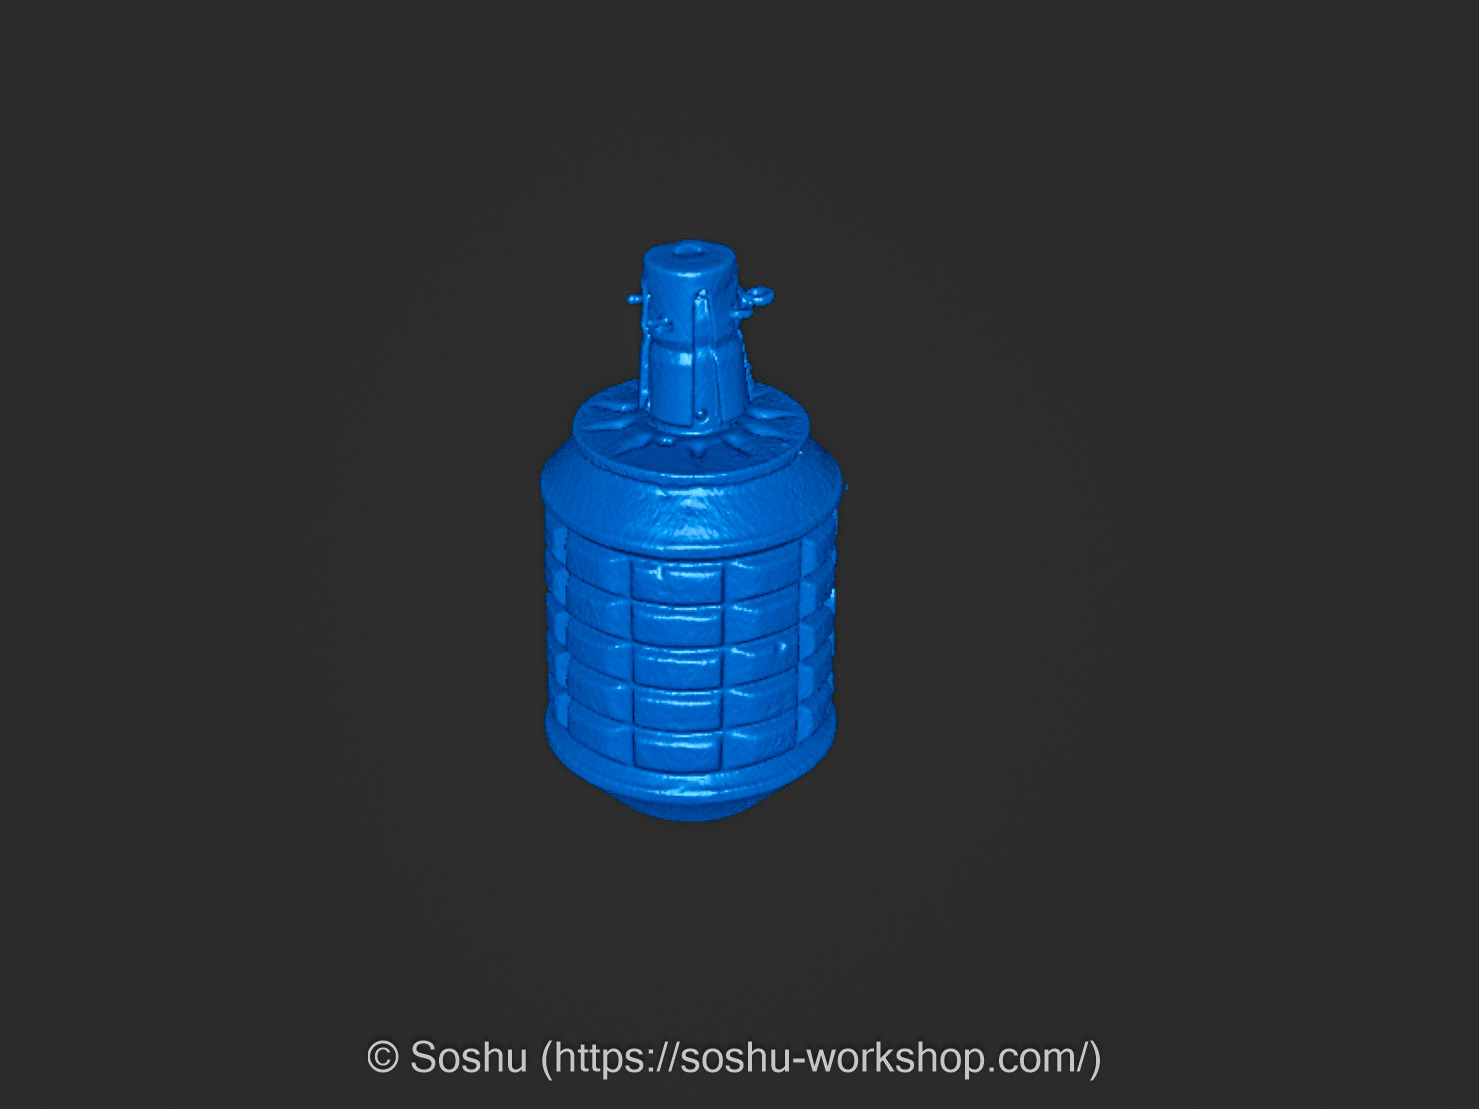
The scan data is imported into CAD, where the geometry is traced and redesigned from scratch.
While the scan data itself is highly accurate in terms of dimensional precision, fine surface details can sometimes be lost in the scanning process. Redesigning from the scan as a reference allows for a cleaner and more accurate final geometry.
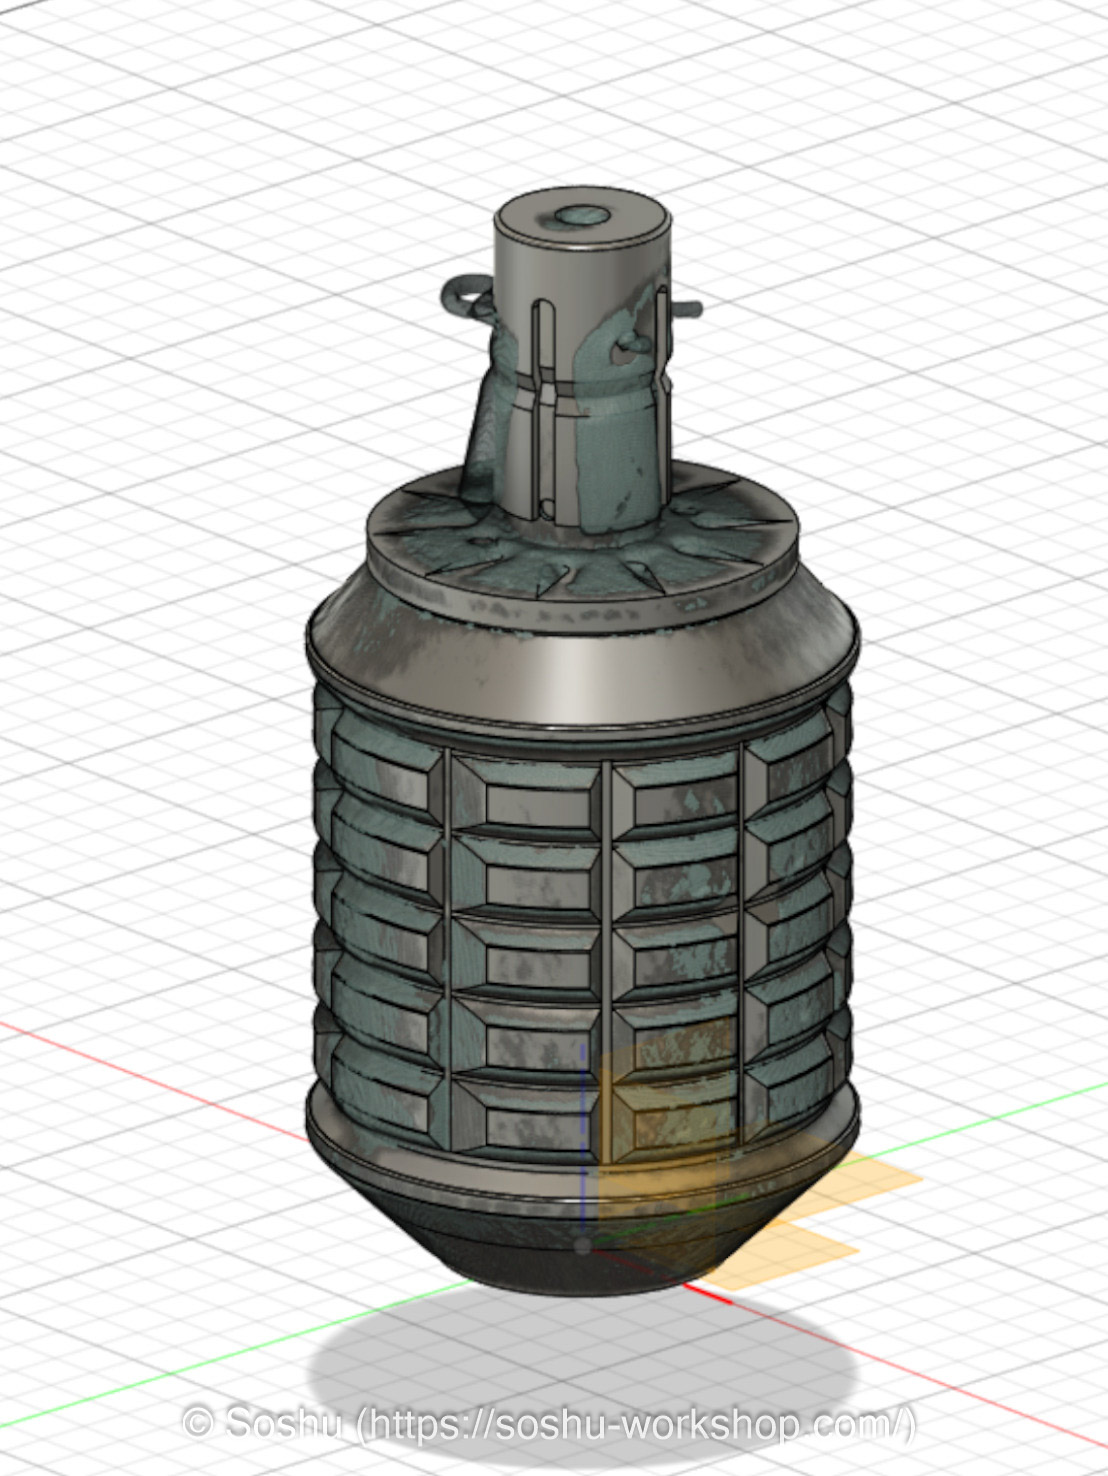
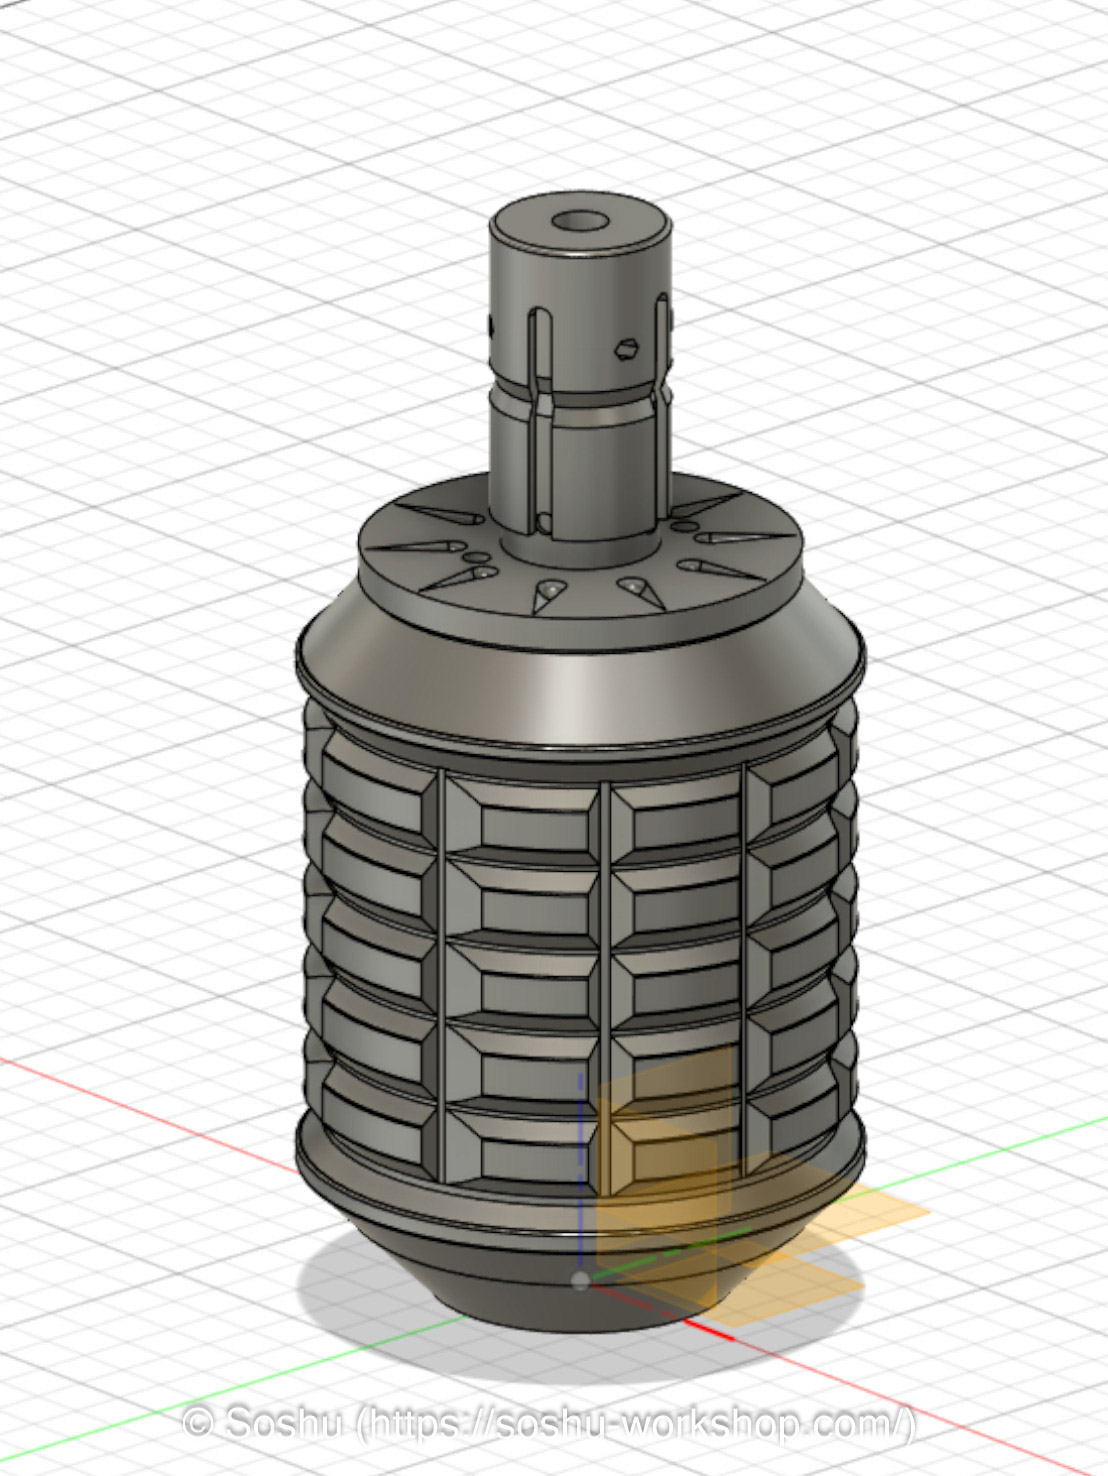
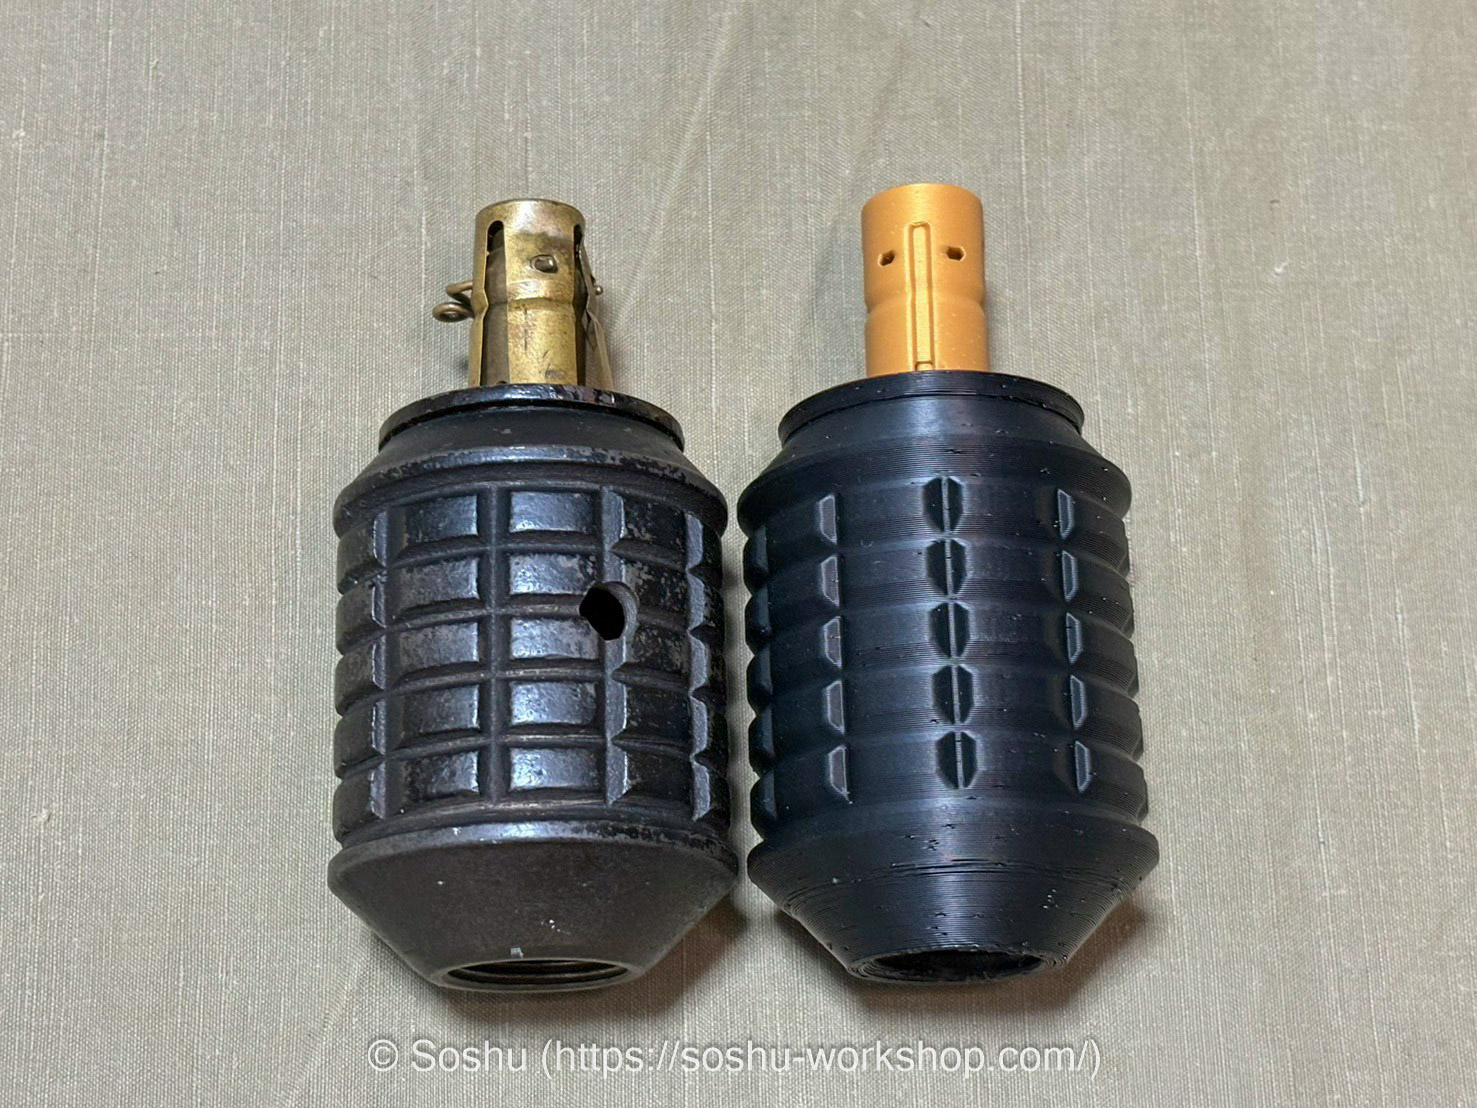
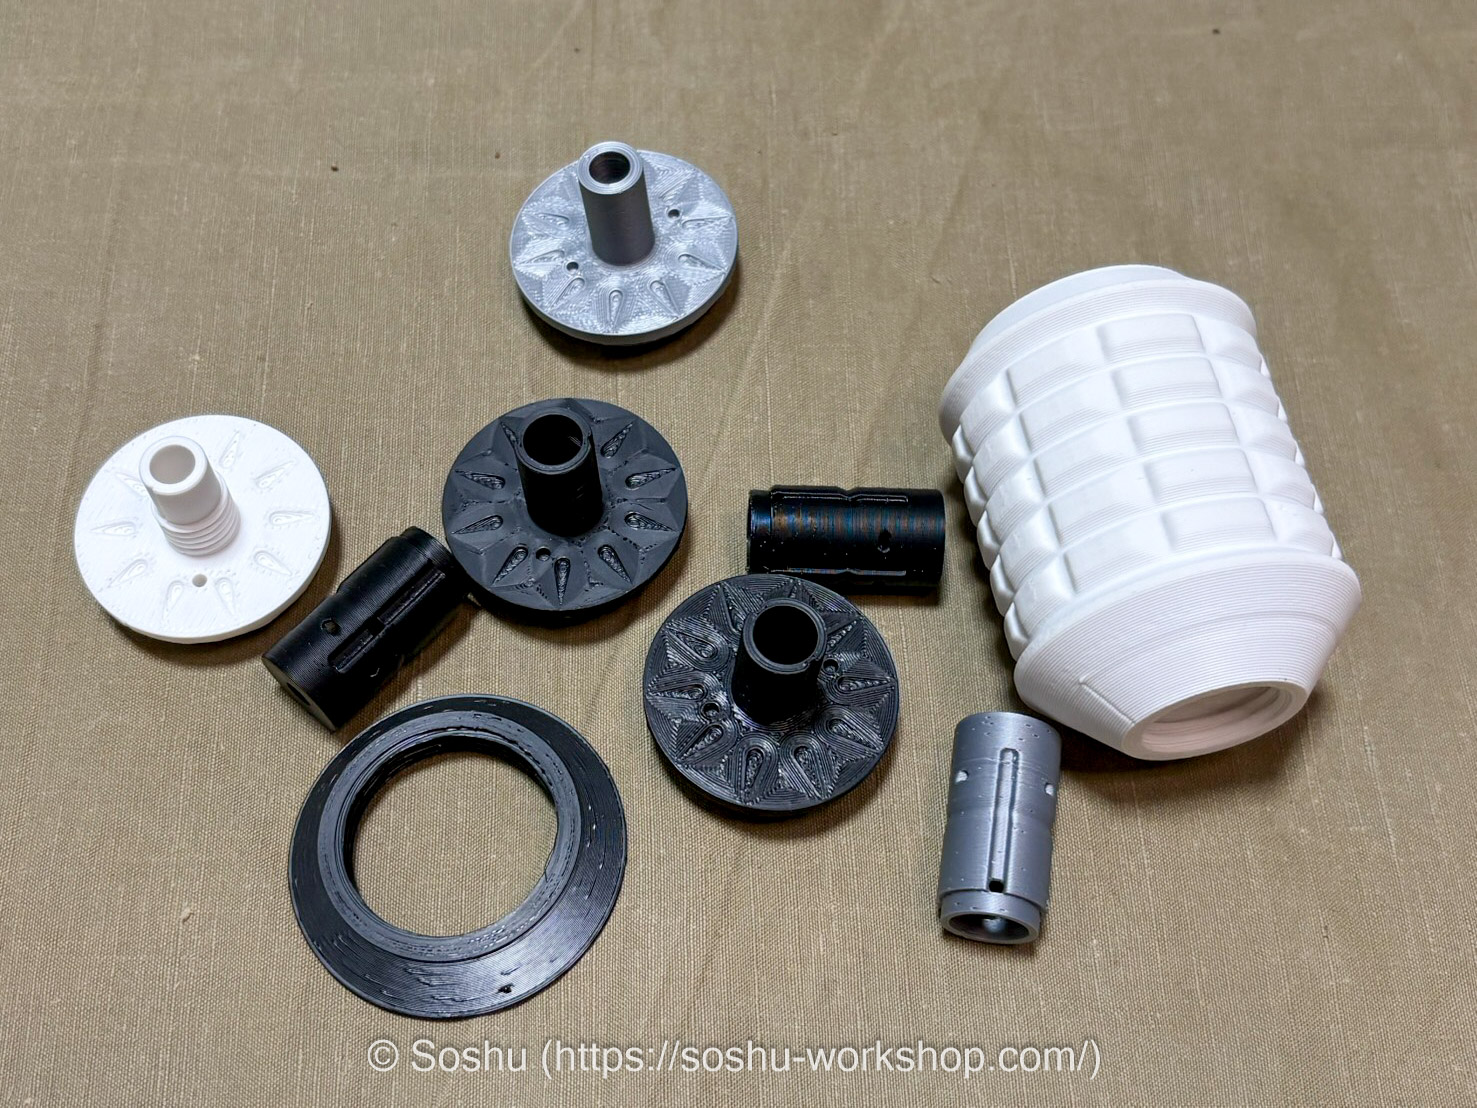
Pictured here are the various test prints produced during the geometry verification process. The design is intended to function as a grenade-shaped BB bottle, with the fuze assembly area serving as the pouring spout for BB pellets.
Finding a satisfactory method for securing the cap proved to be a challenge, and a number of different approaches were tested before settling on a solution.
Pictured here is a prototype printed in multicolor. In terms of geometry, I think it has reached a level where it holds up reasonably well even when placed next to an authentic example.
That said, the surface inevitably retains a somewhat toy-like quality, as is hard to avoid with 3D printed parts. I am currently printing with a 0.4mm nozzle, but switching to a 0.2mm nozzle should reduce the visibility of layer lines, at the cost of longer print times.
There are also already a fair number of 3D printed grenade replicas on the market, which makes differentiation difficult and risks getting drawn into a price competition.
With that in mind, I am leaning toward investing more effort in surface finishing and painting to pursue a texture closer to the authentic piece — I think that is where I can make the most of my strengths.